
Anna stood at the waffle iron watching the first one cook with the kind of focus she usually saves for things she is not sure about. When the lid came up and she saw the deep chocolate grid with the syrup already pooling in the squares, she looked at me and said she was no longer confused about why we owned a waffle iron. The batter smelled exactly like brownie batter because it was brownie batter and the moment the first Brownie Waffle came off the iron and onto the blue plate she reached for it before I had even found the maple syrup.
Jump to:
Why You Will Love This Brownie Waffle
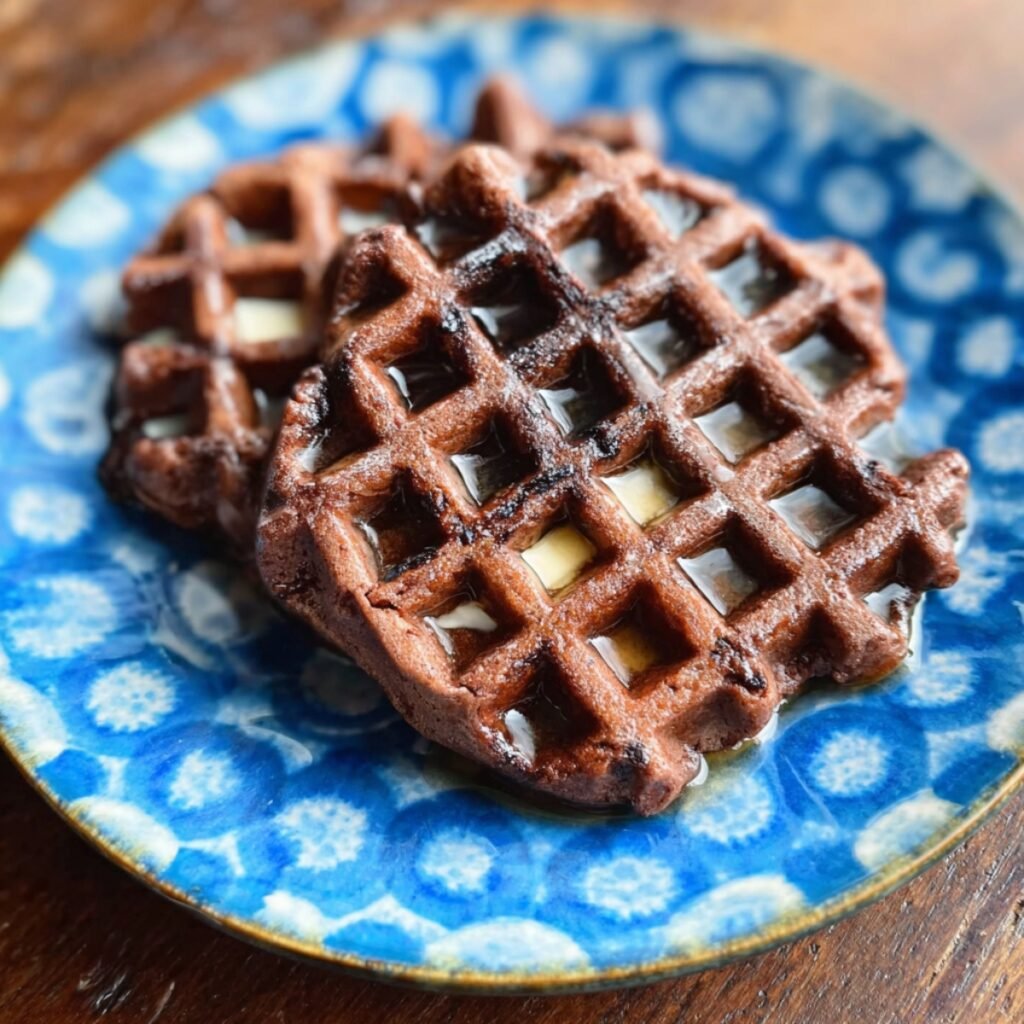
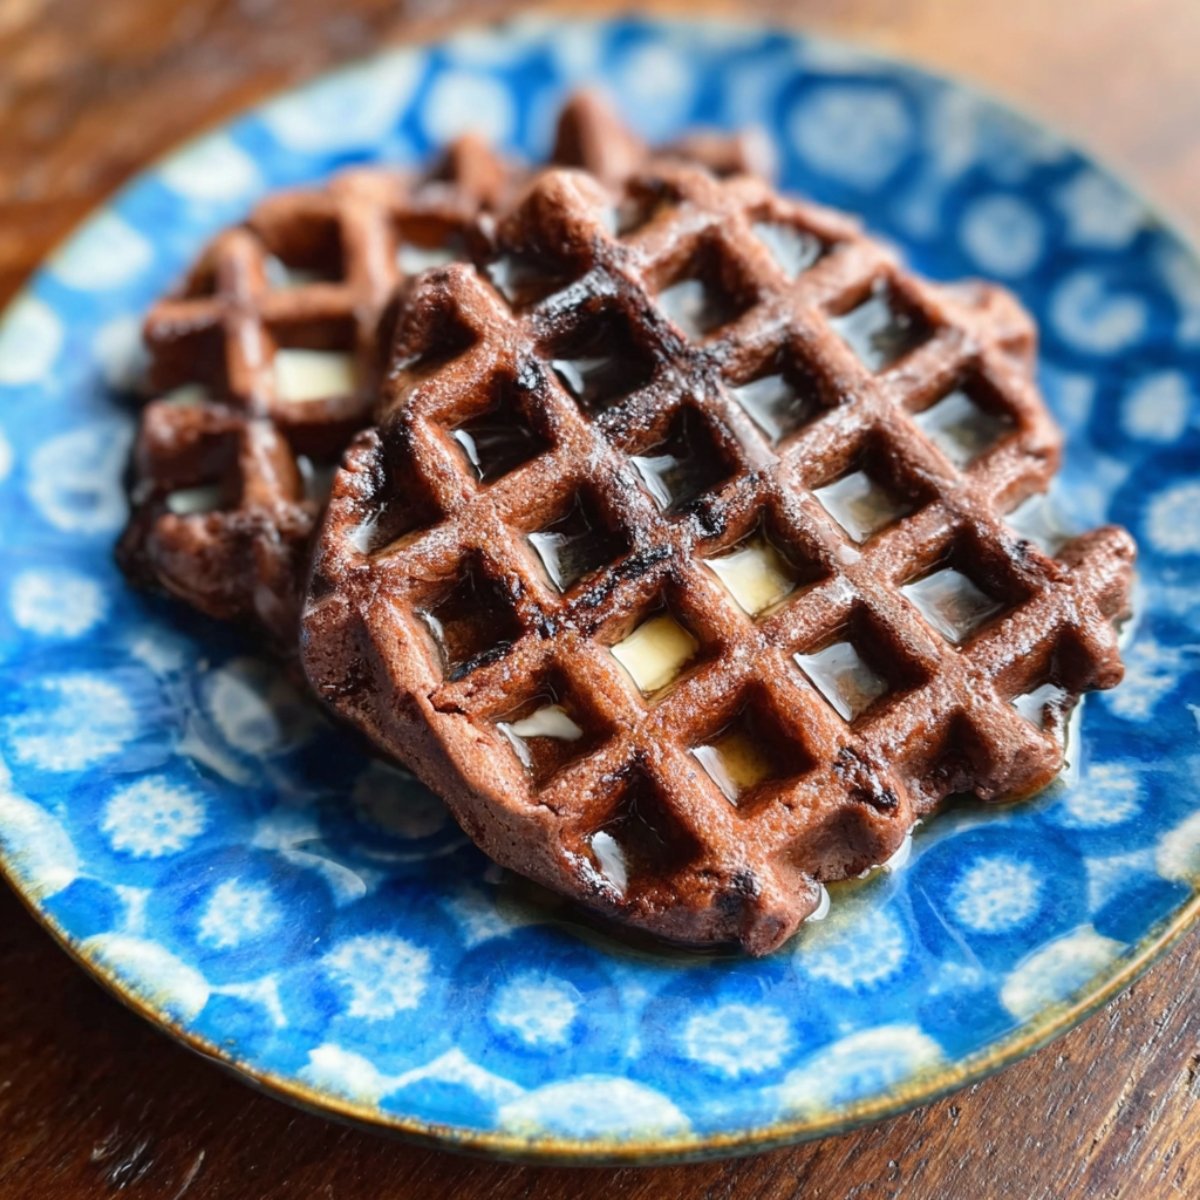
This recipe takes everything a fudgy brownie should be and runs it through a waffle iron so it comes out with crisp, caramelized ridges on the outside and a soft, dense chocolate interior that holds the syrup in every square pocket as shown in the image. It works as a weekend breakfast, a dessert, or anything in between depending on what you put beside it. The blue patterned plate in the image is not accidental; the dark chocolate color of the waffle looks best against something with contrast and these earn their presentation.
How To Make Brownie Waffles
The first time I made this, I used regular waffle batter with extra cocoa and the result tasted like a chocolate waffle rather than a brownie waffle. The texture was too light and airy and the flavor too mild. Anna tasted one and said it was good but that it was just a chocolate waffle. That comparison was the clearest possible instruction to adjust the ratio: more butter, more chocolate, less flour, and no baking powder so the batter stays dense and fudgy through the cooking process. The second batch was completely different and Anna did not have a comparison for it this time.
Main Ingredients
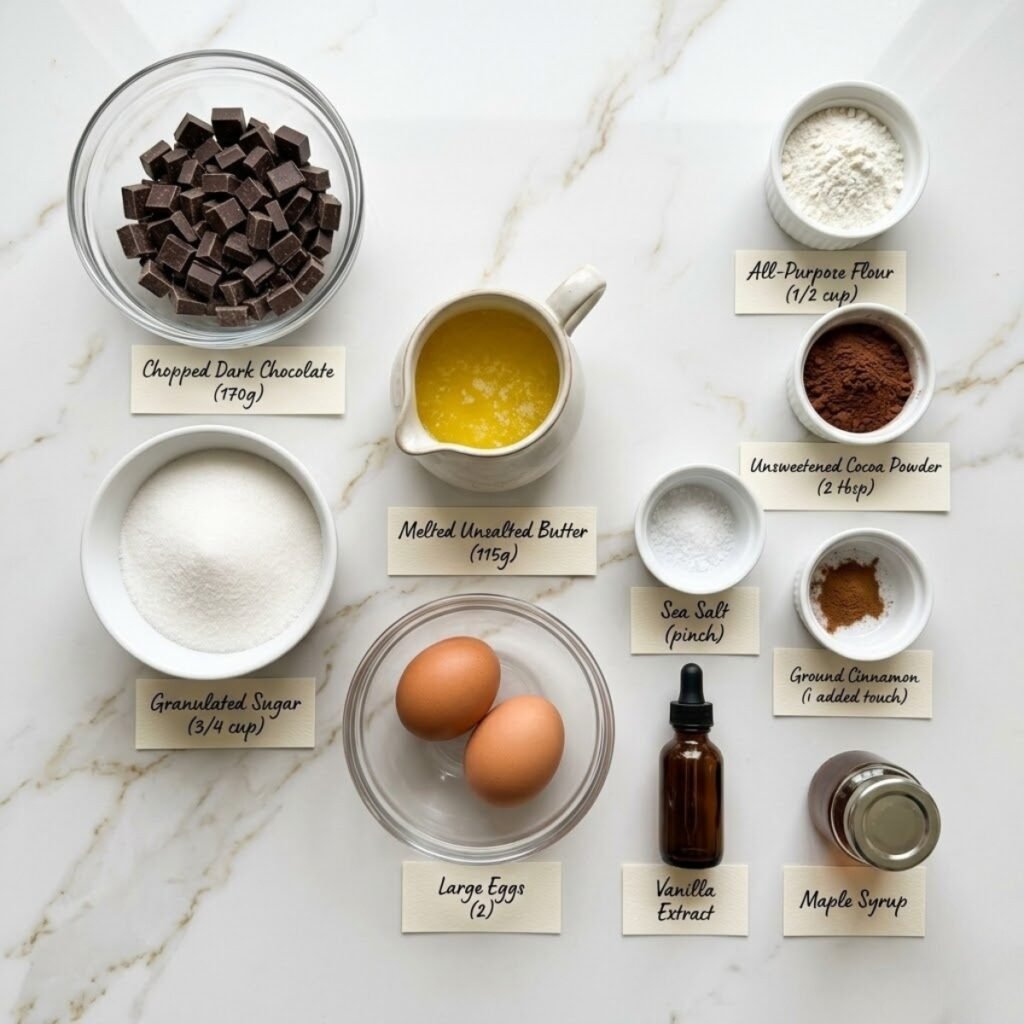
- 115g unsalted butter (melted and slightly cooled; the high butter content is what gives these the dense, fudgy brownie texture rather than a light waffle texture)
- 170g dark chocolate, roughly chopped (melted with the butter to create the deeply flavored base that makes these taste like brownies rather than chocolate cake)
- 2 large eggs (beaten into the chocolate base for structure and the slight chew visible in the waffle texture in the image)
- ¾ cup granulated sugar (sweetens the batter to the same level as a classic brownie so the finished waffle tastes exactly as rich as it looks)
- 1 teaspoon vanilla extract (a classic brownie flavor note that rounds out the chocolate)
- ½ cup all-purpose flour (a smaller quantity than regular waffle batter so the finished waffle stays dense and fudgy rather than light and cakey)
- 2 tablespoons unsweetened cocoa powder (deepens the chocolate color and flavor beyond what the melted chocolate alone provides)
- ¼ teaspoon fine sea salt (sharpens the chocolate flavor throughout)
- Maple syrup for serving (the glossy syrup visible pooled in the waffle grid squares in the image)
Step by Step Instructions
Step 1: Melt the Chocolate and Butter
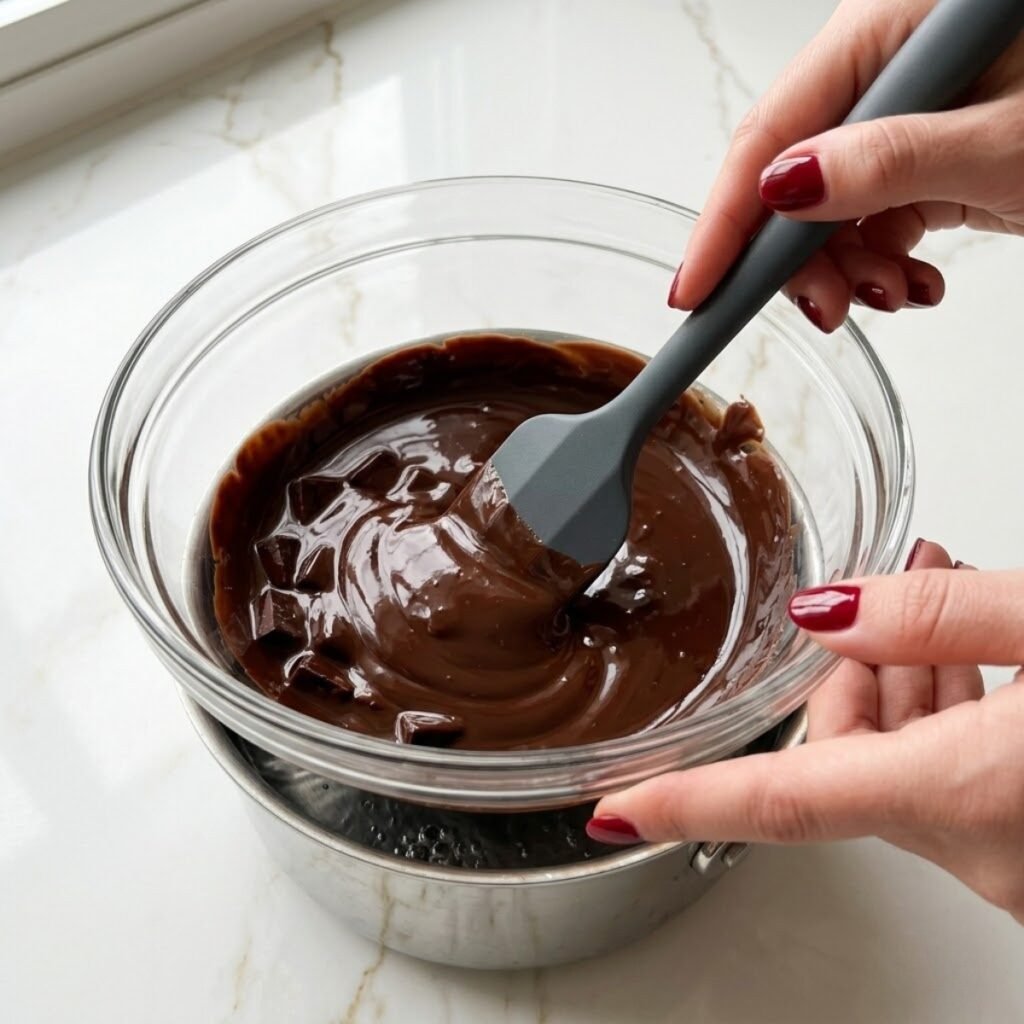
- Combine chopped dark chocolate and unsalted butter in a heatproof bowl set over a saucepan of barely simmering water so the base of the bowl does not touch the water
- Stir continuously with a spatula as the chocolate and butter melt together until the mixture is completely smooth, glossy, and uniformly dark with no visible lumps of unmelted chocolate remaining
- Remove the bowl from the heat and allow the chocolate butter mixture to cool for 5 to 8 minutes so it is warm but not hot before the eggs are added; adding eggs to very hot chocolate scrambles them immediately
- The mixture should still feel warm to the touch but not uncomfortable when tested on the inside of the wrist before proceeding to the next step
Step 2: Build the Brownie Batter
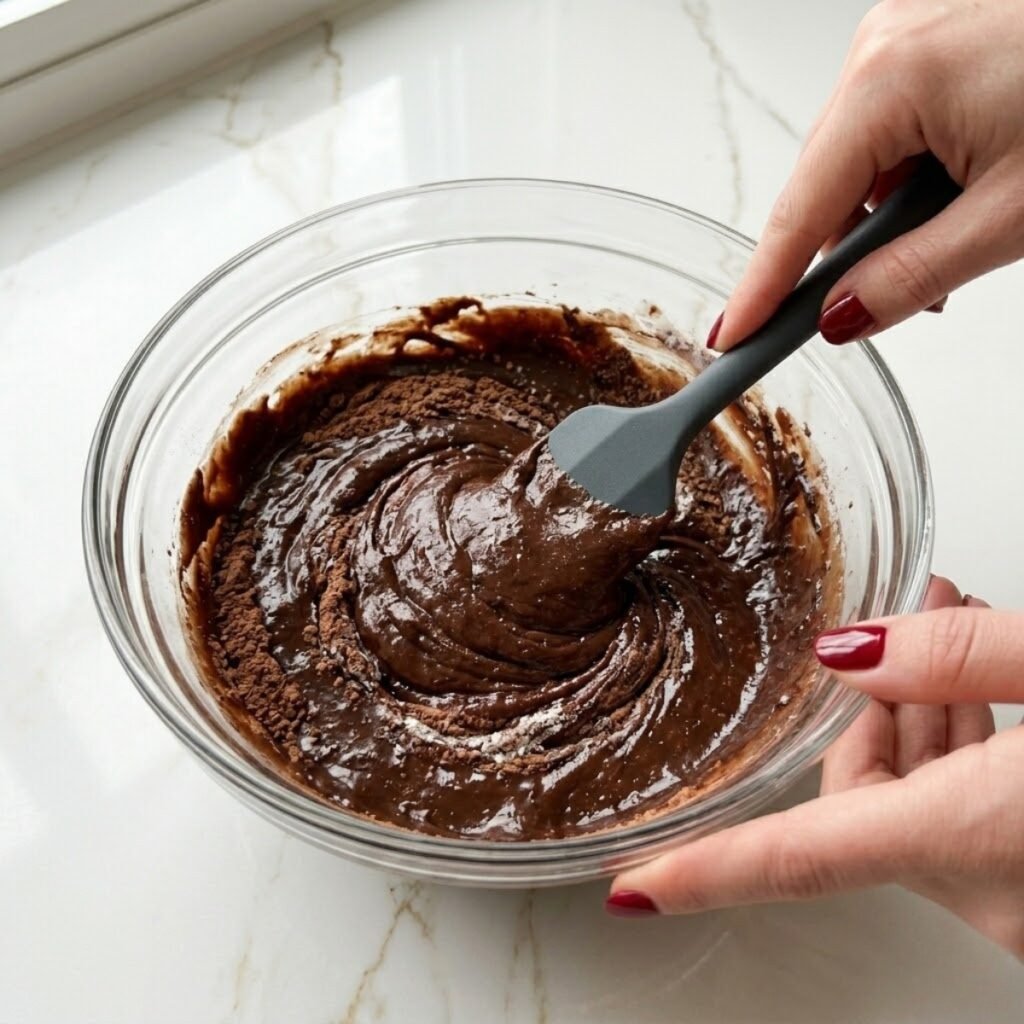
- Whisk granulated sugar into the cooled chocolate butter mixture until fully incorporated and the batter looks slightly lighter in color from the sugar dissolving into the fat
- Add both beaten eggs and the vanilla extract to the chocolate mixture and whisk vigorously for 30 seconds until the batter looks smooth, slightly glossy, and holds together without any separation visible
- Sift the all-purpose flour, cocoa powder, and fine sea salt directly into the chocolate mixture so no lumps form when they are folded in
- Fold the dry ingredients into the wet using a wide spatula with slow circular strokes until just combined with no dry flour patches remaining; do not over-mix or the gluten develops and makes the waffles tough rather than fudgy
Step 3: Cook in the Waffle Iron
- Preheat the waffle iron to medium-high heat and grease the plates generously with melted butter or non-stick spray so the batter does not stick at any point during cooking
- Spoon the brownie batter into the center of the preheated iron using about ⅓ cup of batter per standard waffle so it spreads to the edges without overflowing
- Close the lid firmly and cook for 3 to 4 minutes without opening early; the batter needs the full time to set on both sides before the lid is lifted or the waffle will tear
- The brownie waffle is ready when the steam from the iron has significantly reduced and the exterior feels set when the lid is opened gently; it should look deep brown with defined grid lines as shown in the image
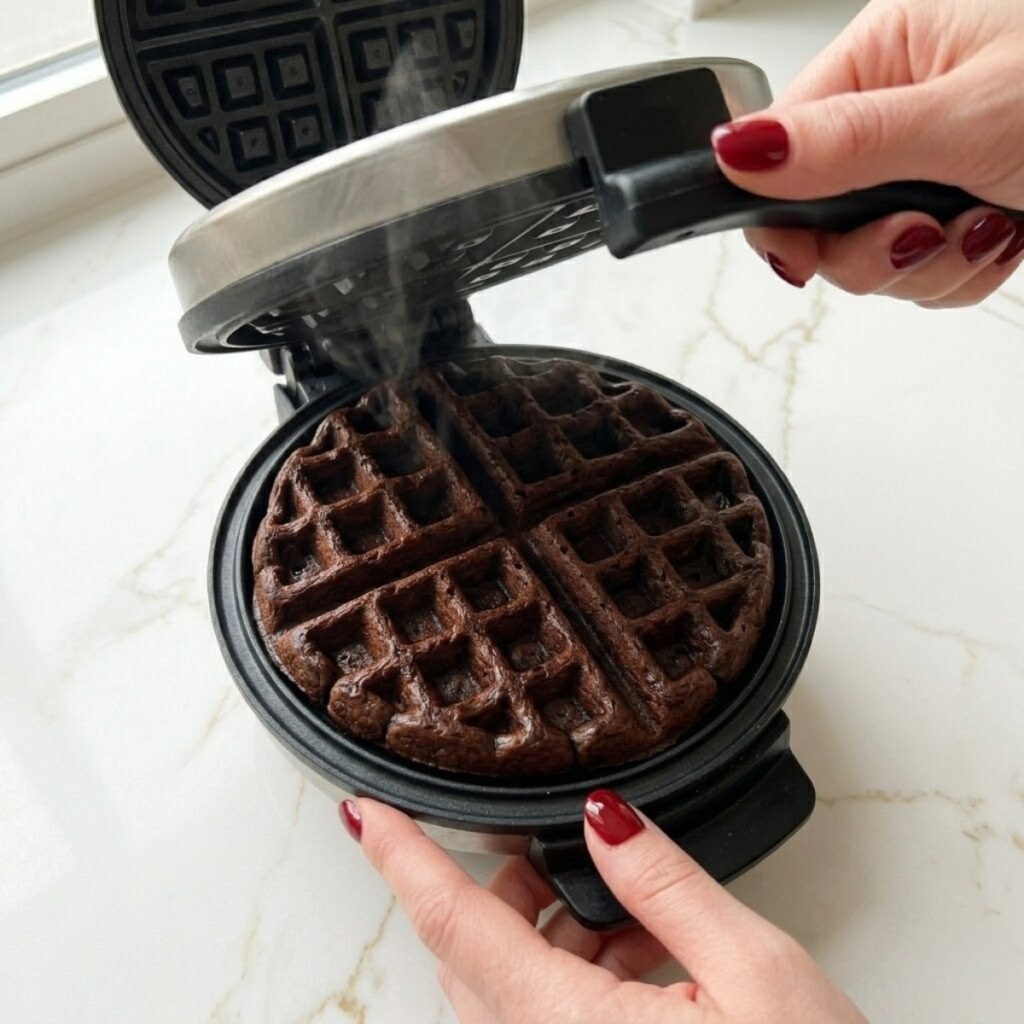
Step 4: Rest and Serve With Maple Syrup
- Remove each brownie waffle carefully from the iron using a fork or non-stick spatula so the grid pattern stays intact and the edges do not crumble
- Allow each waffle to rest on a wire rack for 2 minutes rather than stacking them directly; resting allows the exterior to crisp slightly more from the steam escaping evenly on all sides
- Place two waffles overlapping slightly on a blue patterned plate as shown in the image so both the top and bottom waffle are visible from above
- Drizzle maple syrup generously over the top waffle so it pools into the grid squares and runs slightly down toward the plate as shown, then serve immediately while the exterior is still crisp
Brownie Waffle Variations
Chocolate Chip Brownie Waffles
- Fold ½ cup of mini chocolate chips into the finished batter just before cooking so they are distributed throughout each waffle and melt into small pockets of extra chocolate during the cooking process
- The chocolate chips visible in the finished waffle add texture and visual interest to the grid surface beyond the plain brownie version shown in the image
- Use mini chips rather than regular size so they distribute more evenly through the batter and do not create large lumps that press against the waffle iron plates unevenly
- Anna requests the chocolate chip version every time and carefully checks that the mini chips are distributed into every section of batter before the lid goes down
Brownie Waffles From Boxed Mix
- Use one box of your preferred fudge brownie mix and prepare it according to the package directions but reduce the water by 2 tablespoons so the batter is slightly thicker than usual
- Thicker batter from the box stays in the waffle grid rather than spreading too thin across the iron plates and produces a more defined grid pattern in the finished waffle
- Cook at the same medium-high setting for 3 to 4 minutes and check for doneness by the steam reduction method rather than color alone as boxed mix brownie waffles can look underdone while being perfectly set inside
- This version is the fastest weekday option and produces a result that is nearly indistinguishable from the scratch version in both flavor and appearance
Fudgy Brownie Belgian Waffles
- Use a Belgian waffle iron with deeper grid pockets for a thicker, more substantial waffle that holds significantly more maple syrup in each square
- Increase the batter quantity by one third so the deeper plates fill completely without thin patches at the edges of the finished waffle
- The Belgian version has a thicker, softer interior than the standard waffle iron version and needs 4 to 5 minutes of cooking time at the same medium-high setting
- Serve with a small scoop of vanilla ice cream pressed into the center of the deep grid for a dessert version that takes the same batter in a completely different direction
Substitutions
Dark Chocolate: Semi-sweet chocolate chips melt smoothly in place of chopped dark chocolate and produce a slightly sweeter, less intense brownie flavor. Use the same weight and melt them identically with the butter. Milk chocolate can be used for a sweeter, creamier result but reduces the depth of chocolate flavor noticeably in the finished waffle. All-Purpose Flour: A gluten-free flour blend works in the same quantity for a gluten-free version that produces nearly identical texture. Almond flour at the same quantity makes the waffle slightly more dense and nutty and is a good option for a lower-carb version of the same recipe. Granulated Sugar: Light brown sugar in the same quantity adds a faint molasses note that deepens the brownie flavor slightly and adds moisture to the batter. The finished color of the waffle will be marginally darker than the version made with white sugar but the grid pattern and texture remain identical. Maple Syrup for Serving: Chocolate sauce drizzled into the grid squares in place of maple syrup creates a more dessert-forward presentation. Warm Nutella thinned with a teaspoon of cream and drizzled over the waffles is another option that Anna has requested on more than one occasion with considerable enthusiasm.
Equipment
- Waffle iron (standard or Belgian; greased well before each waffle so the chocolate batter releases cleanly)
- Heatproof bowl and saucepan for the double boiler chocolate melt
- Whisk and wide silicone spatula
- Fine mesh sieve for sifting the flour and cocoa into the wet ingredients
- Wire rack for resting waffles after cooking
- Blue patterned ceramic plate for serving as shown in the image
Emma Tip: If the brownie waffle sticks to the iron when you try to open it, it is not ready yet. A properly cooked brownie waffle releases from both plates cleanly with no tearing when it has had its full cooking time. If it sticks, close the lid gently and cook for another 30 to 60 seconds before trying again. Pulling too early is the single most common reason the grid pattern tears on the first attempt.
Storage Tips
Make Ahead Strategy
- The brownie batter can be made up to 24 hours ahead and refrigerated in a covered bowl; allow it to come to room temperature for 20 minutes before cooking so the batter flows into the waffle iron plates properly
- Cooked brownie waffles keep at room temperature wrapped in foil for up to 4 hours and can be re-crisped in a toaster or oven before serving
- Make a full batch on the weekend and store individual waffles for weekday mornings; they reheat remarkably well and taste nearly identical to freshly made
Refrigeration
- Cooked brownie waffles keep in an airtight container in the refrigerator for up to 3 days without significant loss of flavor
- Reheat in a toaster on a medium setting for 2 minutes or in an oven at 180°C for 5 minutes so the exterior crisps back up before the maple syrup goes on
- Do not microwave refrigerated brownie waffles as the exterior becomes soft and the interior turns dense rather than fudgy; the toaster or oven reheat is always the better option
Freezing
- Cooked and fully cooled brownie waffles freeze individually wrapped in plastic wrap and stored in a sealed freezer bag for up to 1 month
- Reheat directly from frozen in a toaster or toaster oven at medium-high for 3 to 4 minutes until the exterior is crisp and the interior is warmed through
- Do not thaw before reheating as going straight from frozen to the toaster produces a crispier exterior than thawing first at room temperature
My Grandma's Secret Worth Sharing
Emma's grandmother made waffles every Saturday morning without exception and said the most important thing about any waffle batter was what you left out of it. She believed most waffle recipes had one ingredient too many and that simpler batters cooked better and tasted cleaner. Anna heard that story and immediately looked at the brownie waffle batter list and asked why there was no baking powder. That was the correct question and exactly the right observation. The absence of baking powder is what keeps this batter dense rather than airy and what makes the finished waffle taste like a brownie instead of a chocolate pancake. Leaving something out on purpose is a form of knowledge that only comes from making the same thing enough times to understand what each ingredient is actually doing.
FAQs
Why did my brownie waffle stick to the iron?
The iron was not greased generously enough before the batter went in or the waffle was opened before it had finished cooking. Grease the iron thoroughly before every single waffle rather than assuming the previous coating is enough, and never open the lid before the full 3 to 4 minutes has passed. A brownie waffle releases cleanly when it is ready; if it resists, close the lid and cook for another 30 to 60 seconds before trying again.
Can I make brownie waffles from a boxed mix?
Yes, and the result is very close to the scratch version in both flavor and appearance. Use one box of fudge brownie mix prepared according to the package instructions but reduce the water by 2 tablespoons so the batter is slightly thicker. Cook at medium-high heat for the same 3 to 4 minute time and use the steam reduction method to judge doneness rather than color alone.
Why do my brownie waffles taste like chocolate waffles rather than brownies?
The flour ratio is too high relative to the butter and chocolate. A brownie waffle should have significantly less flour than a regular waffle batter and no baking powder so the batter stays dense and fudgy rather than light and airy. If the recipe you are using includes baking powder or more than ½ cup of flour per batch, remove the baking powder and reduce the flour before the next batch.
Two Waffles on a Blue Plate and Nothing Left to Decide
Anna sat down at the table before the second waffle had finished resting, which is the clearest signal I know that the recipe is working. She drizzled the maple syrup herself this time, going square by square with a patience she does not normally show before breakfast, and then looked at the plate for a moment before picking up her fork. If you are building a full morning menu around something this satisfying, Keto Chocolate Chia Seed Pudding With Almond Milk makes the ideal prepare-ahead companion that is already waiting in the refrigerator when the waffles come off the iron. For a savory balance that prevents the morning from being entirely chocolate, Protein-Packed Breakfast Plate brings that clean, fresh contrast of egg and avocado that makes the richness of these waffles feel like a considered choice rather than an indulgence. And when something warm and golden and equally worthy of a slow morning is needed to complete the table, Rise and Shine Breakfast Pot Pie earns its place alongside every time with that flaky pastry and runny egg combination that never gets old. Make these waffles once this weekend and leave a comment below telling us how your grid turned out.
Related
Looking for other recipes like Brownie Waffle? Try these:
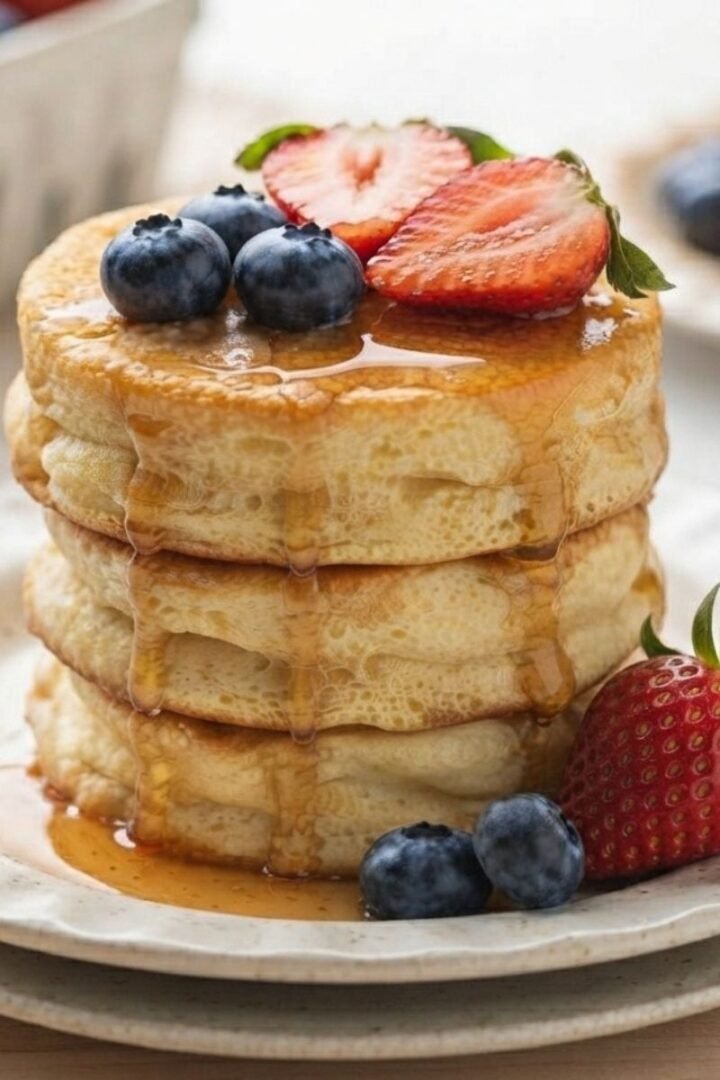
- Japanese Soufflé Pancakes25 Minutes
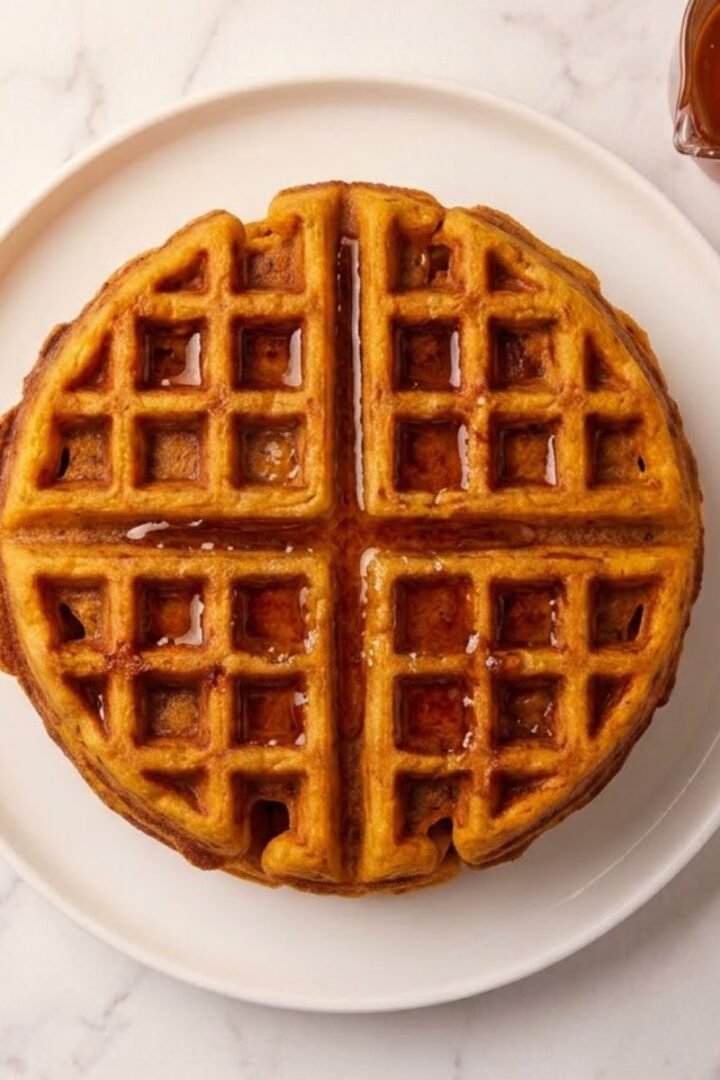
- Sweet Potato Waffles30 Minutes
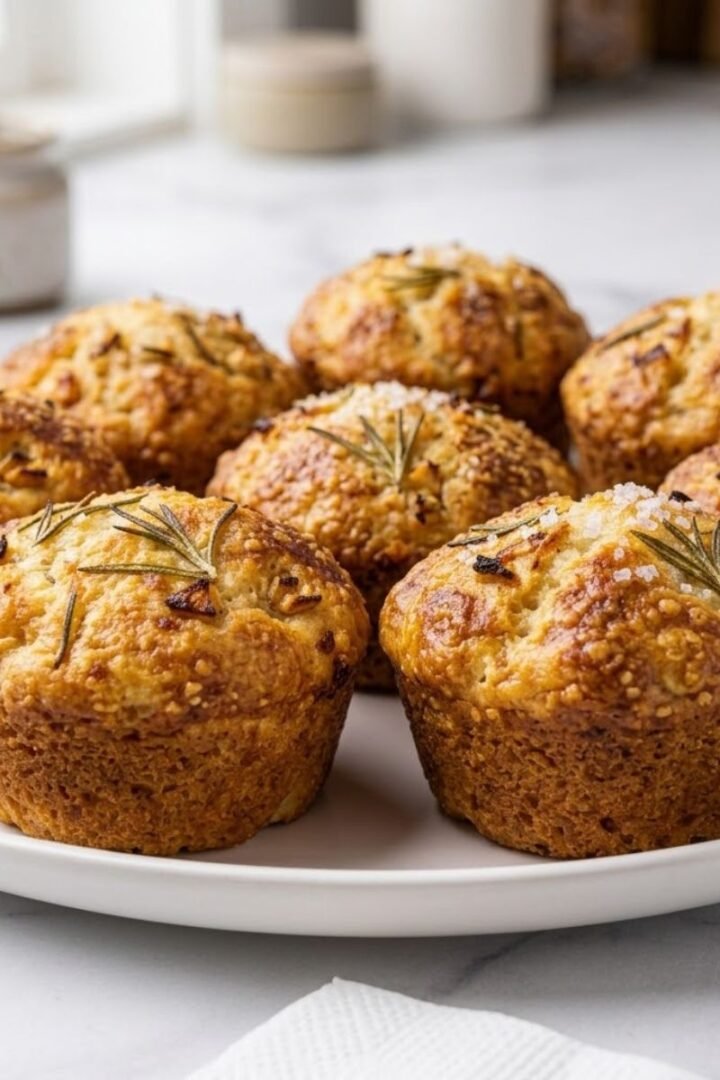
- Garlic Rosemary Focaccia Muffins35 Minutes
- Lemon Rhubarb Bread1 Hours 30 Minutes
Brownie Waffle
Ingredients
Equipment
Method
- Combine chopped dark chocolate and unsalted butter in a heatproof bowl set over a saucepan of barely simmering water and stir continuously until completely smooth, glossy, and uniformly dark.
- Remove from heat and allow the chocolate butter mixture to cool for 5 to 8 minutes until warm but not hot before any eggs are added so they do not scramble on contact.
- Whisk granulated sugar into the cooled chocolate mixture until fully incorporated and the batter looks slightly lighter in color, then add the beaten eggs and vanilla and whisk vigorously for 30 seconds until smooth and glossy.
- Sift all-purpose flour, cocoa powder, and fine sea salt directly into the chocolate mixture then fold with a wide spatula using slow circular strokes until just combined with no dry flour patches remaining.
- Preheat the waffle iron to medium-high heat and grease the plates generously with melted butter or non-stick spray before every single waffle so the batter releases cleanly.
- Spoon approximately ⅓ cup of brownie batter into the center of the preheated iron and close the lid firmly, then cook for 3 to 4 minutes without opening early.
- The brownie waffle is ready when the steam has significantly reduced and the exterior feels set when the lid is opened gently; if it resists, close and cook for another 30 to 60 seconds before trying again.
- Remove each waffle carefully with a fork or spatula so the grid pattern stays intact, then rest on a wire rack for 2 minutes so the exterior crisps slightly from the steam escaping evenly on all sides.
- Place two waffles overlapping slightly on a blue patterned plate as shown in the image, drizzle maple syrup slowly over the top in a back-and-forth motion so it pools into each grid square, and serve immediately.

Leave a Reply