
Anna smelled the garlic hitting the beef from the hallway and appeared in the kitchen before I had even turned around. "Is that the one with the broccoli?" she asked, already pulling her stool to the counter. I nodded and handed her the broccoli to break into florets while I drained the beef. By the time the onion had gone translucent and the broccoli was catching color at the edges of the pan, she had stopped asking questions and started watching. Keto Hamburger Broccoli Skillet is the dinner that taught her what a one-pan meal actually means.
Jump to:
Why You Will Love This Keto Hamburger Broccoli Skillet
This is the kind of weeknight dinner that arrives on the table faster than takeout and leaves almost nothing to clean up. The ground beef browns in its own fat, the onion softens into sweet translucent pieces, and the broccoli cooks long enough to pick up a little color at the edges without going soft or pale. Everything finishes together in the same skillet so the seasoning runs through every element and the beef juices coat the broccoli in a way that makes it taste like it belongs there. Anna came back for a second plate the first time we made it and did not mention that it was low carb until her friend asked.
How To Make a Keto Hamburger Broccoli Skillet
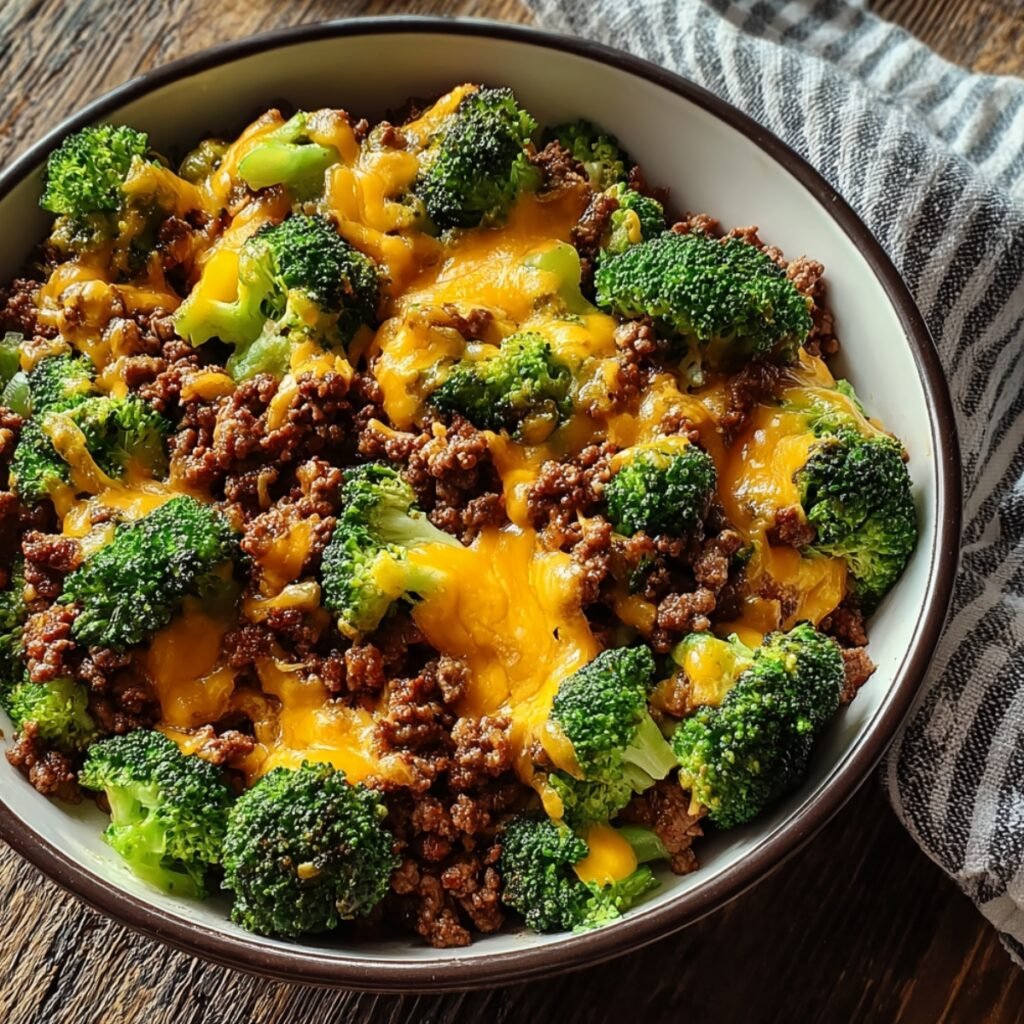
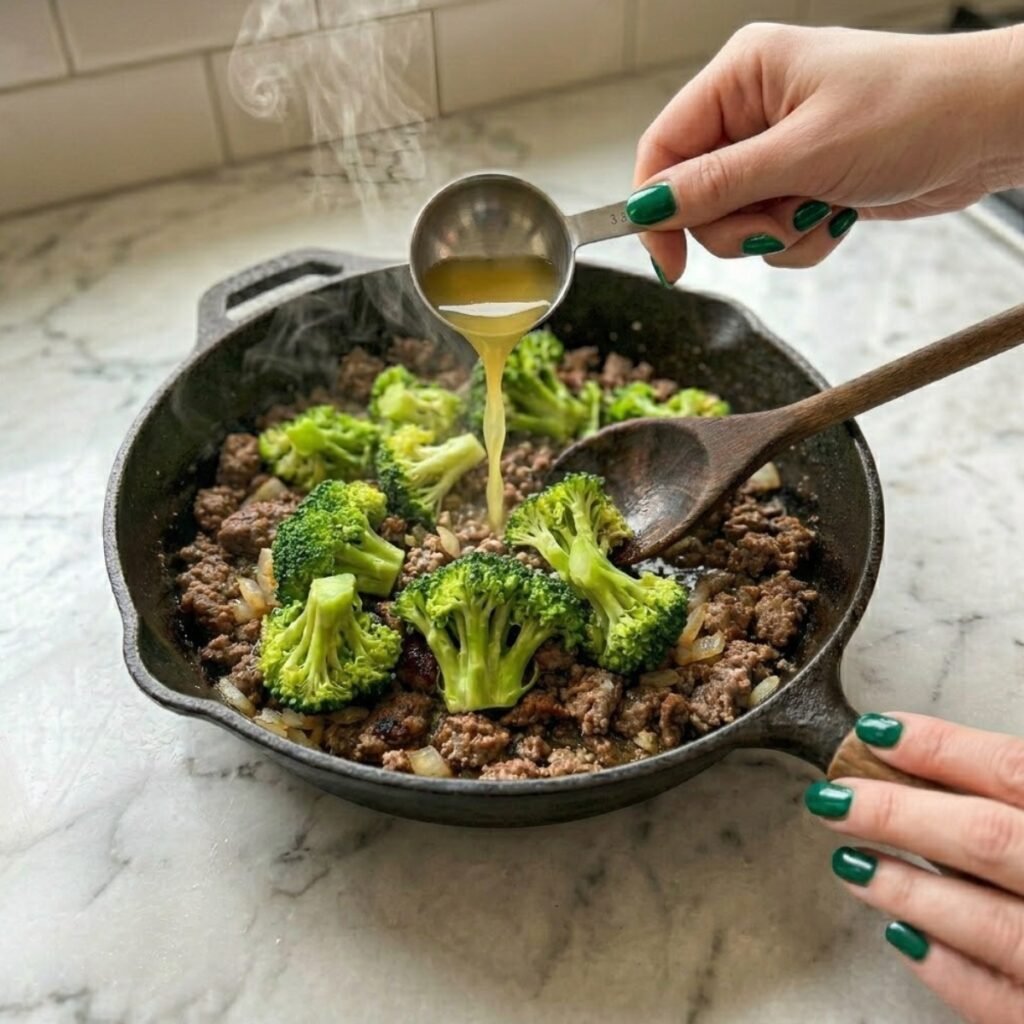
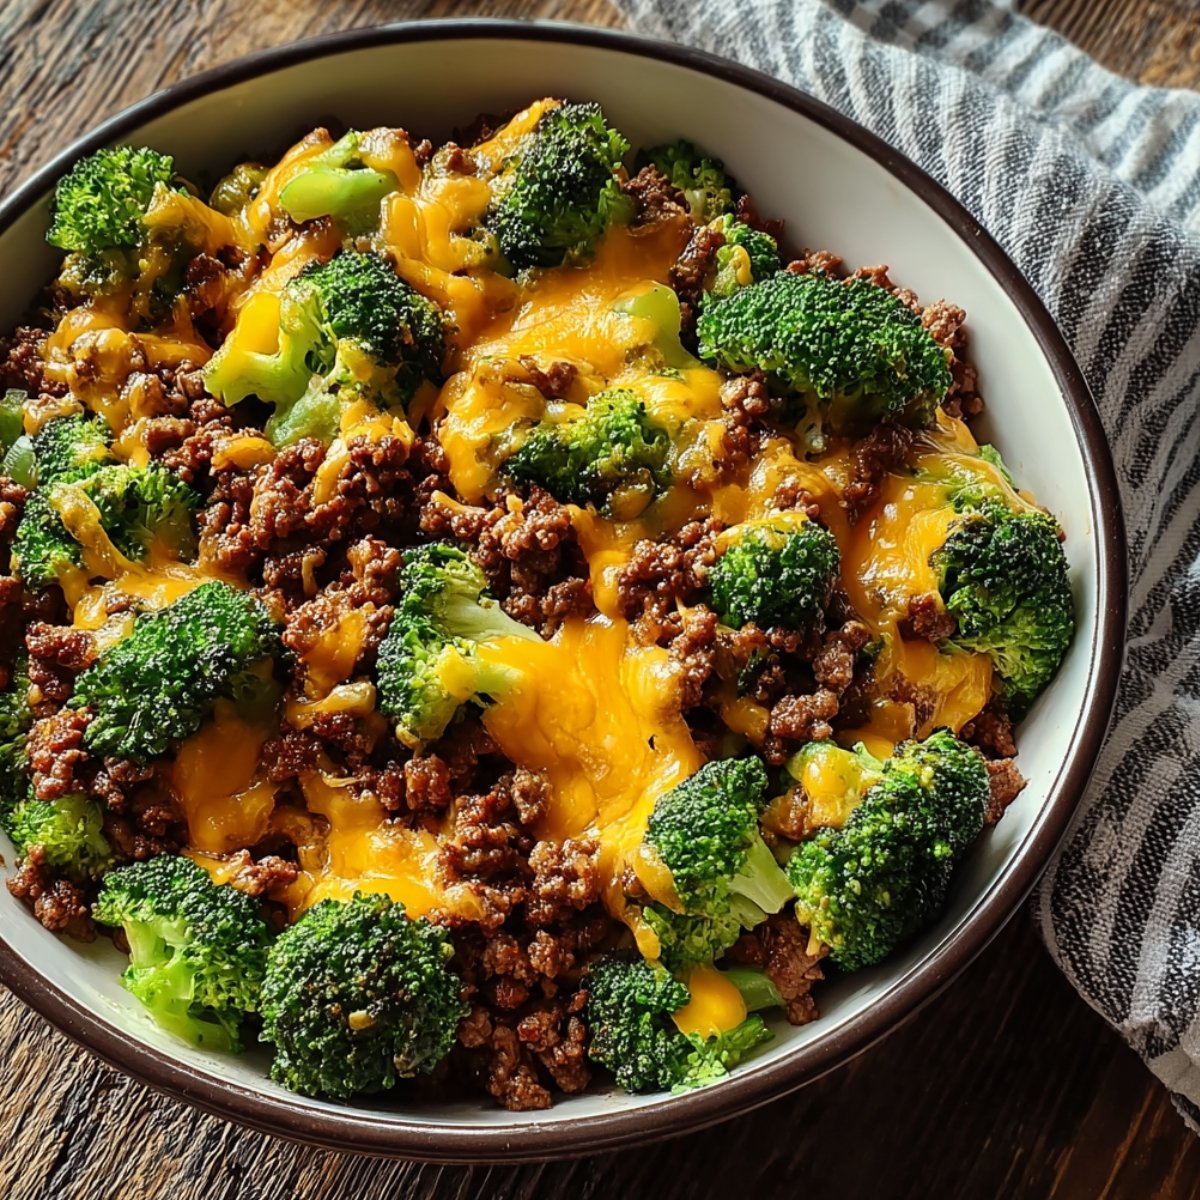
The first time I made this, I added the broccoli too early and cooked everything together from the start, which left the beef gray and steamed rather than browned because the broccoli released so much moisture into the pan. Anna described the result as soft in a way that was not good, which was accurate. The second time I cooked the beef first until it was genuinely browned in small crumbled pieces with a little color on the outside, removed the excess fat, then added the onion and let it soften before the broccoli went in with a splash of broth so it could steam briefly and finish with a dry-pan char. The plate came out looking exactly the way the image shows: deep brown beef, vibrant green broccoli florets, golden onion, and the visible fleck of chili flakes across the surface.
Main Ingredients
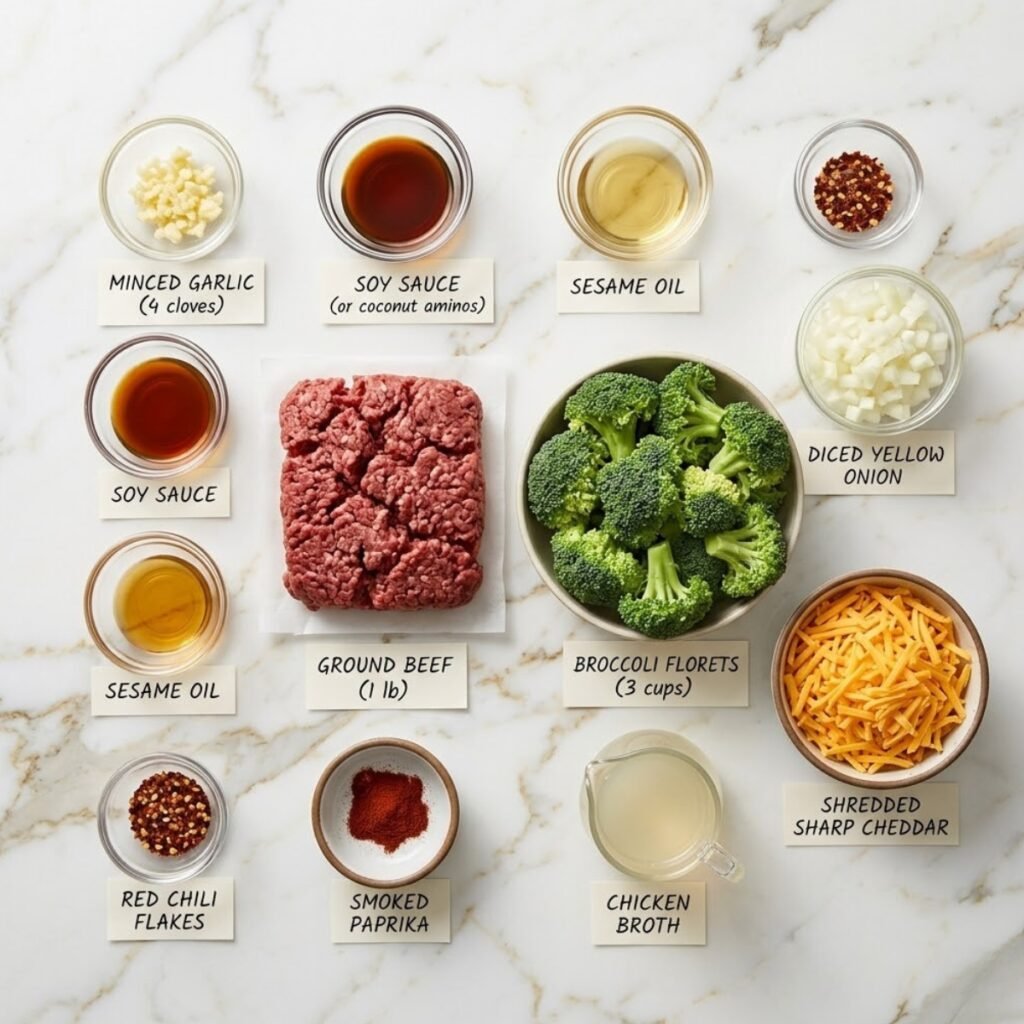
- 1 lb (450g) ground beef, 80/20 blend (the fat ratio in an 80/20 blend provides enough natural fat to brown the beef without added oil and produces the deep color visible in the image; leaner blends brown more slowly and tend to produce a drier finished texture)
- 3 cups broccoli florets, cut into large pieces (large florets hold their shape and pick up color at the edges without turning mushy; small florets overcook before the beef is ready to receive them)
- 1 medium yellow onion, diced (diced rather than sliced so the pieces cook down into the beef and are visible throughout the dish as the golden translucent chunks seen in the image)
- 4 garlic cloves, minced (added after the beef is browned so the garlic sizzles in the fat and becomes fragrant without burning against the empty pan before the beef goes in)
- 2 tablespoons soy sauce or coconut aminos (coconut aminos for a strictly keto-compliant version; both add a savory, slightly caramel depth that ties the beef and broccoli together and creates the glossy coating visible on the beef in the image)
- 1 teaspoon sesame oil (added off the heat at the end so the nutty aroma stays intact rather than being cooked away during the high-heat browning stage)
- ½ teaspoon chili flakes (the visible red specks scattered across the surface of the finished dish; adjust the amount based on preferred heat level)
- ½ teaspoon smoked paprika (adds a mild smokiness to the beef seasoning that reinforces the browned, slightly caramelized character of the meat)
- Salt and black pepper to taste (added to the beef during browning so the seasoning develops into the crust of the crumbled meat)
- 3 tablespoons chicken or beef broth (added to the pan with the broccoli so it creates a brief steam that softens the florets without requiring a lid or additional water that would dilute the flavor of the dish)
Step by Step Instructions
Step 1: Brown the Ground Beef
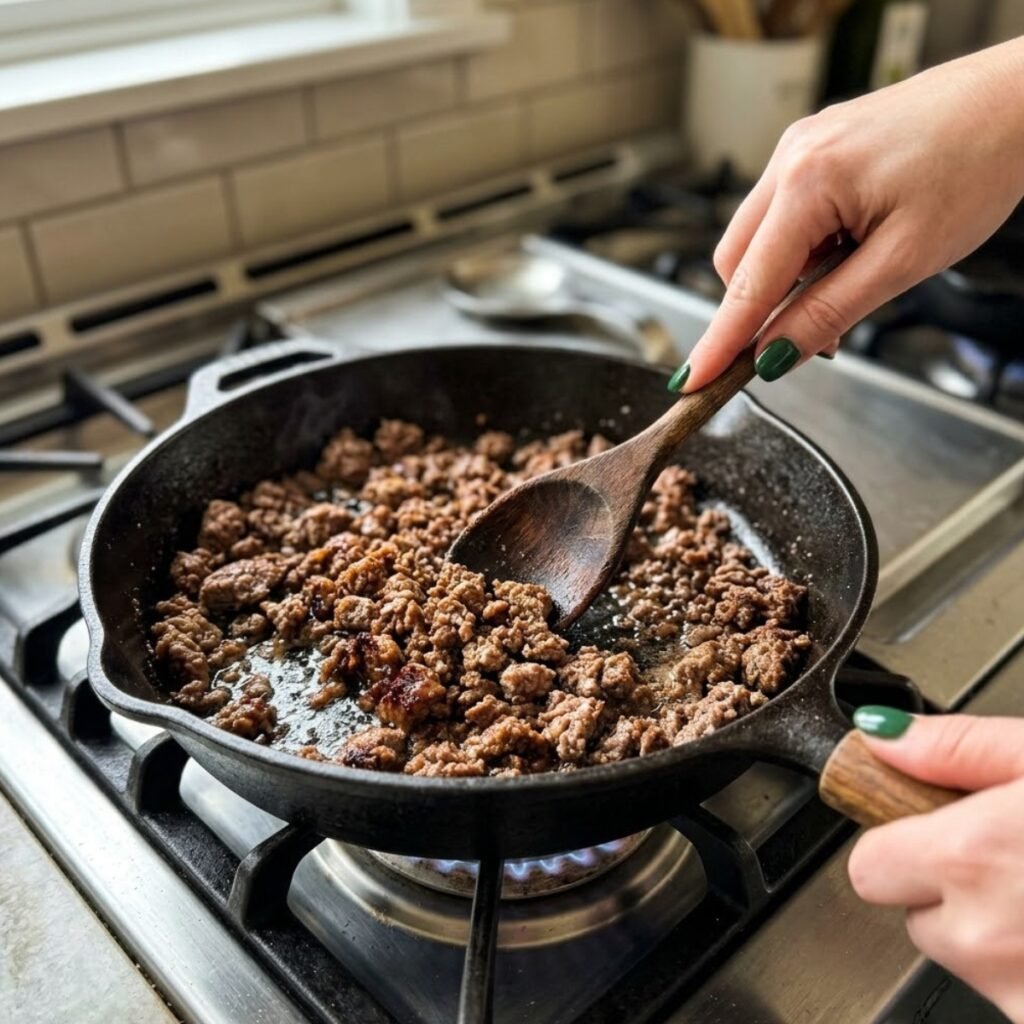
- Heat a large heavy skillet or cast iron pan over medium-high heat for 2 minutes until fully hot, then add the ground beef directly without any additional oil since the fat in the 80/20 blend is sufficient to prevent sticking during the initial browning.
- Break the beef apart using a wooden spoon or spatula into medium crumbled pieces rather than fine granules; pieces approximately 1 to 2 cm give the finished dish visible texture and allow each piece to develop a light crust on the outside rather than steaming in its own moisture.
- Season the beef with the smoked paprika, salt, and black pepper while it is still browning, then leave the pieces undisturbed for 2 minutes so the bottoms develop a slightly caramelized crust before being broken apart and stirred; this is what produces the deep brown color visible in the image rather than a grey, steamed result.
- Once the beef is cooked through and browned, tip the skillet slightly and use a spoon to remove most of the excess rendered fat, leaving about 1 tablespoon in the pan to cook the onion and garlic in so the vegetables have enough fat to soften without sticking.
Step 2: Cook the Onion and Garlic
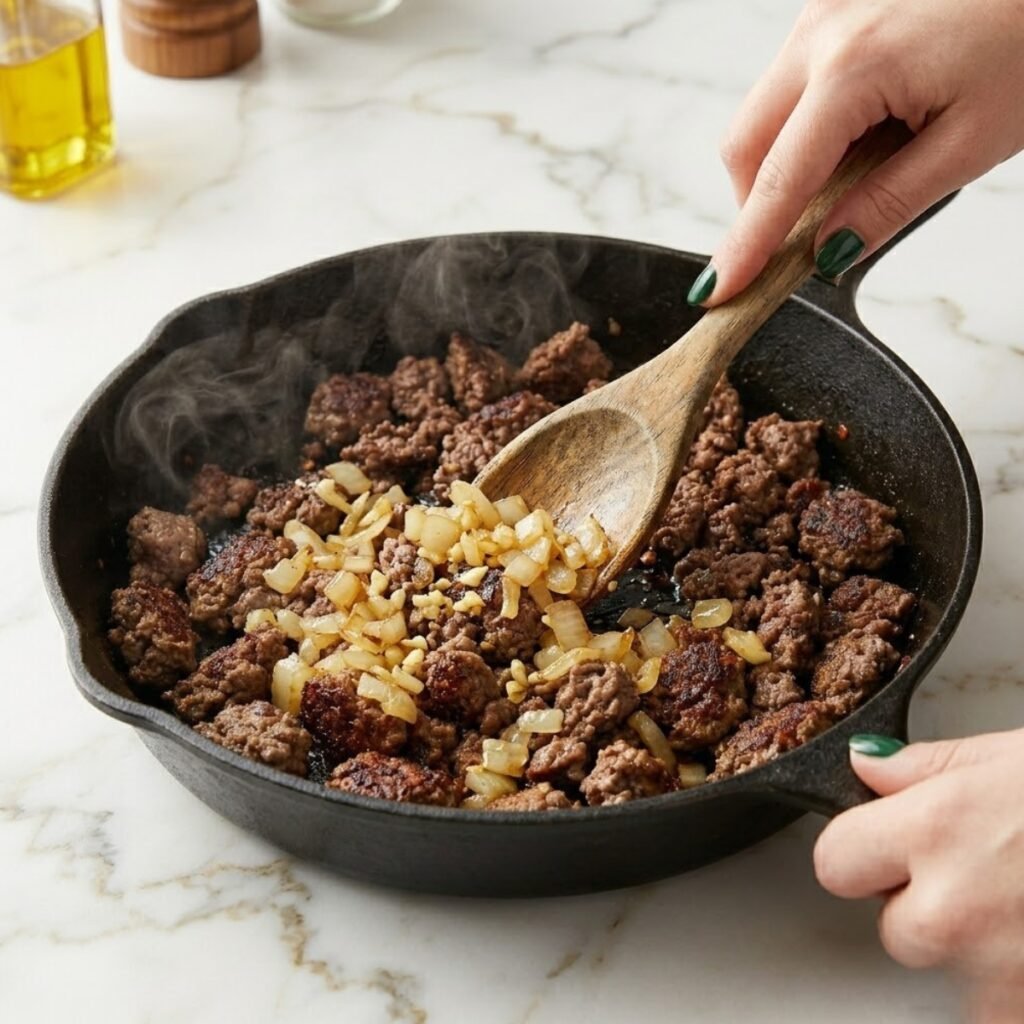
- Reduce the heat to medium, add the diced onion to the pan with the browned beef, and stir to coat the onion pieces in the remaining fat and beef drippings so they absorb the flavor of the browned meat from the first moment of contact with the pan.
- Cook the onion for 4 to 5 minutes, stirring occasionally, until the pieces turn translucent and golden at the edges and have softened enough to cut easily with the side of a spoon; this is the stage visible in the image where the onion sits as soft golden-yellow chunks among the beef.
- Add the minced garlic to the pan and stir constantly for 60 seconds until it turns fragrant and very lightly golden; garlic added to an already-hot pan with residual fat goes from raw to perfectly fragrant in under a minute and will burn if left unattended for any longer than that.
- Pour the soy sauce or coconut aminos into the pan and stir to coat the beef and onion mixture evenly; the sauce will sizzle immediately against the hot surface and reduce slightly in the 30 seconds before the broccoli goes in, which concentrates its flavor and helps it cling to the beef.
Step 3: Add the Broccoli and Finish the Skillet
- Increase the heat back to medium-high, add the broccoli florets to the pan, and stir to distribute them among the beef and onion so each floret has direct contact with the hot surface rather than sitting entirely on top of the other ingredients.
- Pour the broth over the broccoli immediately after adding it to the pan, then stir once and allow the liquid to create a brief burst of steam that softens the florets from within; the broth should evaporate almost completely within 2 to 3 minutes, which is the signal that the broccoli is ready for the finishing stage.
- Continue cooking for another 2 minutes after the broth has evaporated, stirring only once or twice so the broccoli florets have time to sit against the hot surface of the pan and develop the light charred edges visible in the image; this is the detail that makes the broccoli taste like it was cooked with intention rather than just added to the pan.
- Taste the skillet and adjust the seasoning with additional salt and black pepper if needed, then scatter the chili flakes evenly over the surface before the final stir so they distribute throughout the dish rather than sitting in one concentrated area.
Step 4: Finish and Serve
- Remove the skillet from the heat and drizzle the sesame oil over the entire surface of the finished dish, then fold it gently through the beef and broccoli with one or two slow strokes so the nutty aroma is distributed evenly without being cooked off by residual pan heat.
- Allow the skillet to rest off the heat for 2 minutes before serving; the brief rest allows the temperature to equalize across the pan, the sesame oil to absorb slightly into the beef, and the chili flakes to bloom in the residual warmth.
- Spoon the finished skillet generously onto a wide shallow white plate as shown in the image, spreading the beef and broccoli across the surface so both the green florets and the deep brown beef are clearly visible from above rather than one element buried beneath the other.
- Serve immediately while the broccoli is still vibrant green and the beef retains its heat; the color and texture both diminish after about 10 minutes as the residual heat continues cooking the broccoli and the beef absorbs more of the sauce.
Keto Hamburger Broccoli Skillet Variations
Keto Ground Beef and Broccoli Casserole
- After completing the skillet as written, transfer the finished beef and broccoli into a greased 9x13 inch baking dish, scatter a cup of shredded sharp cheddar cheese over the top, and bake at 375°F for 10 to 12 minutes until the cheese is fully melted and beginning to bubble at the edges.
- The casserole version produces a richer, more filling dish than the skillet alone and works well for feeding four to six people at once without requiring individual plating or any additional effort beyond the transfer and bake step.
- Add a thin layer of cream cheese blended smooth with 2 tablespoons of broth before the cheddar layer for a creamier, more sauce-like base beneath the melted cheese topping; this version is especially satisfying as a keto hamburger recipe on a cold evening when you want something that feels more substantial.
- This variation stores and reheats better than the plain skillet version because the melted cheese holds the moisture of the beef during refrigerator storage, and the casserole can be portioned and reheated in individual servings throughout the week.
Simple Ground Beef and Broccoli Recipe With Zucchini
- Add 1 medium zucchini, diced into 1 cm cubes, to the pan alongside the broccoli so both vegetables cook in the same broth steam and finish together at the same time; zucchini has a similar water content to broccoli and the two cook at the same rate without requiring any adjustment to the timing.
- The zucchini pieces take on the color and flavor of the beef drippings and soy sauce during the final dry-pan stage and add a mild, slightly sweet vegetable note that balances the savory beef without competing with the broccoli for presence on the plate.
- Replace the sesame oil at the end with a tablespoon of butter for a richer, less Asian-inflected finish that works well when serving the skillet alongside a simple green salad rather than as a standalone bowl.
- This is the variation I make when Anna wants a hamburger and broccoli skillet but the broccoli in the refrigerator is not quite enough to fill the pan on its own, and neither of us can tell the difference in flavor between the two-vegetable version and the original after the first bite.
Keto Beef and Broccoli Slow Cooker Version
- Brown the ground beef in a skillet first using the same method described in step one, drain the fat, then transfer the browned beef into a slow cooker along with the raw broccoli florets, diced onion, minced garlic, soy sauce or coconut aminos, broth, and all the seasonings.
- Cook on low for 3 to 4 hours or on high for 1.5 to 2 hours; the broccoli will be very soft compared to the skillet version and will release more moisture into the slow cooker, which creates a thicker sauce around the beef that can be stirred through before serving.
- Add the sesame oil and chili flakes only after the slow cooker is turned off and just before serving so both retain their aroma rather than fading into the background during the long, low cook.
- This version works well as a meal prep option because the slow cooker can be started in the morning and the finished dish portioned into containers for the week; the beef absorbs more of the soy sauce flavor during the longer cook and the broccoli becomes tender enough to eat with a fork without any chewing resistance.
Substitutions
- Ground beef can be replaced with ground turkey or ground chicken for a leaner version that stays keto-compliant; use 90/10 ground turkey and add a tablespoon of olive oil to the pan before browning since leaner ground poultry does not render enough fat on its own to prevent sticking during the browning stage.
- Soy sauce can be replaced with coconut aminos for a gluten-free and strictly keto-compliant option with a slightly sweeter, less salty flavor profile; use the same volume and adjust the salt level of the dish after tasting since coconut aminos contribute noticeably less sodium than regular soy sauce.
- Fresh broccoli can be replaced with frozen broccoli florets that have been thawed completely and patted dry before going into the pan; frozen broccoli contains more water than fresh and requires the paper towel step to prevent the pan from filling with steam rather than dry-frying the florets to the charred edges visible in the image.
- Chicken or beef broth for the steam step can be replaced with water in the same quantity when broth is unavailable; the flavor of the finished dish is slightly less complex with plain water but the technique works identically and the difference is compensated for by the soy sauce and sesame oil which carry the primary seasoning of the dish.
Equipment
- Large heavy skillet or cast iron pan (12-inch minimum)
- Wooden spoon or spatula for breaking and stirring the beef
- Large spoon for removing excess fat
- Measuring spoons
- Sharp knife and cutting board for the onion and broccoli
Emma Tip: Cast iron is the best choice for this recipe because it holds heat evenly across the surface and creates the deep brown crust on the beef and the charred edges on the broccoli more reliably than a thinner pan. If you only have a non-stick skillet, use it on medium-high rather than high heat and allow extra time for the beef to brown since non-stick surfaces reach lower maximum temperatures than cast iron or stainless steel.
Storage Tips
Make Ahead Strategy
- The broccoli can be broken into florets up to 2 days in advance and stored in a sealed container in the refrigerator; this makes the weeknight assembly faster since the only active prep step remaining is dicing the onion and mincing the garlic.
- The seasoning blend of smoked paprika, salt, and black pepper can be mixed in a small bowl or jar and stored at room temperature until needed, which reduces the number of individual spice jars you need to open during the 20-minute cook window.
- The full cooked skillet can be prepared up to 2 days in advance, stored in a sealed container in the refrigerator, and reheated in a dry skillet over medium heat for 3 to 4 minutes or in the microwave in 60-second bursts with a splash of broth to restore moisture; the broccoli will be softer than freshly made but the beef flavor deepens slightly overnight.
Refrigeration
- Cooked skillet stores well in an airtight container in the refrigerator for up to 3 days; the broccoli continues to absorb the beef drippings and soy sauce flavor during storage and the dish actually tastes more cohesive on the second day when the seasoning has had time to integrate through every element.
- Store with the sesame oil already mixed through rather than adding it fresh each time; the oil distributes throughout the beef and broccoli during refrigerator storage and its flavor remains present in the reheated dish without needing another addition.
- Do not store the finished skillet with the lid pressed tightly against the broccoli surface; the condensation that builds inside a sealed container makes the broccoli wet and reduces its texture to something noticeably mushier than freshly cooked.
Freezing
- The cooked skillet freezes well in portioned containers for up to 2 months; the beef freezes and reheats without any texture loss, though the broccoli will be significantly softer after thawing than it was when freshly made.
- For the best frozen result, slightly undercook the broccoli when making the skillet specifically for freezing; pull it from the heat while the florets are still slightly firm so they have room to soften further during the reheating step without becoming completely mushy.
- Thaw overnight in the refrigerator and reheat in a dry skillet over medium heat rather than the microwave; the skillet method allows any excess moisture released during thawing to evaporate rather than pooling around the beef and making the dish watery.
My Grandma's Secret Worth Sharing
Emma's grandmother had a cast iron skillet she refused to wash with soap and kept seasoned with a thin film of oil wiped on with a paper towel after every use. She said that a pan that had cooked a thousand meals carried something the ingredients did not have on their own. When I told Anna this while we were heating the pan, she looked at the cast iron with a slightly different expression than she usually gives kitchen equipment, like it had earned some kind of status. She asked if our pan had cooked a thousand meals yet. I told her probably closer to five hundred. She said that was a good start. My grandmother would have agreed with that answer.
FAQs
Why does my ground beef turn grey and steamed instead of browning?
The two most common causes are too much moisture in the pan and overcrowding the beef. If the skillet is too small or the beef is too cold when it goes in, it releases moisture faster than the pan can evaporate it and the meat steams rather than sears. Use a 12-inch or larger skillet so the beef is spread in a thin layer, allow the pan to preheat fully before the beef goes in, and resist the urge to stir too often; leaving the beef undisturbed for the first 2 minutes is what creates the browned crust that gives the dish its color and flavor.
Can I use frozen broccoli for a simple ground beef and broccoli recipe?
Yes, but the thawing and drying step is essential. Frozen broccoli that goes into the pan directly from the bag is coated in ice crystals that melt immediately and flood the pan with water, preventing the dry-fry char that makes the florets look and taste the way they do in the image. Thaw completely in the refrigerator overnight or at room temperature for 30 minutes, then press the florets firmly in a clean kitchen towel before adding them to the pan.
What is the best keto beef and broccoli sauce for this recipe?
The sauce in this recipe is built from soy sauce or coconut aminos, the natural beef drippings left in the pan after browning, the garlic cooked in those drippings, and the small amount of broth added with the broccoli that reduces into a concentrated glaze. For a more substantial sauce, add a tablespoon of sugar-free hoisin sauce or a teaspoon of sesame paste alongside the soy sauce and increase the broth to 4 tablespoons; the sauce will be thicker and slightly glossier when it reduces and will coat the beef and broccoli in a more visible layer.
When the Plate Goes Empty Twic
Anna refilled her plate before I had finished the first serving, which is the clearest possible feedback a one-pan dinner can receive. She asked if we could make it with zucchini next time, which led to the variation that is now in regular rotation alongside the original. If this skillet becomes one of your reliable weeknight answers the way it became one of ours, you might also love our Peruvian Chicken and Rice with Green Sauce for another one-pan dinner that arrives at the table looking like more work than it was, our Salmon with Avocado Salsa when you want a lighter protein with the same bold seasoning energy, or our Creamy Zucchini Noodle Chicken Alfredo for a low-carb pasta alternative that brings the same comfort-dinner feeling without the skillet browning. Make this on the evening when you need dinner done in twenty minutes and on the table without compromise.
Related
Looking for other recipes like Keto hamburger broccoli skillet? Try these:
- Bang Bang Chicken Bowl30 Minutes
- Shrimp and Sausage Gumbo1 Hours
- Firecracker Ground Chicken15 Minutes
- Hot Sausage Feta Honey Pizza30 Minutes

Keto Hamburger Broccoli Skillet
Ingredients
Equipment
Method
- Heat a large heavy skillet or cast iron pan over medium-high heat for 2 minutes until fully hot, then add the ground beef directly without additional oil and break it into medium crumbled pieces approximately 1 to 2 cm; season immediately with smoked paprika, salt, and black pepper.
- Leave the beef undisturbed for 2 minutes so the bottoms develop a light caramelized crust before stirring, then continue cooking and breaking apart until the beef is cooked through and deeply browned with no pink remaining; tip the skillet and spoon out most of the excess rendered fat, leaving about 1 tablespoon in the pan.
- Reduce the heat to medium, add the diced onion to the pan with the browned beef, and stir to coat the pieces in the remaining fat and beef drippings; cook for 4 to 5 minutes, stirring occasionally, until the onion turns translucent and golden at the edges and soft enough to cut easily with the side of a spoon.
- Add the minced garlic and stir constantly for 60 seconds until fragrant and very lightly golden, then pour the soy sauce or coconut aminos into the pan, stir to coat the beef and onion evenly, and allow the sauce to sizzle and reduce slightly against the hot surface for about 30 seconds before adding the broccoli.
- Increase the heat back to medium-high, add the broccoli florets to the pan, and stir to distribute them among the beef and onion so each floret has direct contact with the hot surface rather than sitting entirely on top of the other ingredients.
- Pour the broth over the broccoli immediately, stir once, and allow the liquid to create a brief burst of steam that softens the florets from within; the broth should evaporate almost completely within 2 to 3 minutes, which signals the broccoli is ready for the dry-fry finishing stage.
- Continue cooking for 2 more minutes after the broth has evaporated, stirring only once or twice so the broccoli florets sit against the hot pan surface long enough to develop the light charred edges visible in the image; scatter the chili flakes over the surface and stir through once.
- Remove the skillet from the heat, drizzle the sesame oil over the entire surface, fold it gently through the beef and broccoli with one or two slow strokes, rest for 2 minutes, then spoon generously onto a wide shallow plate spreading both beef and broccoli clearly visible from above and serve immediately.

Leave a Reply