
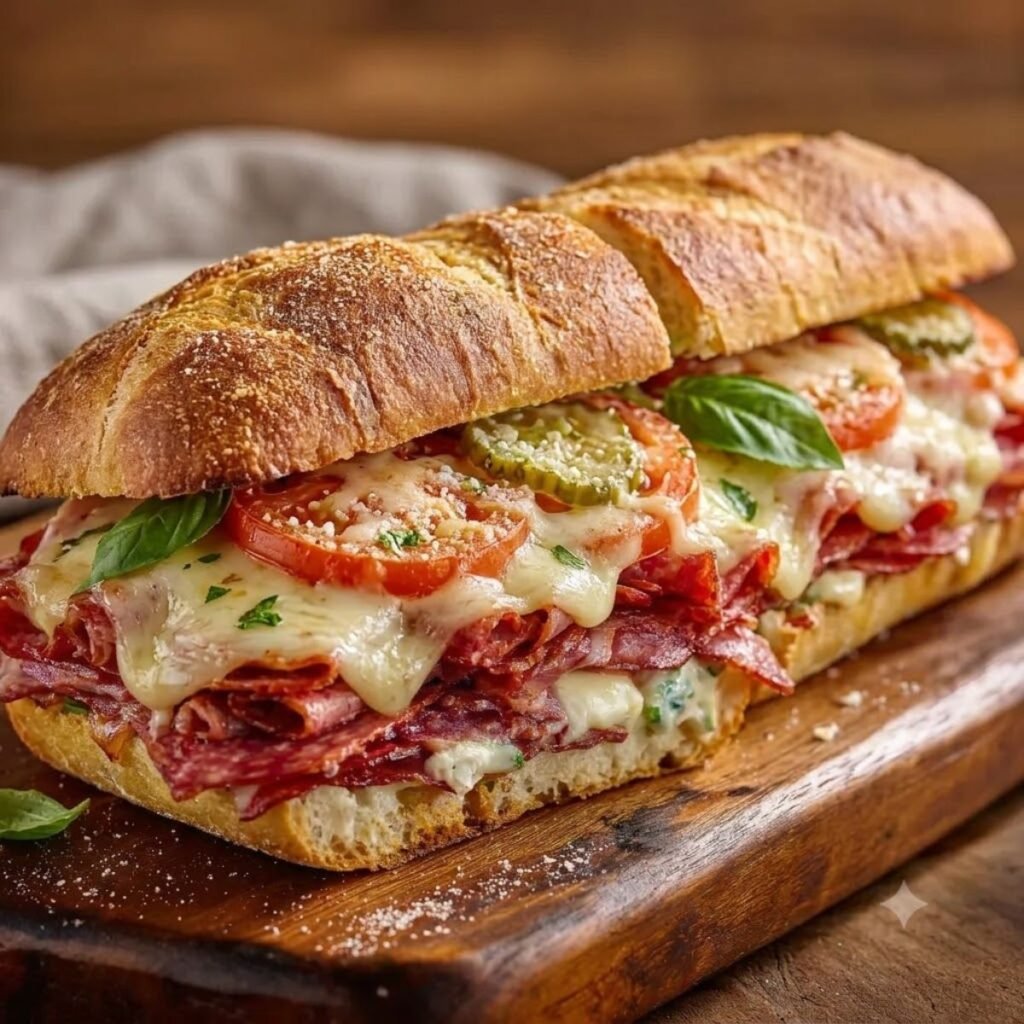
The kitchen is alive with the savory aroma of melting cheese and warm, toasted herbs. Anna giggles as she stacks layers of cured deli meats inside our sliced bread. We are a proper assembly line today, creating something incredibly delicious. These hot, crispy Baked Italian Grinder Sandwiches are our absolute favorite way to upgrade weekend lunch into a cozy family feast.
Jump to:
Why This Recipe Is Special
There is something deeply comforting about biting into a warm sub sandwich where the crust shatters slightly before revealing a gooey, savory center. This meal brings our family together because building the dense, colorful layers is just as engaging as eating them. It turns simple deli ingredients into a hearty dinner that satisfies everyone with minimal effort.
How To Make Baked Italian Grinder Sandwiches
My first attempt at making hot subs resulted in completely charred bread because I left them uncovered too long. Max joked that it looked like a volcanic rock, making Anna laugh hysterically. We quickly learned that baking them covered in foil first allows the cheese to melt fully while protecting the crust. Now, they turn out beautifully golden every single time.
Main Ingredients
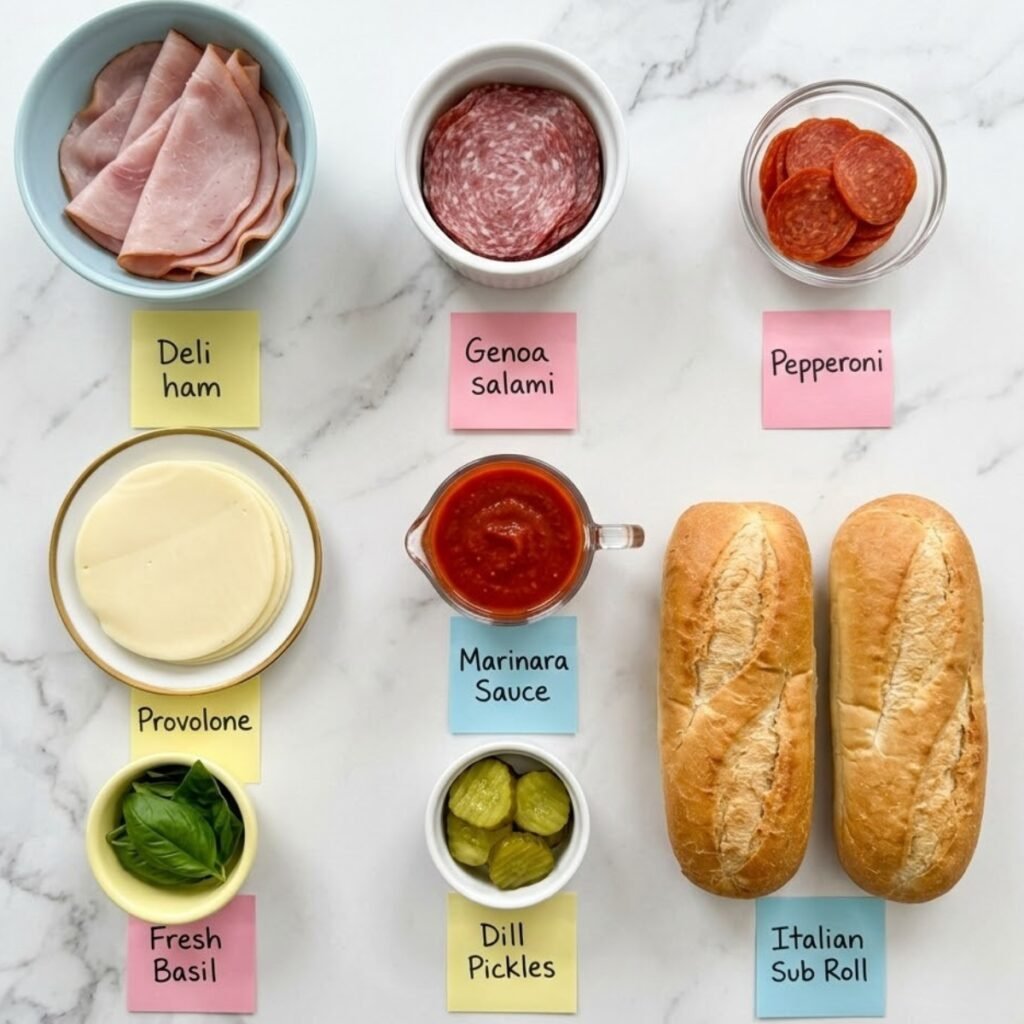
- Italian Sub Rolls: 2 large, sturdy bread loaves split lengthwise to hold the heavy ingredients without turning soggy.
- Provolone Cheese: 8 thick slices to provide a mild flavor and that classic, gooey melted layer.
- Genoa Salami: 12 thin slices for a deeply savory, traditional Italian seasoning base.
- Pepperoni: 16 slices to add a vibrant, spicy kick to the center layers.
- Deli Ham: 8 slices of mild ham to balance out the stronger cured meats.
- Marinara Sauce: Half a cup of rich tomato sauce spread inside for moisture and traditional Italian flavor.
- Fresh Basil: A handful of whole leaves tucked inside to bring a bright, aromatic freshness to the hot sub.
- Pickle Slices: 8 tangy dill pickle rounds to cut through the rich meats with sharp acidity.
Step by Step Instructions
Prepare the Bread Loaves
- Slice the large Italian sub rolls horizontally while keeping the back crust intact to form a pocket.
- Place the open loaves flat onto a large parchment lined baking sheet.
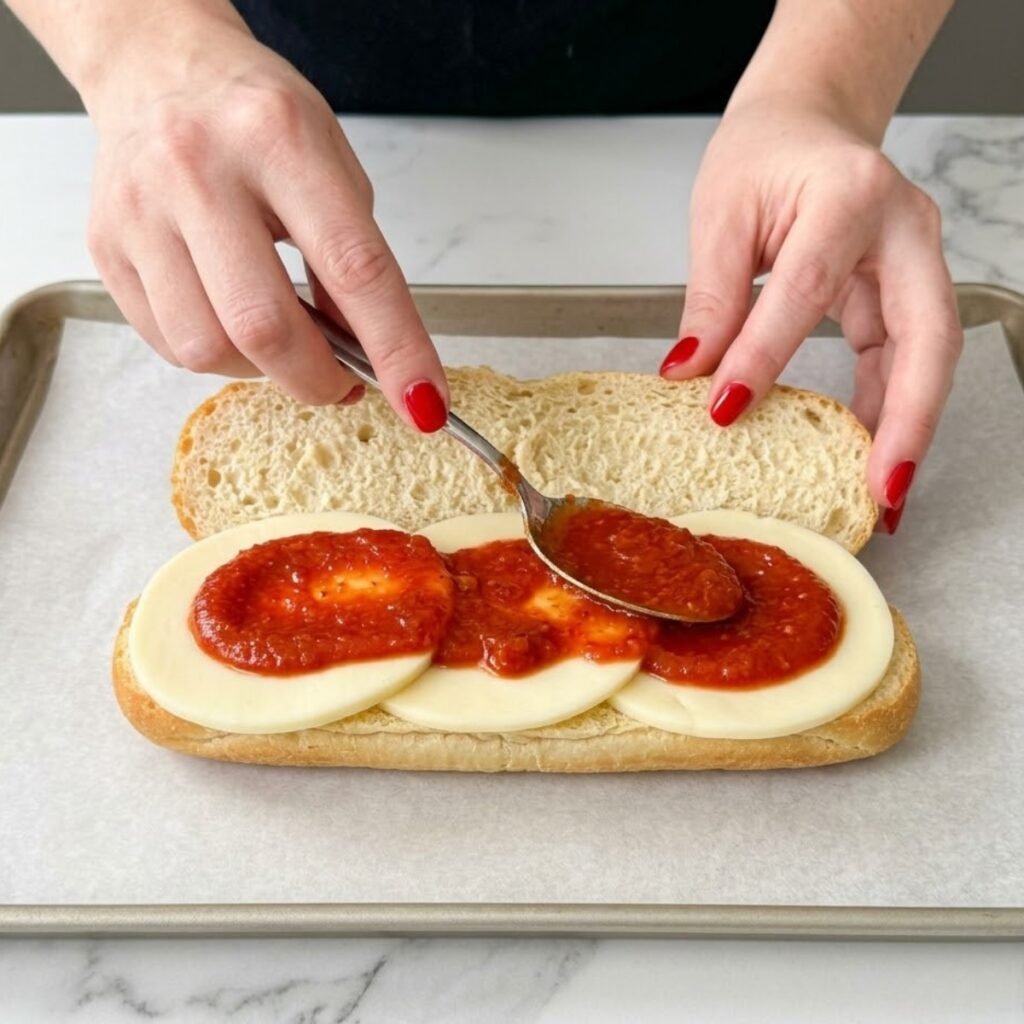
- Spread a thin, even layer of rich marinara sauce across the interior of the bread.
- Layer four slices of provolone cheese across the bottom half to create a barrier.
Layer the Savory Meats
- Arrange the deli ham slices smoothly over the base cheese layer.
- Overlap the Genoa salami slices tightly to cover the ham completely.
- Stack the pepperoni slices evenly along the entire length of the loaf.
- Tuck the tangy pickle slices and fresh basil leaves neatly between the meat layers.
Melt and Bake
- Top the meat and herb assembly with the remaining four slices of provolone cheese.
- Close the top bread halves gently over the fillings to form a neat sandwich.
- Cover the entire baking sheet loosely with a sheet of aluminum foil to trap steam.
- Bake at 200°C for ten minutes until the internal cheese is completely melted.
Crisp the Top Crust
- Remove the aluminum foil carefully to expose the top of the bread loaves.
- Brush the top crust lightly with olive oil and sprinkle with dried Italian herbs if desired.
- Return to the oven uncovered for an additional three minutes until golden and crispy.
- Slice into thick individual portions using a sharp serrated knife before serving immediately.
Baked Italian Grinder Sandwiches Variations
Anna's Sweet Hawaiian Sliders
- Use a connected pack of sweet Hawaiian rolls sliced horizontally in half. Layer the mild meats and cheese closely, bake under foil, and slice into fun, bite-sized party sliders.
The Crispy Grinder Wrap Twist
- Roll the deli meats, marinara, and provolone tightly inside a large flour tortilla instead of sub rolls. Toast it on a dry skillet for two minutes per side until the exterior is crispy.
Chopped Grinder Salad Style
- Dice the meats and cheeses into small squares and toss them with lettuce, tomatoes, and a creamy mayonnaise dressing. Serve this mixture cold inside hollowed-out bread bowls for a fun alternative.
Substitutions
- French Baguette: You can use a sturdy French baguette if traditional soft Italian grinder bread recipe styles are unavailable at your local bakery.
- Mozzarella Cheese: Swap the sliced provolone for low-moisture mozzarella slices to achieve an equally satisfying, mild cheese pull.
- Turkey Breast: Use thinly sliced deli turkey breast in place of the ham if you prefer a leaner meat profile in your sandwich.
- Pizza Sauce: Replace the marinara sauce with a thick pizza sauce or even a drizzle of creamy Italian dressing depending on your flavor preference.
Equipment
- Large rimmed baking sheet
- Parchment paper
- Aluminum foil
- Sharp serrated bread knife
Storage Tips
Make Ahead Strategy
- You can assemble the bread, sauce, meats, and cheese up to twelve hours in advance. Wrap the unbaked sandwiches tightly in plastic wrap and store them in the fridge until ready to bake.
Refrigeration
- Store any leftover baked portions wrapped in foil inside an airtight container for up to two days. Keep any fresh herbs or extra sauces separate to maintain the best texture.
Reheating
- Place the leftover sandwich onto a baking sheet covered loosely with foil. Warm in an oven preheated to 175°C for eight minutes until the center is hot and sizzling.
Family Secret Worth Sharing
My grandma always insisted that the secret to a phenomenal baked sub sandwich lies entirely in protecting the bread crust. She taught me to always start the baking process under a loose tent of foil. This traps the rising steam from the marinara and meats, melting the cheese perfectly without drying out the bread. Watching Anna carefully crimp the foil edges around our baking sheet today reminds me exactly of those cozy weekend afternoons spent learning simple tricks at grandma's side.
Troubleshooting FAQs
How do I prevent my hot grinder sandwich from becoming soggy?
Always layer your cheese slices directly against the bread surface on both the top and bottom halves. The melted cheese acts as a natural moisture barrier that prevents the sauce and meat juices from soaking into the crust.
Can I make these into individual single-serving portions before baking?
Yes, you can slice the long loaves into individual portions after assembling them but before putting them in the oven. Just ensure they are snug against each other on the baking sheet so the fillings do not spill out.
What should I do if my bread tops are browning too fast?
If your oven runs hot and the top crust looks dark before the center cheese melts, simply replace the foil cover loosely over the top and lower the oven temperature by twenty degrees to finish warming.
A Sizzling Sunday Lunch Together
Sitting down at the table with warm, messy fingers is the absolute best part of our weekend cooking sessions. Anna holds her sandwich with both hands, watching the cheese stretch out with pure delight. While we enjoy our hot subs, we are already planning our next kitchen adventures, debating whether to start with a breakfast of Baked Feta Eggs, a comforting side of Baked Potatoes with Mushrooms, or a sweet treat like Banana Nut Baked Oatmeal. Sharing these hearty meals makes our home feel so full and bright.
Don't forget to snap a picture of your Baked Italian Grinder Sandwiches before that ... (trust me, it will disappear quickly!), and leave a rating below. We'd love to hear how this Baked Italian Grinder Sandwiches becomes part of your dinner story.
Star Rate this recipe and join our cooking family.
Related
Looking for other recipes like Recipe? Try these:




Pairing
These are my favorite dishes to serve with this recipe:



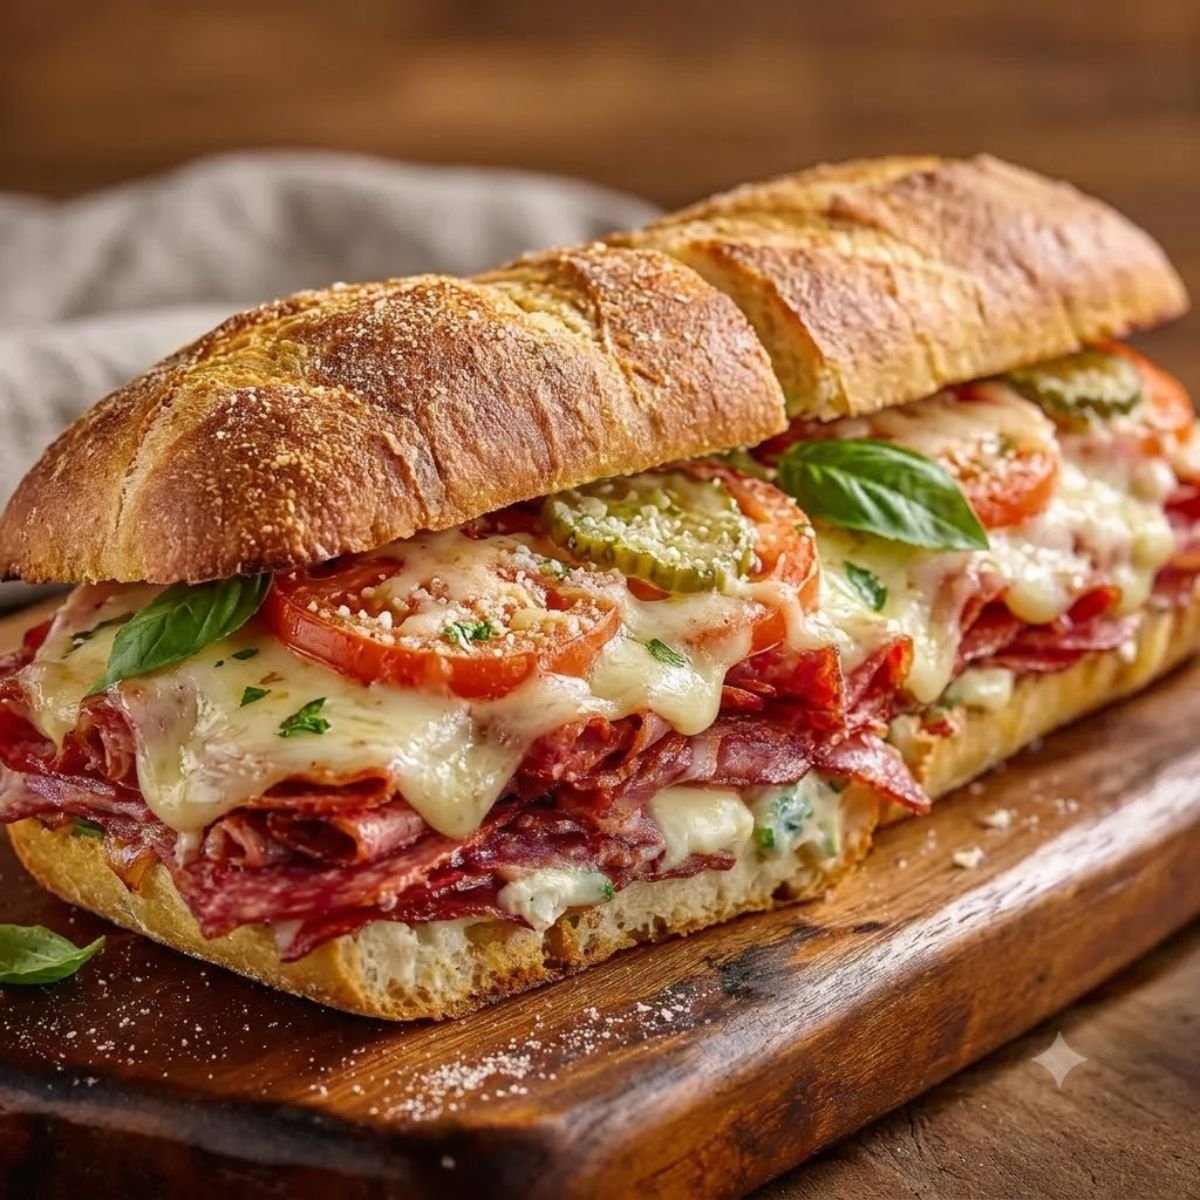
Easy Baked Italian Grinder Sandwiches
Ingredients
Equipment
Method
- Slice your large Italian sub rolls horizontally using a sharp serrated bread knife, keeping the back edge attached to form a pocket.
- Place the opened loaves flat onto a large baking sheet lined with clean parchment paper to prevent sticking.
- Spread half a cup of rich marinara sauce evenly across the interior surfaces of both open loaves.
- Layer four slices of provolone cheese flat across the bottom halves to create a protective barrier for the bread.
- Arrange your deli ham, Genoa salami, and pepperoni slices tightly in overlapping rows over the cheese base.
- Tuck your dill pickle rounds and fresh basil leaves neatly between the layered meats for balanced texture and flavor.
- Top with the remaining four provolone slices and close the upper halves of the loaves firmly over your fillings.
- Cover the baking sheet loosely with aluminum foil and bake at 200°C for ten minutes until the cheese is melted.
- Remove the foil carefully and bake uncovered for three additional minutes until the top crust is crisp and golden brown.


Leave a Reply