
Anna was not convinced that a tortilla could be green and still taste like a tortilla. She stood at the counter watching me blend the spinach into the warm water and said it looked like something from a science experiment. I told her to wait until after the first roll. Twenty minutes later she was wrapping her second one around sliced turkey and asking if we could make them every week. Celia's Spinach Flour Tortilla is the recipe that turned her into the kind of person who cares what her wrap is made of.
Jump to:
- Why You Will Love Celia's Spinach Flour Tortilla
- How To Make Celia's Spinach Flour Tortilla
- Main Ingredients
- Step by Step Instructions
- Celia's Spinach Flour Tortilla Variations
- Substitutions
- Equipment
- Storage Tips
- My Grandma's Secret Worth Sharing
- FAQs
- Rolled, Green, and Ready Before Noon
- Related
- Celia's Spinach Flour Tortilla
Why You Will Love Celia's Spinach Flour Tortilla
These tortillas are soft, pliable, and genuinely green in a way that makes a wrap look like something worth paying attention to before the filling even goes in. The spinach flavor is subtle rather than dominant, which means the tortilla works as a neutral base for almost any filling while still adding something real to the meal. Anna loves that she can roll them tightly around a full sandwich filling without them tearing at the seam or cracking at the fold the way store-bought spinach tortillas sometimes do. They take about 30 minutes from blending to cooking and the recipe makes enough for the whole week if you keep them wrapped in the refrigerator.
How To Make Celia's Spinach Flour Tortilla
The first time I made these, I added the spinach blended into the water before the fat and the flour absorbed it unevenly, leaving pale streaks of unmixed dough that baked into the tortilla as lighter patches. Anna looked at the finished stack and said they looked like someone had tried to marble them, which was generous. The second attempt I blended the spinach with the water until the mixture was completely smooth and uniformly green before it touched the flour, and the dough came together into a consistent, evenly colored green from the first knead. That blending step done properly is the difference between a truly green tortilla and one that looks like it gave up halfway through.
Main Ingredients
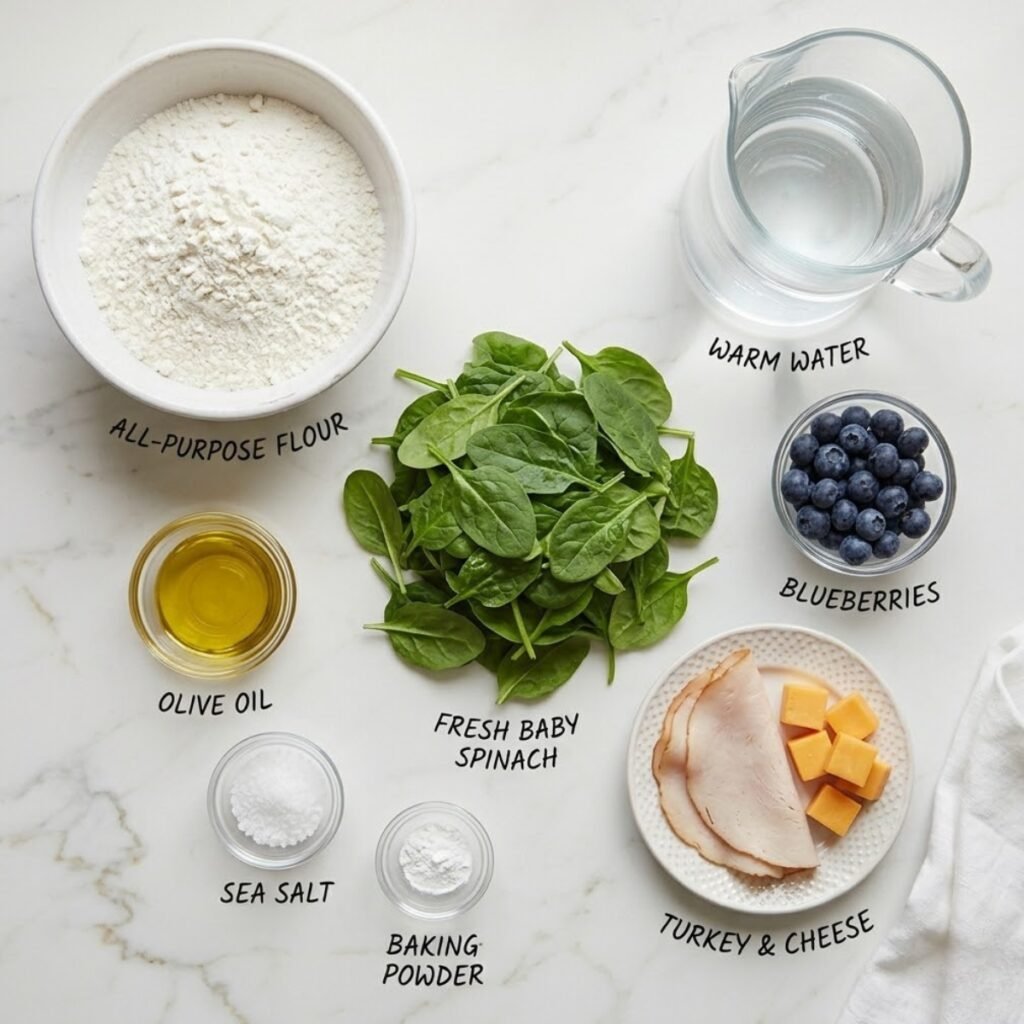
- 2 cups (250g) all-purpose flour, plus extra for dusting (the base structure of the tortilla; measure by spooning into the cup rather than scooping directly from the bag to avoid packing the flour and making the dough stiff)
- 1 cup (30g) fresh baby spinach, packed (the color and mild green flavor; fresh spinach blends more smoothly and produces a more vivid color than frozen spinach which tends to give a duller, murkier green)
- ½ cup (120ml) warm water (used to blend the spinach into a smooth liquid base; the water should be warm enough to help the fat in the dough distribute evenly but not hot enough to begin cooking the spinach)
- 3 tablespoons olive oil or vegetable shortening (the fat that makes these tortillas soft and pliable; olive oil produces a slightly more savory flavor and shortening produces a more neutral, classically soft tortilla texture)
- ½ teaspoon salt (seasons the dough and helps control the gluten development so the tortillas stay tender rather than chewy)
- ½ teaspoon baking powder (a small amount gives the tortillas a faint lift and keeps them from being completely flat and dense; they should be thin but not cracker-stiff)
Step by Step Instructions
Step 1: Blend the Spinach and Prepare the Dough
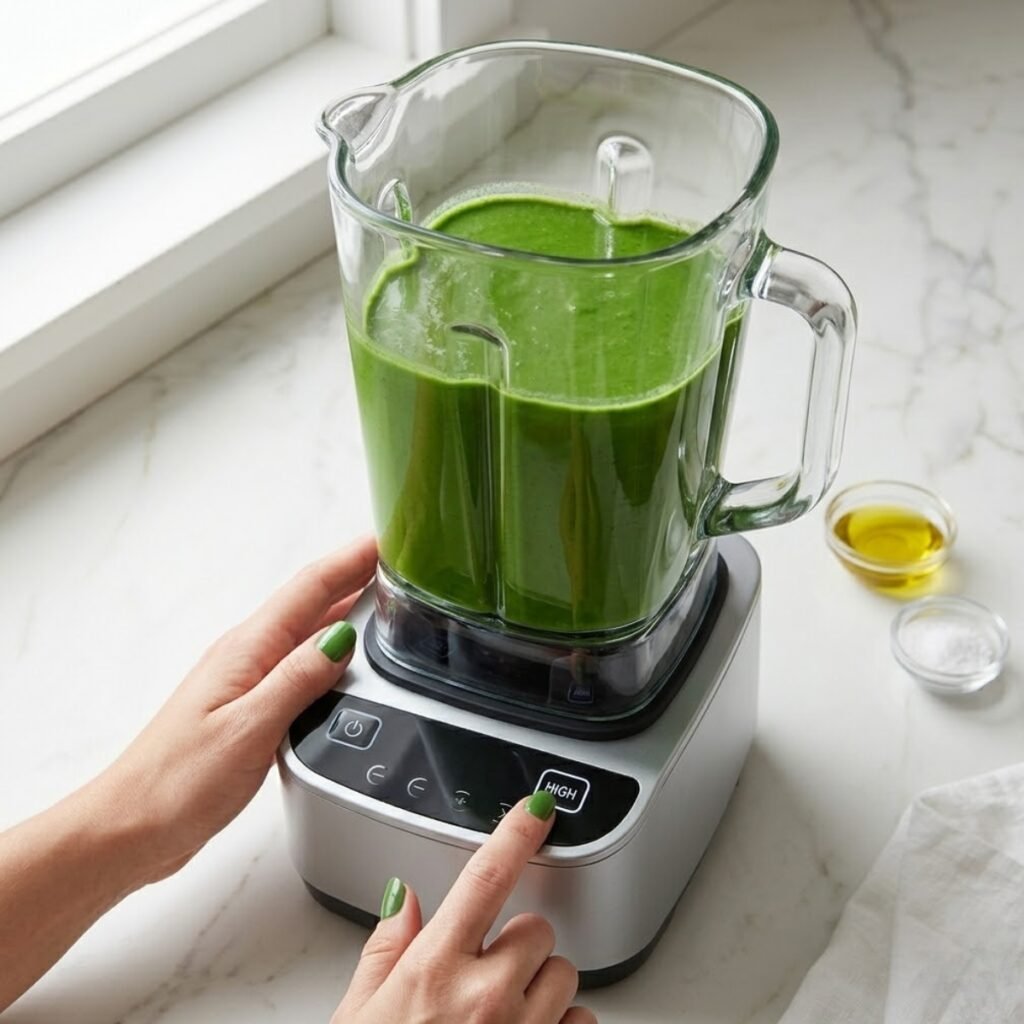
- Add the fresh baby spinach and warm water to a blender and blend on high speed for 30 to 45 seconds until the mixture is completely smooth, uniformly green, and no visible leaf pieces or fibrous strands remain when you hold the blender up to the light.
- Check the consistency by pouring a small amount onto a white plate; if any green flecks are visible, blend for an additional 15 seconds until the liquid is a clean, solid green with no visible texture, because unmixed spinach fiber creates uneven color and texture in the finished tortilla.
- Combine the flour, salt, and baking powder in a large mixing bowl and whisk briefly to distribute the dry ingredients evenly, then add the olive oil or shortening and rub it into the flour with your fingertips until the mixture resembles coarse, slightly clumping crumbs with no visible pools of oil.
- Pour the green spinach water into the flour mixture gradually, stirring with a fork as you pour, until a shaggy dough begins to form and all the flour has been incorporated; the dough should look evenly green at this point with no pale dry patches remaining at the bottom of the bowl.
Step 2: Knead and Rest the Dough
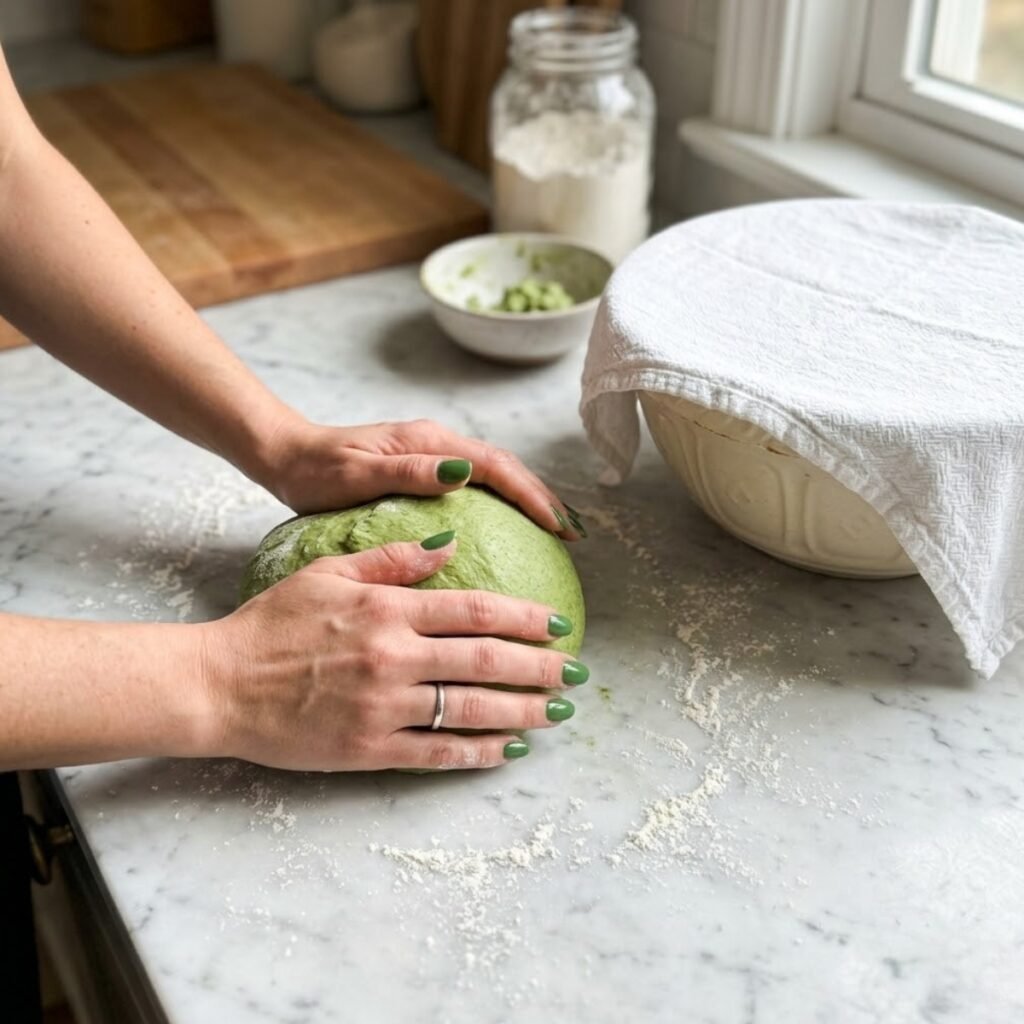
- Turn the dough out onto a lightly floured surface and knead firmly for 3 to 4 minutes, pressing the heel of your hand into the dough, folding it back on itself, and turning it a quarter turn with each stroke until the surface feels smooth, slightly tacky, and springs back slowly when you press a fingertip into it.
- Check the dough's consistency by pulling a small piece; it should stretch without tearing immediately rather than snapping back like a rubber band, which indicates the gluten has relaxed enough to allow the tortillas to be rolled thin without shrinking back toward the center.
- Form the dough into a smooth ball, return it to the bowl, and cover the bowl with a clean kitchen towel or plastic wrap; rest at room temperature for 15 minutes so the gluten relaxes completely and the dough becomes significantly easier to roll without pulling back from the edges.
- After resting, divide the dough into 8 equal portions by pressing it into a rough circle and cutting it like a pie, then roll each portion into a smooth ball between your palms and set on a lightly floured surface under the damp towel to prevent the surface from drying while you work through each one.
Step 3: Roll and Cook the Tortillas
- Working with one dough ball at a time, press it into a small disc with your palm, then roll with a rolling pin from the center outward in all directions, rotating the dough a quarter turn after each roll to keep it in a roughly circular shape; the target thickness is about 2mm, thin enough that you can see your hand through it very faintly when held up to the light.
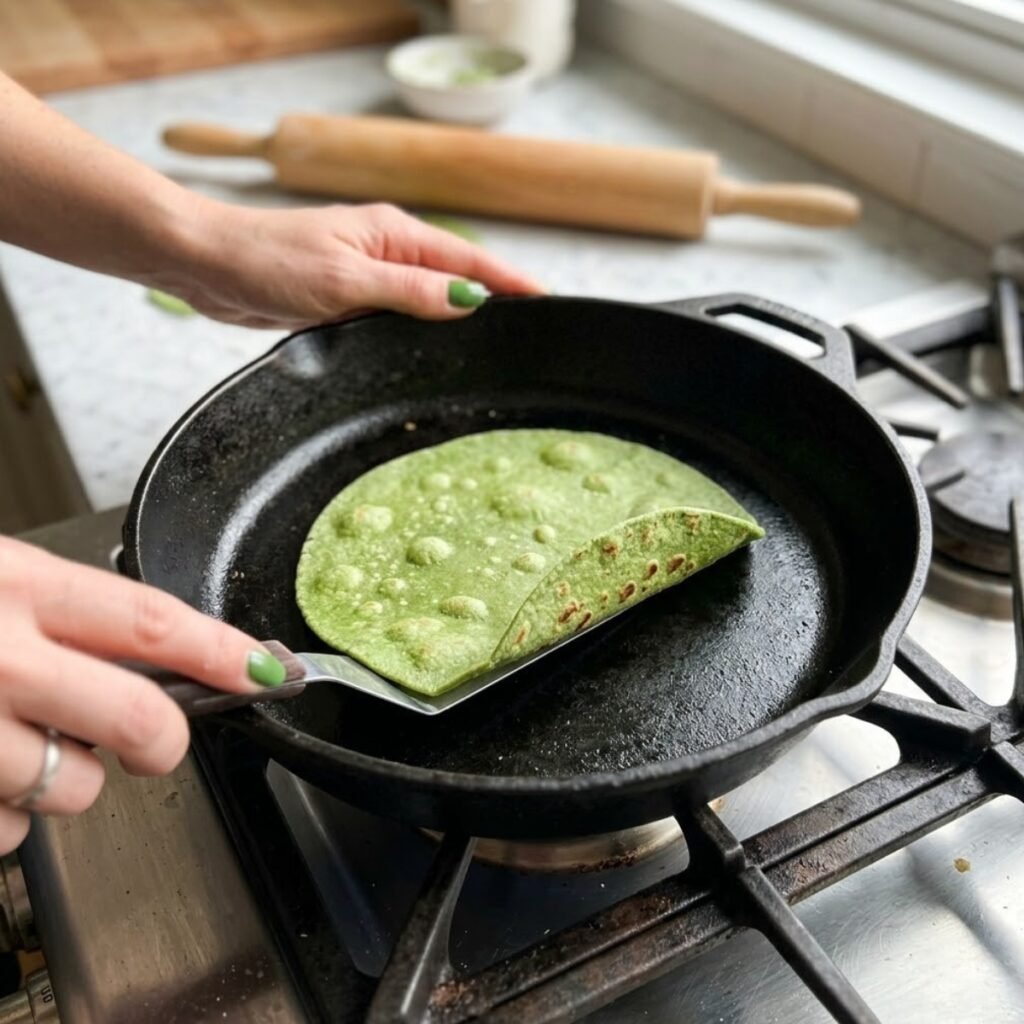
- Heat a dry cast iron skillet or heavy non-stick pan over medium-high heat until a drop of water evaporates immediately on contact, then lay a rolled tortilla flat in the pan and cook for 45 to 60 seconds until the underside develops small brown spots and the top surface shows bubbles forming and beginning to puff in places.
- Flip the tortilla using a wide spatula and cook the second side for 30 to 45 seconds until matching brown spots appear and the tortilla feels dry to a light touch rather than looking raw and damp; the green color will darken slightly during cooking, which is normal and the finished tortilla will still be clearly green when cool.
- Remove the cooked tortilla to a clean plate and cover it immediately with a kitchen towel so the steam trapped beneath the towel keeps the surface soft and pliable; a tortilla exposed to air while hot becomes brittle at the edges within minutes, so the towel cover is essential if you want them to roll without cracking.
Step 4: Stack, Cool, and Wrap
- Continue rolling and cooking the remaining dough balls one at a time, stacking each finished tortilla directly on top of the previous one under the towel so the collective steam from the stack keeps the whole batch soft as you work through the last few.
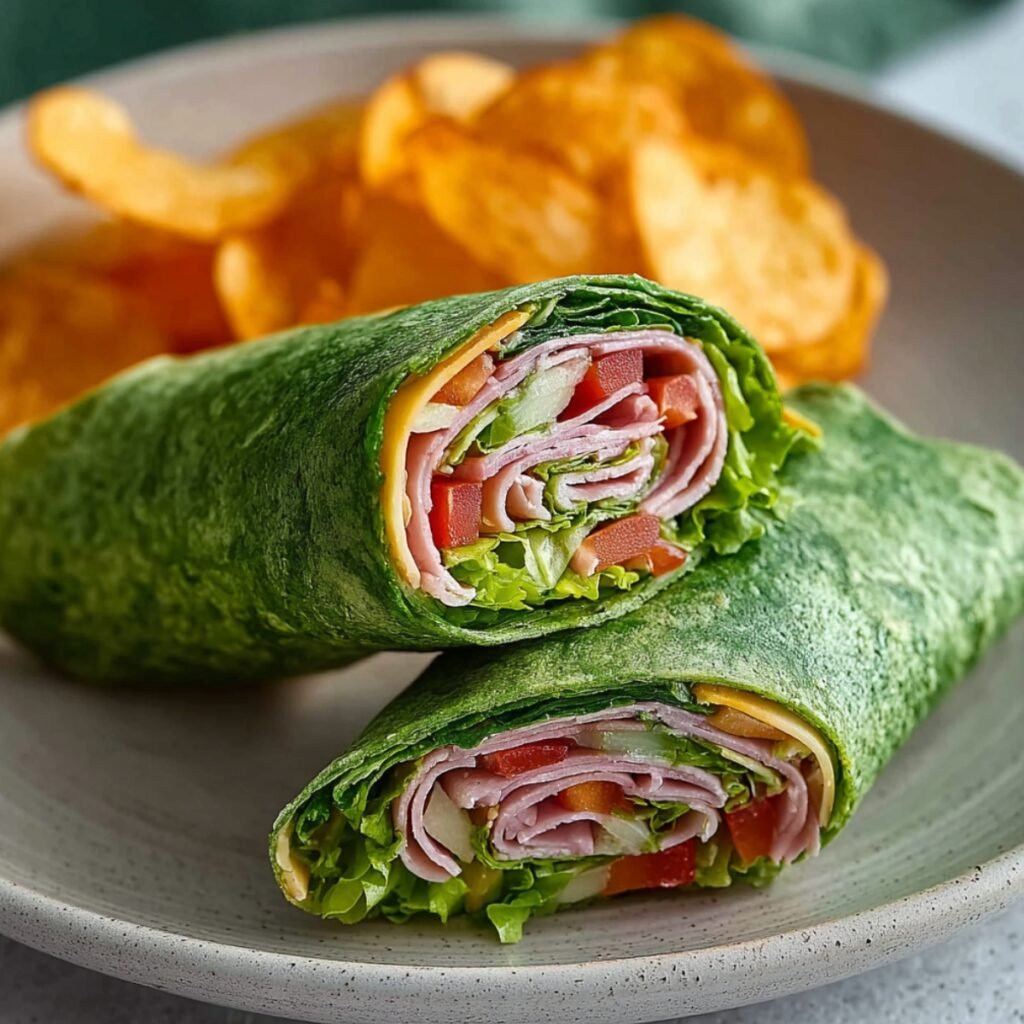
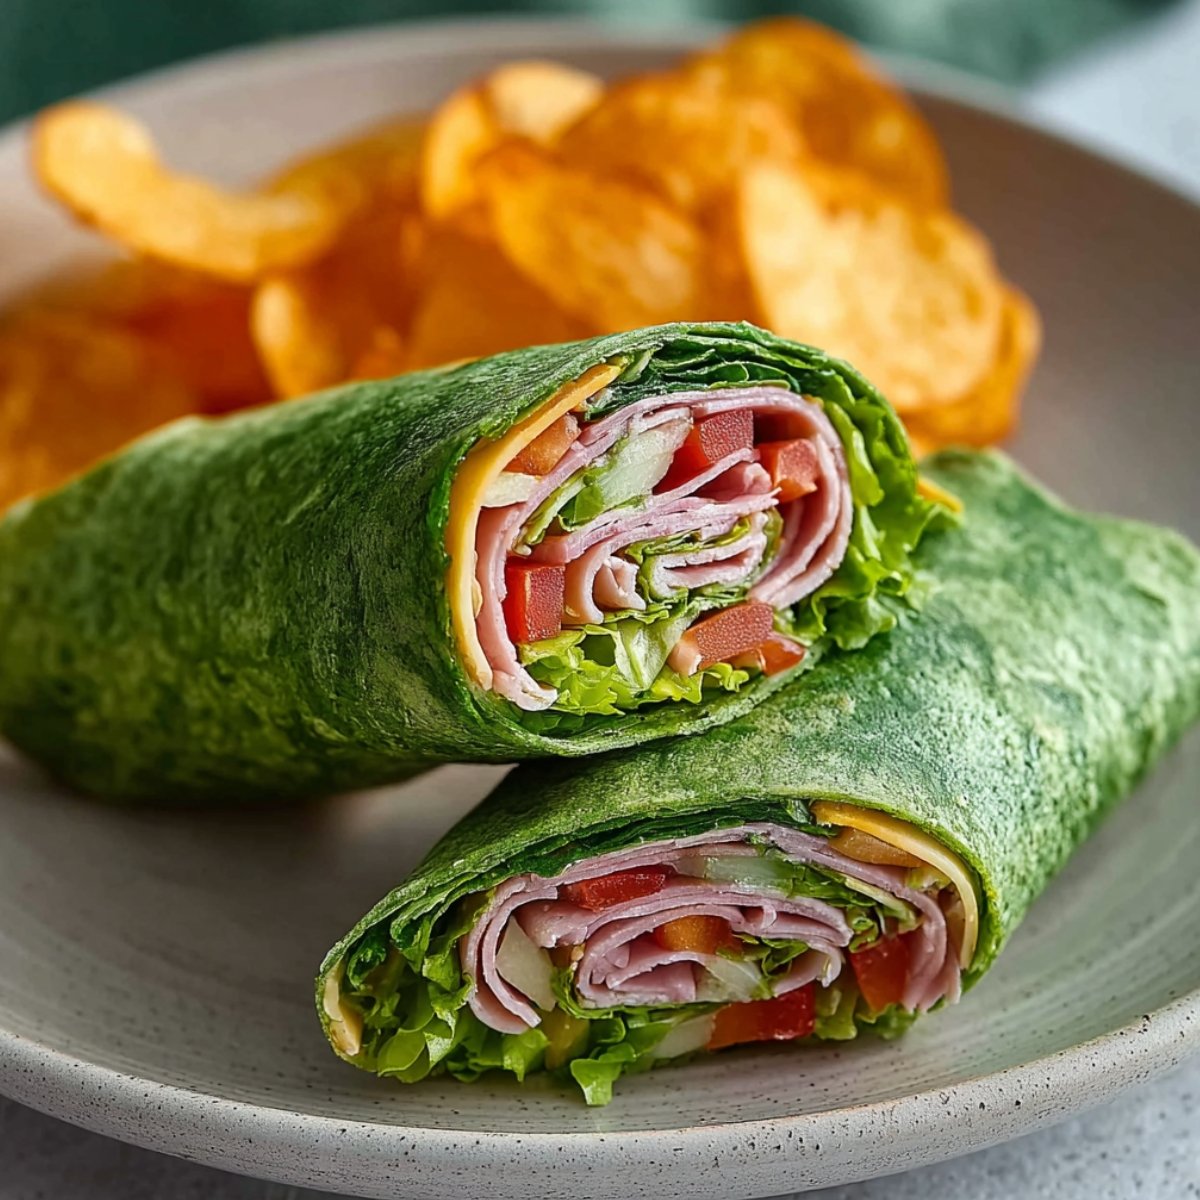
- Allow the full stack to rest under the towel for 5 minutes after the final tortilla is cooked; the combined steam from the stack during this window is what produces the soft, completely pliable texture visible in the finished tortillas in the image, where they bend and roll cleanly around the filling without any visible cracking at the fold.
- To use immediately, lay a cooled tortilla flat, add the filling of your choice starting from the center, fold in the two short sides, then roll firmly from the bottom up so the filling is completely enclosed and the seam sits underneath the roll when placed on the plate.
- To store, allow the stack to cool completely before wrapping tightly in plastic wrap or sealing in a zip-close bag; room temperature storage for up to 2 days works well and refrigerator storage for up to 5 days keeps them soft when reheated briefly in a dry pan for 20 seconds per side.
Celia's Spinach Flour Tortilla Variations
Sourdough Spinach Tortillas
- Replace 50g of the all-purpose flour with an equal weight of sourdough discard stirred smooth before adding to the dry ingredients, then reduce the warm water by 2 tablespoons since the discard contributes its own moisture to the dough.
- The sourdough version produces a tortilla with a faintly tangy, more complex flavor underneath the mild spinach character and a slightly chewier texture at the fold that holds up particularly well when used for wraps with wetter fillings like avocado, salsa, or juicy grilled chicken.
- Allow the sourdough dough an extra 5 minutes of rest time after kneading since sourdough discard adds hydration and acidity to the gluten network that benefits from a slightly longer relaxation period before rolling.
- Anna prefers the sourdough version with turkey and cheese because she says the slight sourness makes the whole wrap taste more interesting than a plain flour version and she now specifically asks which dough I used before she adds the filling.
Corn Tortilla Style Spinach Wraps
- Add ¼ cup of fine masa harina to the dough alongside the all-purpose flour and reduce the plain flour by the same amount for a hybrid tortilla that has the soft roll-ability of a flour tortilla with a faint corn character running through the green spinach base.
- The masa harina absorbs water at a different rate than all-purpose flour so add the spinach water a tablespoon at a time rather than all at once, stopping when the dough comes together into a smooth, slightly tacky ball that holds its shape when pressed without feeling sticky on the surface.
- This variation works especially well for taco fillings where the corn flavor complements the seasoned meat and the green tortilla provides a visual contrast that makes even a simple taco look considered and deliberate on the plate.
- The cooking time stays the same but the finished tortilla is slightly more opaque than the plain flour version and tears more cleanly rather than stretching, which makes it better suited to hard taco folding than to a tight burrito roll.
Spinach Wrap With Herb-Infused Dough
- Add 1 tablespoon of finely chopped fresh basil or flat-leaf parsley to the spinach and water before blending so the herbs blend into the liquid base and infuse their flavor and a slightly deeper green throughout the dough.
- The herb-infused version pairs especially well with Mediterranean fillings such as feta, roasted red pepper, hummus, and thinly sliced cucumber where the basil in the dough echoes the herbs already in the filling without overpowering any single element.
- Use the exact same method, quantity, and cook time as the base recipe; the herbs add flavor and a slightly more complex color to the finished tortilla but do not change the texture or handling of the dough in any way that requires adjustment.
- This variation is the one I make when we are eating the wraps for dinner rather than packing them for lunch, because the herb-scented dough makes the kitchen smell noticeably better during cooking and the finished tortilla carries enough flavor to feel like a deliberate choice rather than simply a vessel for the filling.
Substitutions
- All-purpose flour can be replaced with a 1:1 gluten-free flour blend for a gluten-free version of these tortillas; the dough will feel slightly stickier and less elastic than the wheat version and benefits from a 5-minute longer rest before rolling to allow the binding agents in the blend time to hydrate fully before the tortillas go into the pan.
- Fresh baby spinach can be replaced with frozen spinach that has been completely thawed and squeezed dry in a kitchen towel before blending; frozen spinach contains more water than fresh and the thorough drying step is essential to prevent the dough from becoming too wet and sticky to handle, which would require additional flour and dilute the green color.
- Olive oil can be replaced with melted coconut oil, vegetable shortening, or even room temperature butter in the same quantity; shortening and butter produce the most classically soft tortilla texture while coconut oil adds a very faint sweetness that works well in wraps with sweeter fillings like roasted sweet potato or avocado and mango.
- All-purpose flour in the dough can be replaced with whole wheat flour for a heartier, slightly nuttier version with more fiber; use a 50/50 split of whole wheat and all-purpose rather than a full whole wheat substitution because 100 percent whole wheat produces a drier, less pliable tortilla that cracks at the fold more readily than the blend.
Equipment
- Blender for the spinach and water
- Large mixing bowl
- Rolling pin
- Cast iron skillet or heavy non-stick pan
- Wide flat spatula for flipping
- Kitchen towel for resting and stacking
- Plastic wrap or zip-close bags for storage Emma Tip: If you do not have a rolling pin, a smooth-sided glass or a clean wine bottle works perfectly for rolling the dough thin. Keep the surface lightly dusted with flour and roll from the center outward, applying even pressure from your palms rather than pressing harder with one side of the rolling surface, which is the most common cause of uneven thickness in homemade tortillas.
Storage Tips
Make Ahead Strategy
- The dough can be made and kneaded up to 24 hours in advance, wrapped tightly in plastic wrap, and refrigerated; bring it to room temperature for 20 minutes before dividing and rolling since cold dough springs back under the rolling pin and is significantly harder to roll to the correct thinness than dough at room temperature.
- The full batch of cooked tortillas can be made on Sunday and used through the week; wrap the cooled stack tightly in plastic wrap and store in the refrigerator so they are ready to fill and roll at any meal without any additional preparation beyond a brief warm-up if desired.
- For an even faster weekday morning, assemble and wrap the filled tortillas the night before, wrap each one tightly in plastic wrap or foil, and refrigerate overnight; most fillings hold well for 8 hours and the tortilla softens slightly against the filling in a way that actually improves the overall texture of the wrap.
Refrigeration
- Cooked tortillas keep well stacked and wrapped tightly in plastic wrap in the refrigerator for up to 5 days; separate each tortilla with a small square of parchment paper if they seem inclined to stick together, particularly in warmer, more humid kitchen conditions.
- Reheat individual refrigerated tortillas in a dry pan over medium heat for 20 seconds per side until they are warm, soft, and pliable enough to roll without cracking; do not microwave them uncovered as this makes the edges tough and dry rather than restoring the soft texture of the freshly cooked version.
- Filled wraps stored in the refrigerator will soften the tortilla slightly where it meets wet ingredients over time; this is a texture preference issue rather than a food safety one and many people find the slightly softened tortilla preferable to a crisp one when eating a cold wrap directly from the refrigerator.
Freezing
- Cooked tortillas freeze well separated by parchment paper squares and sealed in a zip-close freezer bag for up to 2 months; thaw at room temperature for 15 minutes or place in a dry pan over medium-low heat from frozen and heat for 30 to 40 seconds per side until fully thawed and soft.
- The dough balls before rolling and cooking also freeze well; freeze them individually on a parchment-lined tray until solid, then transfer to a freezer bag for up to 2 months and thaw overnight in the refrigerator before rolling and cooking as normal the following morning.
- Do not freeze filled wraps because the moisture from the filling migrates into the tortilla during freezing and the tortilla becomes waterlogged and tears rather than unrolling cleanly after thawing.
My Grandma's Secret Worth Sharing
Emma's grandmother made flour tortillas by feel rather than by recipe, pressing her palm into the dough and reading the resistance the way other people read a thermometer. She said the dough told you everything you needed to know if you paid attention to how it pushed back, and that soft dough made soft tortillas without exception. When Anna pressed her fingertip into the rested dough for the first time and it came back slowly rather than snapping back, she looked up and said it felt like it was ready. She was right, and my grandmother would have told her so immediately without checking a single measurement.
FAQs
Is a spinach tortilla healthy?
A spinach flour tortilla is made from the same base ingredients as a regular flour tortilla with the addition of blended spinach, which contributes a small amount of vitamins A, C, and K as well as iron and folate. The spinach itself is genuinely present in the dough rather than being a coloring agent, which means the nutritional contribution is real even if not enormous per tortilla. Compared to a plain flour tortilla, the spinach version provides slightly more fiber and micronutrients and the same satisfying softness and flexibility that makes a flour tortilla useful as a wrap base for any filling.
Are spinach tortillas gluten-free?
Standard spinach flour tortillas made with all-purpose flour are not gluten-free because wheat flour is the primary structure-building ingredient in the dough. The spinach itself is naturally gluten-free but does not replace the function of wheat gluten in creating the soft, pliable texture that makes these tortillas roll without tearing. For a gluten-free version, replace the all-purpose flour with a certified gluten-free 1:1 flour blend and follow the substitution notes above; the result is a safe option for those avoiding gluten with a texture that is close to but not identical to the wheat version.
Which tortillas are gluten-free?
Corn tortillas made from masa harina are naturally gluten-free and are the most widely available gluten-free tortilla option in most grocery stores. Traditional corn tortillas contain only masa, water, and salt with no wheat flour. Certified gluten-free flour tortillas made with rice flour, almond flour, or a gluten-free flour blend are also available commercially and can be made at home using the substitution in this recipe. Always check packaging for cross-contamination warnings if celiac disease or severe gluten sensitivity is a concern, since many commercial facilities produce both wheat and corn tortillas on shared equipment.
Rolled, Green, and Ready Before Noon
Anna carried her wrap to the table and set it down with the patience of someone who had done the work and was prepared to enjoy the result. She cut it on the diagonal the way I showed her and held up half so the filling was visible at the cut edge, then set it back down carefully. The image does not lie about what these look like when they are done right: clean green exterior, tight roll, filling visible at the end. If this becomes the wrap you make every week the way it became the one we make every week, you might also love our Protein Berry Bake for a high-protein breakfast that pairs with a wrap morning the way something baked and warm pairs with something cool and portable, our Loaded Hash Browns with Scrambled Eggs when the weekend calls for a full plate rather than something rolled, or our Baked Feta Eggs when you want the eggs on the side of the wrap rather than inside it. Make a batch on Sunday and see whether they last until Friday.
Related
Looking for other recipes like Celia's Spinach Flour Tortilla? Try these:
- Japanese Soufflé Pancakes25 Minutes
- Sweet Potato Waffles30 Minutes
- Garlic Rosemary Focaccia Muffins35 Minutes
- Lemon Rhubarb Bread1 Hours 30 Minutes
Celia's Spinach Flour Tortilla
Ingredients
Equipment
Method
- Add the fresh baby spinach and warm water to a blender and blend on high for 30 to 45 seconds until completely smooth and uniformly green with no visible leaf pieces or fibrous strands remaining; check by pouring a small amount onto a white plate and blend an additional 15 seconds if any green flecks are still visible.
- Combine the flour, salt, and baking powder in a large mixing bowl and whisk briefly to distribute evenly, then add the olive oil or shortening and rub it into the flour with your fingertips until the mixture resembles coarse crumbs with no visible pools of fat.
- Pour the green spinach water into the flour mixture gradually while stirring with a fork until a shaggy dough forms and all flour is incorporated; the dough should look evenly green with no pale dry patches at the bottom of the bowl.
- Turn the dough out onto a lightly floured surface and knead firmly for 3 to 4 minutes until smooth, slightly tacky, and springs back slowly when pressed with a fingertip; form into a ball, return to the bowl, cover with a kitchen towel or plastic wrap, and rest at room temperature for 15 minutes.
- Divide the rested dough into 8 equal portions, roll each into a smooth ball between your palms, and keep them covered under the damp towel while you work; roll each ball on a lightly floured surface from the center outward, rotating a quarter turn after each roll, until approximately 2mm thick.
- Heat a dry cast iron skillet or heavy pan over medium-high heat until a drop of water evaporates immediately on contact, then lay one rolled tortilla flat in the pan and cook for 45 to 60 seconds until the underside develops small brown spots and the top surface shows bubbles forming and beginning to puff.
- Flip using a wide spatula and cook the second side for 30 to 45 seconds until matching brown spots appear and the tortilla feels dry to a light touch; remove immediately to a plate and cover with a kitchen towel so the steam keeps the surface soft and pliable while you cook the remaining tortillas.
- Stack each cooked tortilla directly on top of the previous one under the towel as you finish cooking, then allow the full stack to rest covered for 5 minutes after the final tortilla is done so the collective steam keeps the entire batch soft; use immediately or cool completely before wrapping and storing.
Leave a Reply