
Last Tuesday evening, Anna took one bite and said, "Aunty Emma, this tastes exactly like my favorite cheeseburger but way cooler because it's pie!" after digging into cheeseburger pie. I've made this recipe countless times over the years, and it's one of those dependable dinners that never fails picky eaters or busy nights.

Jump to:
Why Cheeseburger Pie Wins Weeknights
This cheeseburger pie represents ultimate family dinner combining familiar cheeseburger flavors with convenient casserole format creating meal everyone actually eats. The combination of seasoned beef with melted cheese and self forming crust creates dinner Anna ranks as "better than drive through but made at home" which feels like highest possible praise.
We especially love how this cheeseburger pie uses Bisquick creating its own crust during baking eliminating fussy pastry work. Anna appreciates that "it's basically magic science food" because she finds the self crusting phenomenon absolutely fascinating every single time.
Background
The cheeseburger pie became retro classic because it delivers satisfying dinner using pantry staples and impossible pie technique where batter magically forms crust. This vintage recipe from the Bisquick era transforms simple ground beef into layered pie perfect for busy weeknights when you need something that tastes homemade but comes together quickly without complicated steps.
These self crusting pies work beautifully for family dinners, potlucks, or anytime you want comfort food that feels nostalgic. The beauty lies in how Bisquick batter sinks beneath beef then rises around edges creating golden crust while cheese melts throughout creating cohesive dish.
How To Make Cheeseburger Pie
Quick Overview
Brown ground beef with onions, layer in pie pan with cheese, pour Bisquick batter over top, bake until golden for retro dinner in 45 minutes.
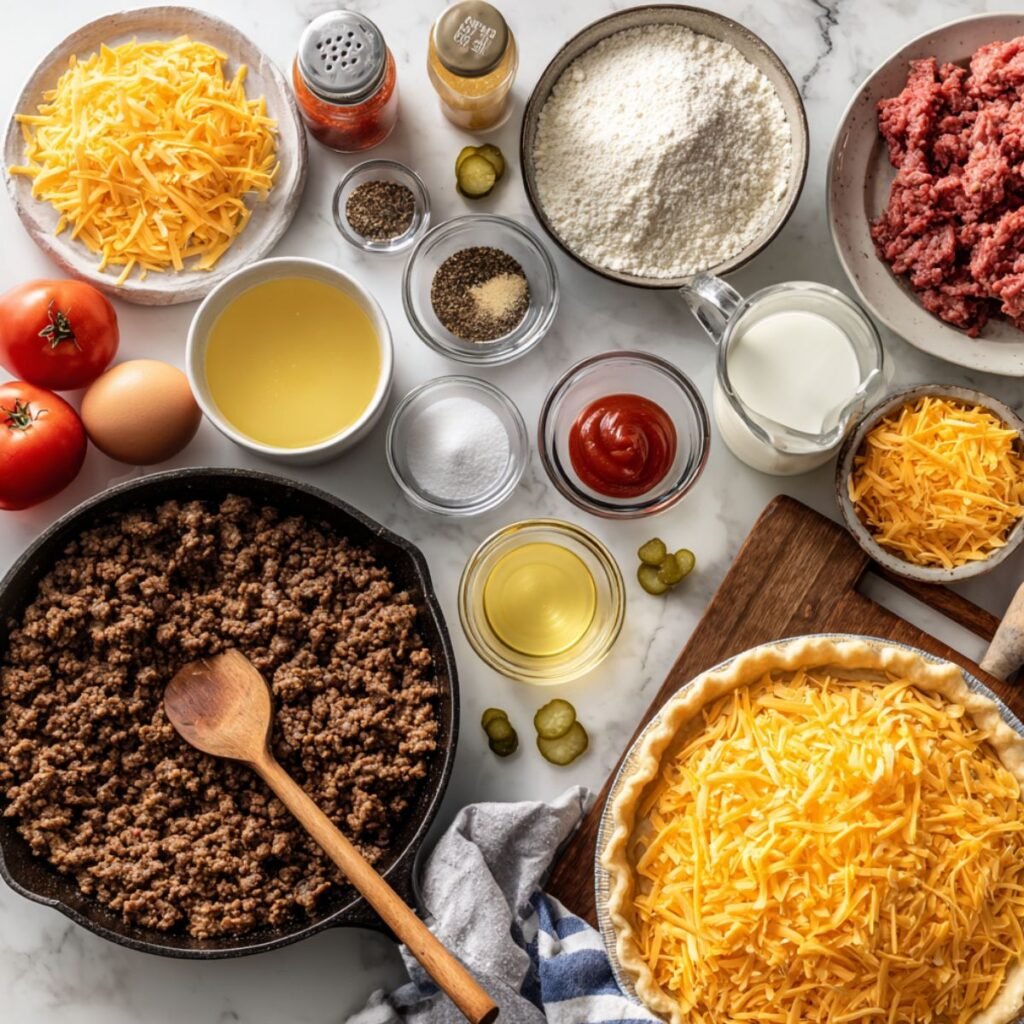
Ingredients
- Ground beef
Aunty says: Lean ground beef works best without excess grease - Onion
Anna's note: Chopped super small so I can't pick them out individually - Cheddar cheese
Aunty says: Sharp cheddar creates bold cheeseburger flavor throughout pie - Bisquick mix
Anna's observation: The magic powder that makes its own crust somehow - Milk
Aunty says: Combines with Bisquick creating batter that forms bottom crust - Eggs
Anna's wisdom: These help everything stick together and puff up nice - Salt and black pepper
Aunty says: Season beef well for proper cheeseburger flavor profile - Garlic powder
Anna's note: Makes the beef taste more restaurant special than plain - Worcestershire sauce
Aunty says: Adds umami depth making beef taste richer and more complex - Ketchup and mustard
Anna's observation: Optional for serving but these make it taste like real cheeseburger - Pickles
Aunty says: Sliced dill pickles for topping adding classic burger tanginess - Tomatoes
Anna's wisdom: Diced fresh tomatoes for garnish making it look fancy
Instructions
Brown the Beef Base
Preheat oven to 400°F and grease 9 inch pie pan generously with butter or cooking spray. Heat large skillet over medium high adding ground beef and breaking it up.
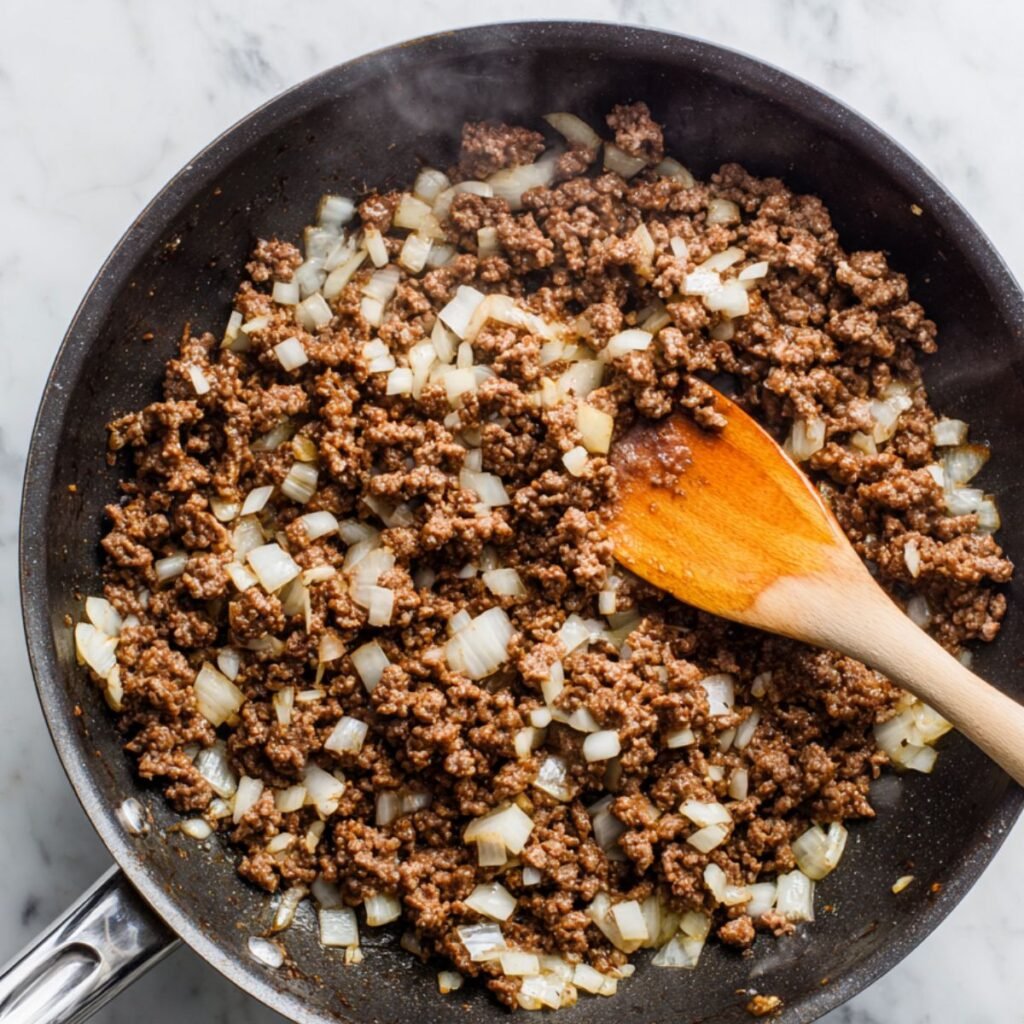
Anna's note: I love using the wooden spoon to smash beef into tiny pieces like making burger crumbles!
Add diced onion to beef cooking until meat is browned and onions are softened about 8 minutes. Drain excess fat thoroughly preventing greasy pie.
Season beef mixture with salt, pepper, garlic powder and Worcestershire sauce stirring well. The pie needs well seasoned beef creating proper burger flavor foundation.
Layer in Pie Pan
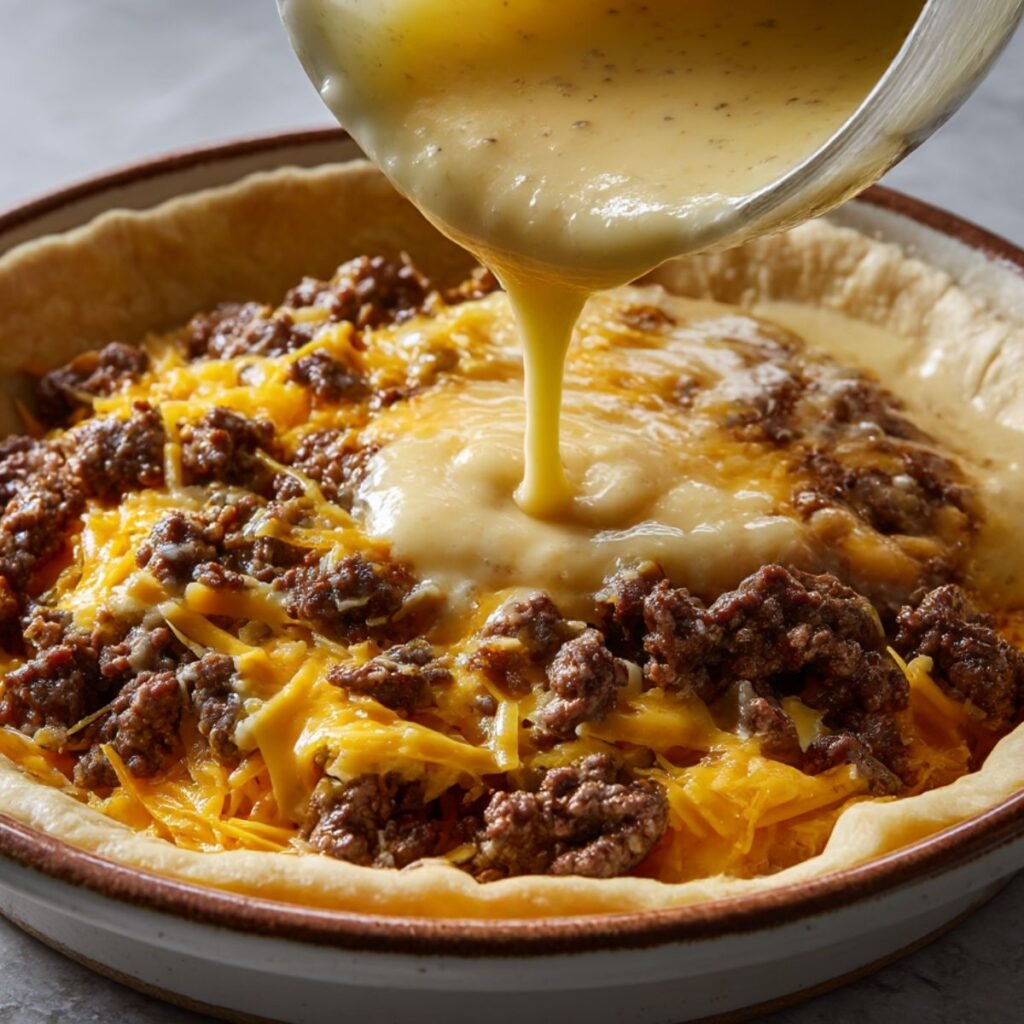
Spread seasoned beef mixture evenly in bottom of prepared pie pan creating base layer. Sprinkle shredded cheddar cheese over beef covering completely.
Aunty says: The cheese layer melts during baking creating gooey center that makes this pie taste authentically burgery!
Press mixture down gently creating compact layer. This helps prevent beef from floating when you pour batter over top.
Reserve small amount of cheese for sprinkling on top during last few minutes of baking if desired. The pie looks more finished with golden cheese on surface.
Make Magic Bisquick Batter
Whisk together Bisquick mix, milk and eggs in medium bowl until smooth with no lumps remaining. The batter should be pourable consistency like thin pancake batter.
Anna's observation: Watching the batter is like preparing science experiment that becomes dinner which is super cool!
Pour batter evenly over beef and cheese layer in pie pan. The batter will seem thin but magically sinks to bottom forming crust as it bakes.
Use spoon to spread batter to edges ensuring even coverage. Don't worry if some beef pieces poke through because that creates rustic homestyle appearance.
Bake Until Golden Perfect
Bake for 30 to 35 minutes until top is golden brown and knife inserted in center comes out clean. The pie should be puffed and set not jiggly in middle.
Aunty says: The impossible crust forms on bottom while top becomes golden creating perfect texture contrast!
If desired, sprinkle reserved cheese on top during last 5 minutes of baking allowing it to melt and brown slightly.
Let pie rest for 5 minutes after baking allowing layers to set making slicing neater. Cut into wedges like regular pie serving hot with traditional burger toppings.
Substitutions
Ground Turkey Use ground turkey for lighter version maintaining same seasoning and cooking method.
Gluten Free Replace Bisquick with gluten free baking mix following same measurements for dietary needs without sacrificing texture.
Bacon Addition Add crumbled cooked bacon to beef layer for bacon cheeseburger version Anna calls "double meat special."
Different Cheese Try American, Swiss or pepper jack instead of cheddar for varied flavor profiles matching personal preferences.
Variations
Pizza Style Add Italian seasoning to beef, use mozzarella cheese and top with pepperoni for pizza burger hybrid.
Western Bacon Mix barbecue sauce into beef, add bacon and use cheddar jack cheese for smokehouse version.
Mushroom Swiss Sauté mushrooms with beef and use Swiss cheese creating upscale burger pie variation adults love.
Jalapeño Popper Add diced jalapeños to beef and use pepper jack cheese for spicy kick throughout.
Breakfast Version Use breakfast sausage instead of beef, add scrambled eggs and serve for brunch as morning cheeseburger pie.
Low Carb Skip Bisquick batter and use pie crust or make crustless version for keto friendly adaptation.
Equipment
Large skillet for browning beef and onions. 9 inch pie pan for baking your cheeseburger pie to golden perfection.
Wooden spoon for breaking up ground beef. Mixing bowl and whisk for Bisquick batter preparation.
Cheese grater if using block cheese. Sharp knife for slicing finished pie into neat wedges.
Storage
Refrigerator and Reheating
Store leftover cheeseburger pie covered in refrigerator for up to 3 days. Pie reheats beautifully maintaining texture and cheeseburger flavors perfectly.
Reheat individual slices in microwave for 1 to 2 minutes or reheat whole pie covered in 350°F oven for 15 minutes. Oven method keeps crust from getting soggy.
Freezer and Make Ahead
Freeze baked pie wrapped tightly for up to 2 months. Thaw overnight in refrigerator before reheating gently to serving temperature.
Assembled unbaked pie doesn't freeze well because batter separates. Best to bake first then freeze for optimal texture when reheating later.
Aunty's Top Family Secret
My secret for the most incredible cheeseburger pie with perfect self forming crust instead of soggy bottom disaster lies in draining beef extremely thoroughly because excess grease prevents batter from setting properly creating greasy mess, plus greasing pie pan generously because this helps impossible crust release easily and brown beautifully on bottom, and here's what creates magic which is not stirring batter into beef because you want batter to sink naturally to bottom forming crust layer while beef stays suspended above, and one more critical thing is baking at proper high temperature because 400°F creates golden top while setting crust underneath.
FAQs
What's in a cheeseburger pie?
Ground beef, onions, cheddar cheese and Bisquick batter that forms its own crust. This cheeseburger pie combines classic burger flavors in convenient pie format perfect for family dinners.
What are the ingredients in a burger pie?
Essential ingredients include ground beef, cheese, onions and baking mix for self forming crust. Our cheeseburger pie uses simple pantry staples creating retro dinner everyone loves.
What are the ingredients for a cheeseburger?
Traditional cheeseburgers use beef, cheese, buns and toppings like pickles, onions, ketchup and mustard. The cheeseburger pie incorporates these flavors in baked format without buns.
What goes with cheeseburger pie?
Serve with french fries, salad, pickles or traditional burger toppings like ketchup and mustard. This cheeseburger pie pairs well with classic diner sides everyone enjoys.
Retro Magic Dinner
This cheeseburger pie brings vintage Bisquick magic to your table using impossible pie technique and familiar burger flavors. The self forming crust with cheesy beef layers creates dinner Anna requests weekly proving retro recipes deserve place in modern meal rotation.
We'd love to hear about your pie adventures! Did the crust form magically? What toppings did you add? Share your experience in comments because hearing how others make this recipe inspires our kitchen creativity.
You might also enjoy our hearty Cowboy Casserole Recipe for different comfort dinner, classic Amish Hamburger Steak Bake when craving beef, or fun Pretzel Crusted Chicken for something different. Each recipe brings crowd pleasing flavors for different occasions.
Rate this recipe and join our Aunty Meals family! We can't wait to see photos of your cheeseburger pie success stories.
By Emma Miller with love !
Related
Looking for other recipes like this? Try these:




Cheeseburger Pie
Ingredients
Equipment
Method
- Preheat oven to 400°F, grease 9 inch pie pan generously with butter or cooking spray
- Heat skillet over medium high, add ground beef breaking it up, add diced onion, cook 8 minutes until browned, drain fat thoroughly
- Add salt, pepper, garlic powder and Worcestershire sauce to beef, stir well
- Spread seasoned beef mixture evenly in bottom of prepared pie pan, press down gently
- Sprinkle shredded cheddar cheese over beef covering completely, reserve small amount for topping if desired
- Whisk together Bisquick mix, milk and eggs in bowl until smooth with no lumps
- Pour batter evenly over beef and cheese layer, spread to edges with spoon
- Bake 30 to 35 minutes until top golden brown and knife inserted in center comes out clean
- If using, sprinkle reserved cheese on top during last 5 minutes of baking
- Let pie rest 5 minutes, cut into wedges, serve hot with burger toppings

Leave a Reply