
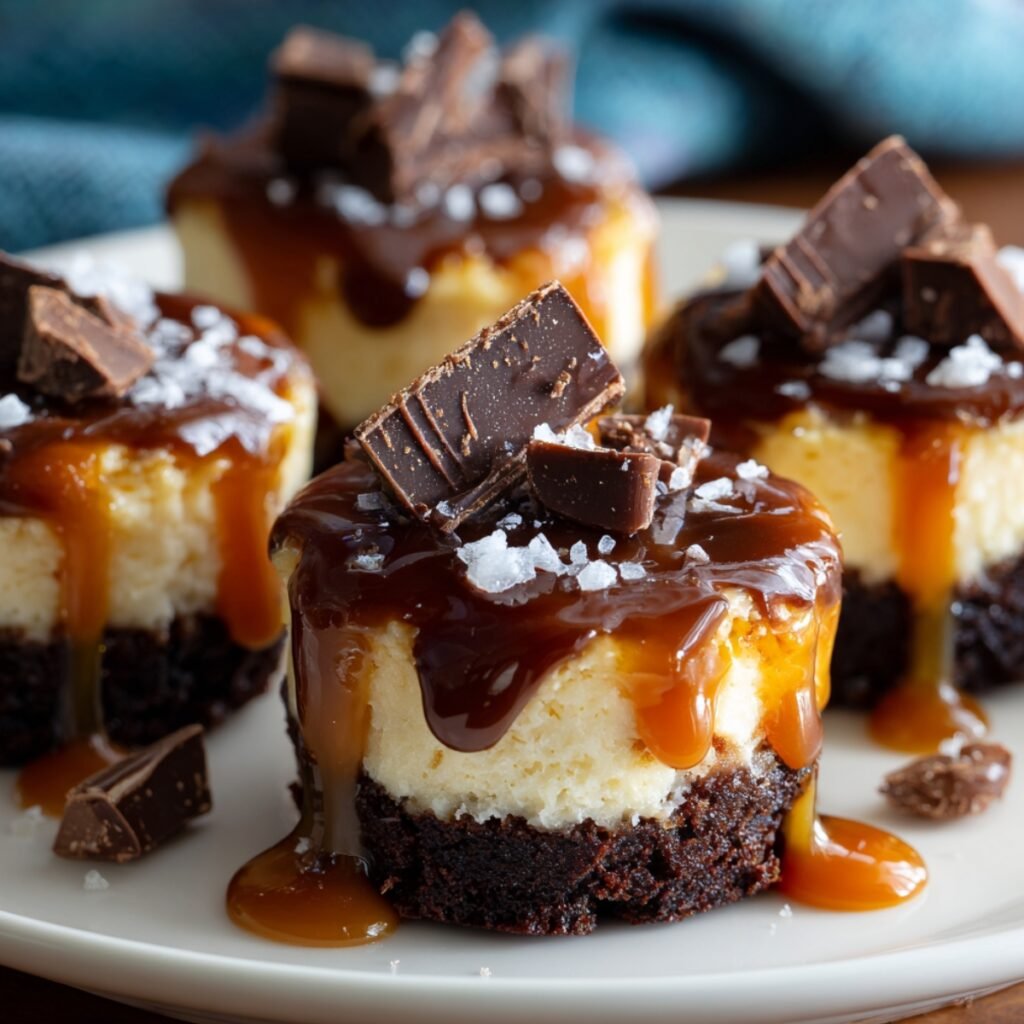
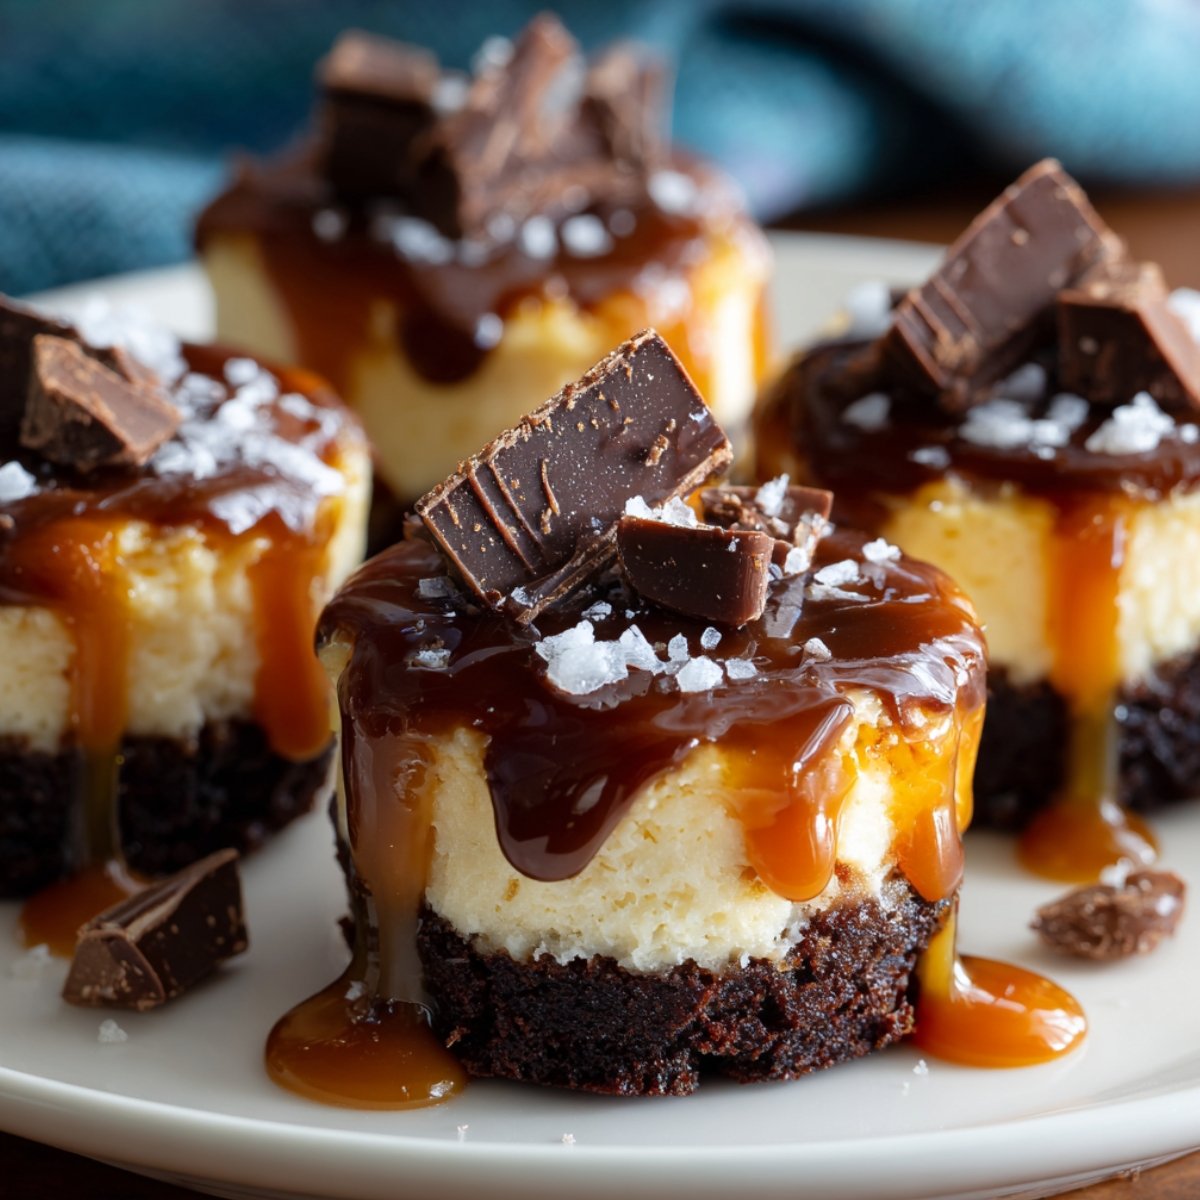
Anna counted them twice before we even had the caramel drizzle done. "Fourteen," she said, with the tone of someone managing inventory. I told her we could make more if we needed to. She watched me drizzle the chocolate ganache over each bite with a spoon and then add the caramel in thin amber ribbons that ran down the sides and pooled on the plate. When I pressed a flake of sea salt onto each one, she said it looked like something from a dessert menu. Chocolate Caramel Cheesecake Bites are the dessert that makes people stop mid-conversation.
Jump to:
- Why You Will Love These Chocolate Caramel Cheesecake Bites
- How To Make Chocolate Caramel Cheesecake Bites
- Chocolate Caramel Cheesecake Bites Variations
- Substitutions
- Equipment
- Storage Tips
- My Grandma's Secret Worth Sharing
- FAQs
- Fourteen on the Plate and Twelve at the Table
- Related
- Chocolate Caramel Cheesecake Bites
Why You Will Love These Chocolate Caramel Cheesecake Bites
These bites are built to impress at the scale of a single piece rather than a whole cake, and that difference matters more than it sounds. Each one is a complete dessert in three layers: a fudgy dark chocolate brownie base, a creamy vanilla cheesecake center, and a glossy drizzle of chocolate ganache and salted caramel that drips down the sides and pools onto the plate in the way that makes something look almost too good to eat. Anna brought a plate of these to the table and three people asked for the recipe before they had finished the first bite. They come together over two simple stages and reward the patience of an overnight chill with a cross-section that looks exactly like the image every single time.
How To Make Chocolate Caramel Cheesecake Bites
The first time I made these, I cut the bites directly from the pan while the cheesecake layer was still warm from being poured over the baked brownie base, and the layers compressed into each other rather than sitting as distinct visible bands in the cross-section. Anna looked at the squashed edges and said they looked like a mistake with good intentions, which was generous and accurate at the same time. The second attempt I baked the brownie base fully, let it cool completely, poured the cheesecake filling, chilled the whole pan overnight, and then cut with a hot wiped knife the following morning. The cross-section came out exactly as the image shows: a dark, dense chocolate base, a pale cream cheesecake layer with clean horizontal edges, and the ganache and caramel running over the top in separate glossy layers.
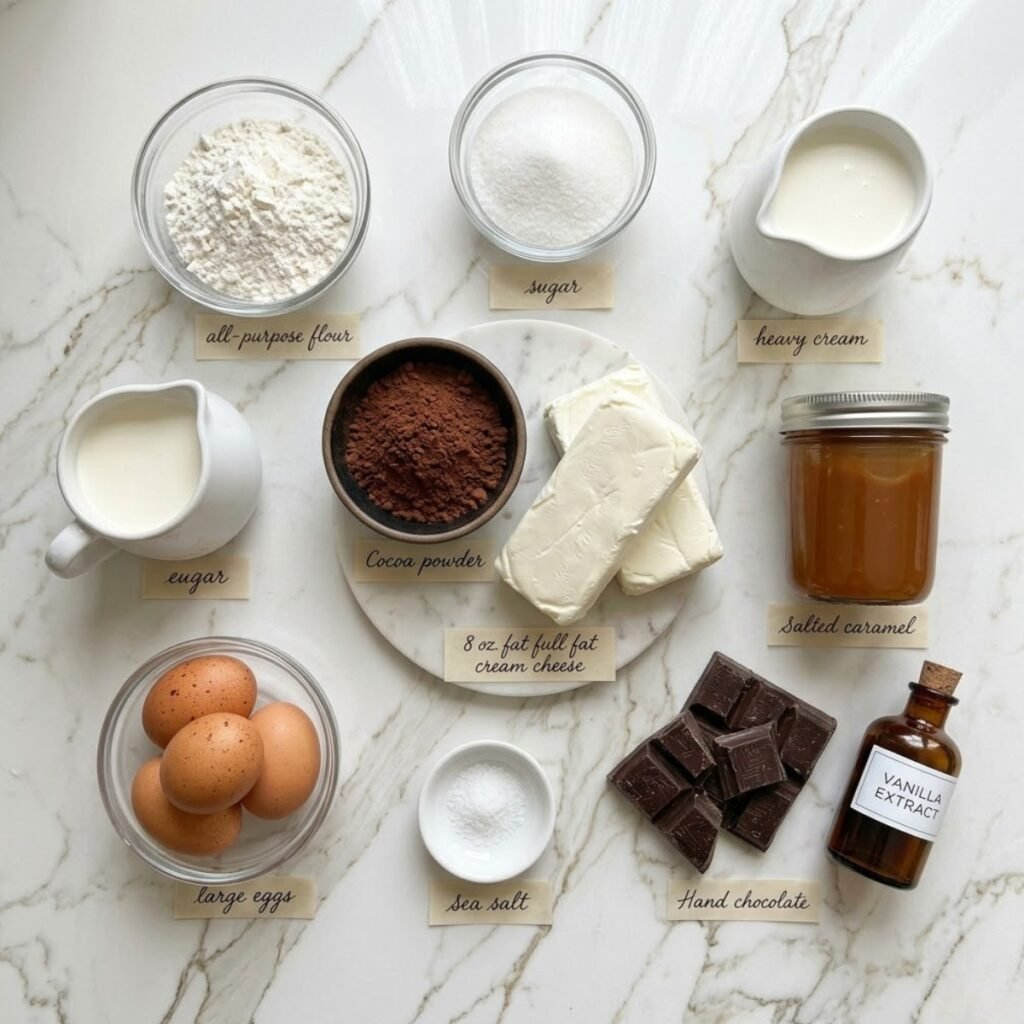
Main Ingredients
For the Chocolate Brownie Base:
- ½ cup (115g) unsalted butter (melted and slightly cooled before mixing; hot butter can cook the egg if added directly without cooling)
- 1 cup (200g) granulated sugar (produces a dense, fudgy brownie base rather than a cakey one when combined with the lower flour ratio)
- 2 large eggs (room temperature; they incorporate into the butter and sugar more smoothly when not cold from the refrigerator)
- 1 teaspoon vanilla extract (deepens the chocolate flavor of the base)
- ½ cup (60g) all-purpose flour (a low flour ratio relative to the butter and sugar is what keeps the base fudgy rather than cakey)
- ⅓ cup (35g) unsweetened cocoa powder (the dark, slightly bitter cocoa flavor visible in the deep brown base layer of each bite in the image)
- ¼ teaspoon salt (enhances the chocolate and balances the sweetness of the sugar)
- ¼ teaspoon baking powder (a small amount lifts the base just enough to give it structure without making it cake-like)
For the Cheesecake Layer:
- 16 oz (450g) full-fat cream cheese, room temperature (the primary layer; room temperature cream cheese beats smooth and lump-free in under 2 minutes)
- ½ cup (100g) granulated sugar (sweetens the filling without overpowering the slight tang of the cream cheese)
- 2 large eggs, room temperature (set the filling during the bake so it slices cleanly rather than running when the bites are cut)
- 1 teaspoon vanilla extract (adds warmth and depth to the pale cream layer)
- ¼ cup (60ml) sour cream (adds a subtle tang and keeps the cheesecake layer creamy rather than dense)
For the Chocolate Ganache and Caramel Drizzle:
- 100g (3.5 oz) dark chocolate, finely chopped (the ganache component; finely chopped chocolate melts evenly when the hot cream is poured over it)
- ½ cup (120ml) heavy cream (heated to just below a simmer before being poured over the chopped chocolate to form the ganache)
- ½ cup (120ml) store-bought or homemade salted caramel sauce (the amber drizzle visible running down the sides of the bites alongside the ganache; use a thick, pourable caramel that flows slowly rather than a thin syrup that runs off immediately)
- Flaky sea salt (scattered over each finished bite after the drizzles are applied; the large white crystals visible on the surface of each bite in the image)
- Dark chocolate pieces, roughly broken (2 to 3 small shards pressed into the ganache on each bite before the caramel is drizzled; the irregular dark triangular pieces visible on the surface of the bites in the image)
Step by Step Instructions
Step 1: Make and Bake the Brownie Base
- Preheat the oven to 325°F (165°C) and line a 9x9 inch baking pan with parchment paper leaving a 2-inch overhang on two sides so the finished slab lifts cleanly from the pan without the bites crumbling at the edges during removal.
- Melt the butter in a medium saucepan over low heat or in the microwave in 30-second bursts, then allow it to cool for 3 minutes before whisking in the granulated sugar until the mixture looks glossy and sand-like; do not add the eggs while the butter is still hot enough to steam when you place your hand 5 cm above the surface.
- Add the eggs one at a time to the cooled butter-sugar mixture, whisking vigorously after each addition until fully incorporated, then add the vanilla extract and whisk once more; the mixture should look thick, smooth, and slightly lighter in color than the butter and sugar alone.
- Sift the flour, cocoa powder, salt, and baking powder directly into the butter-egg mixture and fold with a spatula using slow, circular motions from the bottom of the pan upward until no dry pockets remain and the batter looks uniform and glossy; spread it into the lined pan and bake at 325°F for 20 to 22 minutes until the surface looks set and a toothpick inserted in the center comes out with moist crumbs but not wet batter.
Step 2: Cool the Brownie and Make the Cheesecake Layer
- Remove the brownie base from the oven and allow it to cool completely in the pan on a wire rack for a minimum of 45 minutes; the base must be fully cooled to room temperature before the cheesecake filling is poured over it, because a warm brownie will partially cook the bottom of the cream cheese filling and prevent the two layers from setting distinctly.
- While the brownie cools, reduce the oven temperature to 300°F (150°C) and beat the room temperature cream cheese in a large bowl with a hand mixer on medium speed for 2 minutes until completely smooth and lump-free before adding any other ingredient; starting with perfectly smooth cream cheese is the single most important factor in a lump-free finished cheesecake layer.
- Add the granulated sugar and beat for 1 more minute, then add the eggs one at a time on low speed beating just until each one disappears into the mixture rather than beating vigorously, which would incorporate too much air and cause the cheesecake layer to crack and puff during baking.
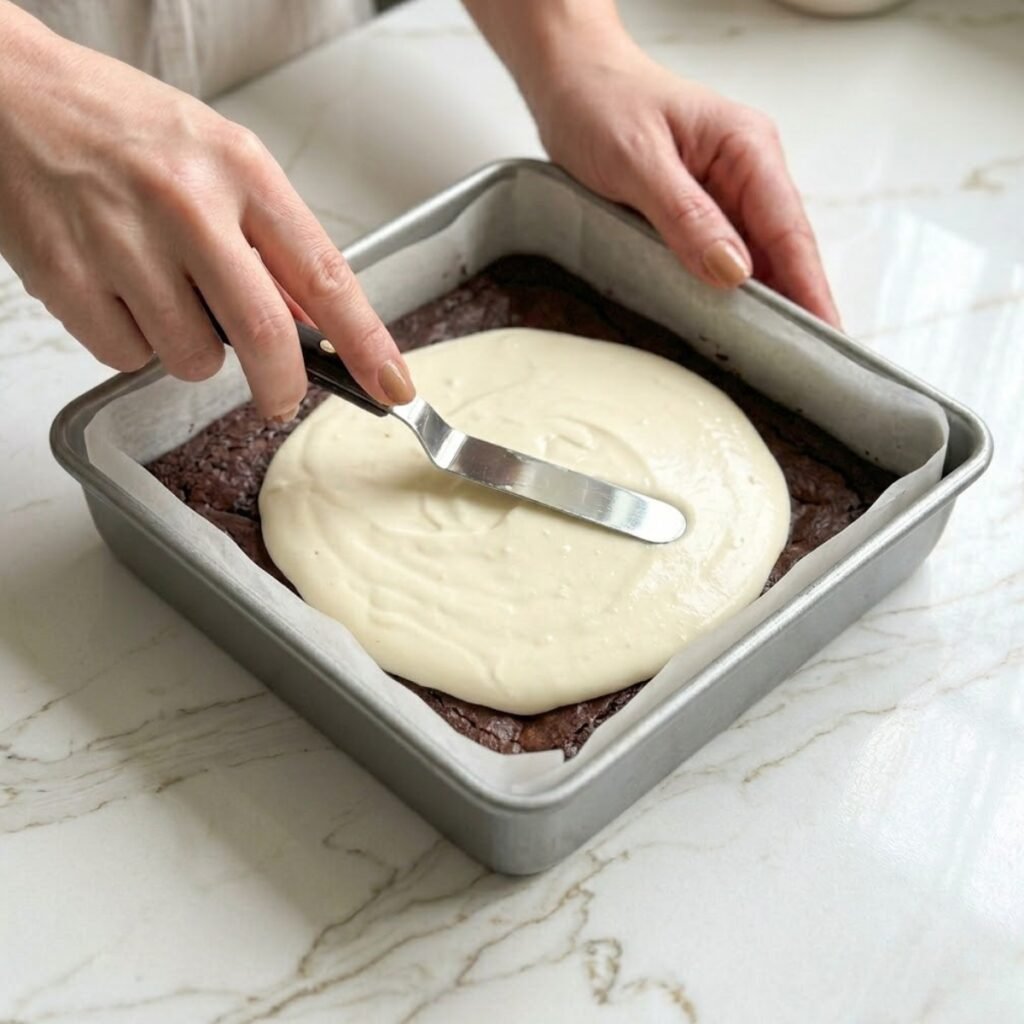
- Add the vanilla extract and sour cream and beat on low speed for 30 seconds until just combined, then pour the finished filling directly over the fully cooled brownie base in the pan, spreading it gently to the edges with an offset spatula so the surface is level and the brownie base is completely covered.
Step 3: Bake the Cheesecake Layer and Chill Overnight
- Slide the pan into the oven preheated to 300°F and bake for 30 to 35 minutes until the edges of the cheesecake layer look set and the center still has a very slight jiggle when the pan is nudged gently; the center will finish setting from residual heat during the cooling period.
- Turn off the oven, crack the door open 2 inches, and allow the cheesecake to cool inside the oven for 30 minutes before removing; this gradual cooling prevents the thermal shock that causes cheesecake layers to crack at the surface and split from the brownie base below.
- Remove the pan from the oven and allow it to cool completely to room temperature on a wire rack, then cover the pan tightly with plastic wrap without pressing it onto the surface of the cheesecake, and refrigerate overnight or for a minimum of 6 hours.
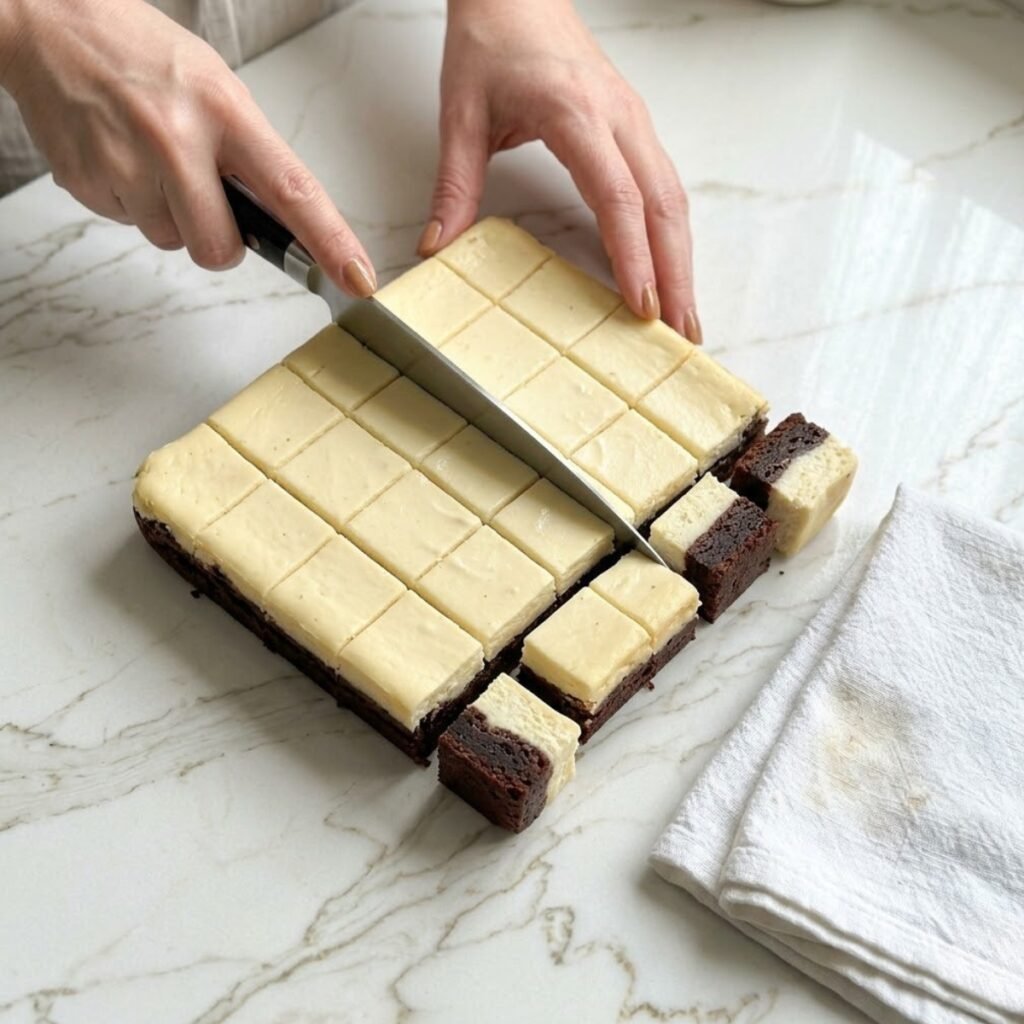
- The following day, lift the entire slab from the pan using the parchment overhangs and set it on a cutting board; use a sharp knife run under hot water and dried between each cut to divide the slab into 16 to 20 small square bites, wiping the blade between every cut so the brownie crumbs do not transfer onto the white cheesecake faces of the adjacent pieces.
Step 4: Make the Ganache, Drizzle, and Garnish
- Finely chop the dark chocolate and place it in a medium heat-safe bowl, then heat the heavy cream in a small saucepan over medium heat until it just begins to steam and shows small bubbles forming around the edge but before it reaches a full simmer; pour the hot cream over the chopped chocolate and let it sit undisturbed for 2 minutes before stirring slowly from the center outward until completely smooth and glossy.
- Allow the ganache to cool for 5 minutes until it is slightly thicker than pouring cream but still fully fluid, then spoon it over each bite starting at the center and letting it run naturally over the edges and down the sides rather than trying to guide it, which creates the organic drips visible in the image.
- Warm the salted caramel sauce in a small saucepan or microwave until it is pourable but not hot, then drizzle it from a spoon over each ganache-topped bite in thin, slow ribbons that run alongside the chocolate and pool on the plate around the base of each piece the way the amber color appears in the image.
- Press 1 to 2 small rough-broken dark chocolate shards into the ganache on top of each bite while it is still tacky, scatter a generous pinch of flaky sea salt over the surface of every finished bite so the large white crystals are visible from above, and refrigerate the finished platter for 15 minutes before serving so the ganache sets to a glossy, slightly firm finish that holds the garnish in place.
Chocolate Caramel Cheesecake Bites Variations
No Bake Chocolate Caramel Cheesecake Bites
- Replace the baked brownie base with a no-bake chocolate base made from 2 cups of Oreo cookie crumbs combined with 4 tablespoons of melted butter, pressed firmly into the parchment-lined pan and chilled for 30 minutes in the refrigerator until firm before the cheesecake filling is added.
- Replace the baked cheesecake filling with a no-bake version made by beating the cream cheese with powdered sugar, vanilla, and ½ cup of heavy cream whipped to medium-stiff peaks and folded in; pour over the chilled Oreo base and refrigerate for 4 hours until set before cutting.
- The no-bake version produces a slightly softer cheesecake layer than the baked version, so cut the bites while still cold directly from the refrigerator and return them to the refrigerator between the ganache and caramel steps so each layer can set before the next is added.
- The finished visual is nearly identical to the image because the ganache, caramel drizzle, and sea salt finish are applied identically regardless of whether the base and filling were baked or no-bake; this version is the one to make on a day when you want the result without turning the oven on.
Turtle Cheesecake Bites With Pecans
- Add ½ cup of roughly chopped toasted pecans to the brownie batter before spreading it into the pan so the nuts bake into the base and create the distinctive turtle flavor combination of chocolate, caramel, and nut in every single bite.
- After applying the caramel drizzle, scatter a small cluster of 3 to 4 whole toasted pecans on top of each finished bite in addition to the chocolate shard, which is the classic turtle arrangement that makes the reference to turtle candy unmistakably clear.
- Use a darker, slightly bitter caramel sauce rather than a sweet caramel for the turtle version because the pecan adds its own natural sweetness and a sweet caramel on top of a sweet brownie with sweet cheesecake can tip the balance past the point where the salt and chocolate have room to function as a counterweight.
- Anna calls this version the fancy candy bar bite because the combination of elements reminds her of the boxed candy section at the shop near her grandmother's house, which she says is the highest possible flavor compliment.
Brownie Cheesecake Bites With Salted Caramel Center
- Before pouring the cheesecake filling over the cooled brownie base, drizzle 3 tablespoons of thick salted caramel sauce directly onto the brownie surface and use a toothpick or chopstick to swirl it in loose figure-eight motions so it creates a visible caramel layer between the brownie and the cheesecake rather than sitting only on top.
- Pour the cheesecake filling over the swirled caramel layer immediately so the filling seals the caramel in place before it has time to sink entirely into the brownie below; when the bites are cut after the overnight chill, there will be a third visible layer of amber caramel between the dark brownie and the pale cheesecake in the cross-section.
- Reduce the caramel drizzle on the finished top of each bite to a lighter amount since the interior caramel layer already contributes a significant caramel presence in every bite without additional sweetness from above.
- This is the variation for the person at the table who says they want more caramel, and it answers that request from inside the bite rather than only from the drizzle on top.
Substitutions
- Dark chocolate in the ganache can be replaced with semi-sweet or milk chocolate for a sweeter, less bitter ganache that looks identical in the image but tastes noticeably sweeter alongside the caramel; if using milk chocolate, reduce the caramel drizzle slightly since the total sweetness of the finished bite increases considerably when both the ganache and caramel are on the sweeter end.
- Store-bought caramel sauce can be replaced with homemade salted caramel made by cooking sugar to an amber caramel, adding warm cream slowly while stirring, then adding butter and a generous pinch of salt; homemade salted caramel is thicker and has a more complex, slightly bitter edge than most commercial sauces that makes it taste more deliberate and less like a condiment.
- All-purpose flour in the brownie base can be replaced with a 1:1 gluten-free flour blend in the same quantity for a gluten-free version that bakes and cuts identically; avoid using almond flour in place of all-purpose in the brownie base because the high fat content of almond flour changes the density and moisture level of the base significantly and the bites do not hold their shape as cleanly when cut.
- Sour cream in the cheesecake layer can be replaced with full-fat Greek yogurt in the same quantity; the substitution produces a slightly tangier, slightly lighter cheesecake layer with essentially no visual difference in the finished cross-section, and works well for those who do not keep sour cream regularly stocked.
Equipment
- 9x9 inch baking pan
- Parchment paper with 2-inch overhang on two sides
- Medium saucepan for the brownie batter and ganache
- Hand mixer or stand mixer for the cheesecake filling
- Large mixing bowl
- Offset spatula for spreading layers
- Sharp knife wiped between each cut
- Small saucepan for warming the caramel and making the ganache
- Wire rack for cooling the brownie base
Emma Tip: For the cleanest bite cuts, refrigerate the fully assembled and set slab for 20 minutes after lifting it from the pan and before cutting. A knife dipped in very hot water and dried with a kitchen towel immediately before each cut glides through the cream cheese layer without dragging or tearing the brownie crumb. Three slow, deliberate downward cuts in each direction is all that is needed; sawing through the layers splits the brownie base and cracks the cheesecake face.
Storage Tips
Make Ahead Strategy
- The brownie base can be baked, cooled, and stored in the pan covered with plastic wrap at room temperature for up to 2 days before the cheesecake layer is added; this makes the two-stage process more flexible by splitting it across two separate days.
- The chocolate ganache can be made up to 3 days in advance and stored in a sealed jar in the refrigerator; reheat gently in a small saucepan over the lowest possible heat or in the microwave in 10-second bursts, stirring between each, until it returns to a pourable consistency before drizzling over the finished bites.
- The full assembled slab without the ganache and caramel drizzle keeps in the refrigerator for up to 3 days before cutting and finishing, which means the bites can be cut and garnished on the day they are served so the ganache is freshly applied and the sea salt is still visibly distinct rather than absorbed into the surface.
Refrigeration
- Finished and garnished bites store well in a single layer in an airtight container in the refrigerator for up to 4 days; the ganache sets firmly after the first few hours of refrigerator storage and the salt crystals may dissolve slightly into the ganache surface, which does not affect flavor but reduces the visual contrast of the garnish.
- Store without stacking unless a layer of parchment paper is placed between every level so the ganache topping of the lower layer does not stick to the brownie base of the upper layer when the container is opened.
- The caramel sauce that pooled around the base of each bite during the drizzle step will firm slightly in the refrigerator and can be served as-is for a more structured appearance or allowed to come to room temperature for 10 to 15 minutes before serving so it softens back toward the glossy, dripping presentation visible in the image.
Freezing
- Unfrosted bites without the ganache, caramel, or salt garnish freeze well individually wrapped in plastic wrap and stored in a sealed freezer bag for up to 2 months; thaw overnight in the refrigerator and apply the ganache and caramel drizzle fresh after thawing for a result close to the original.
- Finished garnished bites can also be frozen flat on a parchment-lined tray until the ganache is solid, then transferred to a sealed bag; the ganache and caramel retain their flavor after thawing but the sea salt dissolves into the ganache surface during freezing and needs to be replaced with fresh flakes at the moment of serving.
- Do not freeze the bites in a stack without parchment between each layer; the ganache topping and the caramel drizzle will weld the pieces together during freezing and the bites cannot be separated cleanly after thawing without tearing the chocolate and caramel surfaces.
My Grandma's Secret Worth Sharing
Emma's grandmother believed that the sea salt was not a garnish but an ingredient, which is a meaningful distinction for anyone who has ever sprinkled flakes over a chocolate dessert and watched someone's expression change with the first taste. She said salt on chocolate was the oldest trick in confectionery and the most underused one, and that the trick only worked when the crystals were large enough to land on the tongue as a separate sensation before the sweetness of the chocolate arrived. When I pressed the first flake into the ganache while Anna watched, she tipped her head and said she could see what I was doing. She pressed the next one in herself with the same quiet precision, and my grandmother would have approved of both the technique and the silence.
FAQs
Why did my cheesecake layer crack across the surface during baking?
Cracking almost always results from one of three causes: the oven temperature was too high, the eggs were overbeaten and incorporated too much air into the filling, or the cheesecake was cooled too quickly after baking. For this recipe, 300°F is the correct temperature and beating the eggs on low speed only until they just disappear into the mixture is essential. The cracked oven door method of cooling gradually is the most reliable way to prevent surface cracks; removing a hot cheesecake directly into cold kitchen air creates a temperature shock that causes the surface to contract faster than the interior, and the tension cracks the top.
How do I get clean layer definition when I cut the bites?
The single most important factor is a fully chilled slab cut with a hot wiped knife. The slab needs overnight refrigerator time, not just a few hours, because the brownie base and cheesecake layer need to firm to different temperatures before they behave as a single cohesive block under the knife. A room temperature or even slightly warm slab cuts through the cheesecake cleanly but tears at the brownie boundary and compresses both layers. Dip the knife in very hot water, dry it completely, and use a single slow downward press rather than a sawing motion for the cleanest edge on both layers.
Can I make a no bake chocolate caramel cheesecake bites version of this recipe?
Yes, see the no-bake variation above. The key differences are using an Oreo crust pressed into the pan rather than a baked brownie, and folding whipped cream into the cream cheese rather than baking the filling. The no-bake version is slightly softer and needs to be kept cold all the way through the cutting and garnishing steps because the filling begins to soften significantly at room temperature without the egg structure that the baked version has to hold it firm. The ganache and caramel drizzle steps are identical.
Fourteen on the Plate and Twelve at the Table
Anna recounted as the platter went down and looked up with an expression that confirmed her arithmetic was correct and she had already identified the two that had not been claimed. She was not wrong and she was not subtle about it. The table went quiet in the specific way that happens when something is very good and no one wants to interrupt the first bite with words. If these become the dessert your table requests by name, you might also love our Blackberry Pistachio Dream Bars for another layered bar dessert that earns the same slow attention on a board, our Greek Yogurt Jello when you want something lighter and fruit-forward that sets in a glass with minimal effort, or our Mini Blackberry Lavender Cheesecakes for individually portioned cheesecakes that carry the same kind of occasion energy in a smaller, floral-forward format. Make these once for any table that deserves something that looks like more than it cost.
Related
Looking for other recipes like Chocolate Caramel Cheesecake Bites? Try these:
- Blueberry Lemonade Cupcakes35 Minutes
- Oreo Cheesecake Donut Burger15 Minutes
- Apple Pie Cheesecake Tacos25 Minutes
- Jasmine Peach Vanilla Cake50 Minutes
Chocolate Caramel Cheesecake Bites
Ingredients
Equipment
Method
- Preheat the oven to 325°F (165°C) and line a 9x9 inch pan with parchment paper leaving a 2-inch overhang on two sides; melt the butter and cool for 3 minutes, then whisk in the sugar until glossy, add the eggs one at a time whisking well after each, and add the vanilla.
- Sift the flour, cocoa powder, salt, and baking powder into the butter-egg mixture and fold with a spatula until no dry pockets remain; spread into the lined pan and bake at 325°F for 20 to 22 minutes until a toothpick comes out with moist crumbs, then cool completely on a wire rack for at least 45 minutes.
- Reduce oven to 300°F (150°C); beat the room temperature cream cheese on medium speed for 2 full minutes until completely smooth and lump-free, then add the sugar and beat 1 more minute.
- Add the eggs one at a time on low speed beating only until each just disappears into the mixture, then add the vanilla extract and sour cream and beat on low for 30 seconds until just combined; pour the filling over the completely cooled brownie base and spread gently to the edges with an offset spatula.
- Bake at 300°F for 30 to 35 minutes until the edges look set and the center has a very slight jiggle when the pan is nudged; turn off the oven, crack the door 2 inches, and allow the cheesecake to cool inside the oven for 30 minutes before removing.
- Remove from the oven and cool completely to room temperature on a wire rack, then cover with plastic wrap without pressing it onto the surface and refrigerate overnight or a minimum of 6 hours; lift the slab using the parchment overhangs, set on a cutting board, and cut into 16 to 20 small square bites using a sharp knife run under hot water and dried between every single cut.
- Make the ganache by pouring hot heavy cream (just below simmering) over the finely chopped dark chocolate, resting 2 minutes without stirring, then stirring slowly from the center outward until completely smooth and glossy; cool for 5 minutes until slightly thickened, then spoon over each bite letting it drip naturally over the edges.
- Warm the salted caramel sauce until pourable and drizzle in thin ribbons alongside the chocolate ganache on each bite; press 1 to 2 broken dark chocolate shards into the tacky ganache on each piece, scatter a generous pinch of flaky sea salt over every finished bite, then refrigerate the platter for 15 minutes until the ganache sets to a glossy firm finish before serving.
Leave a Reply