
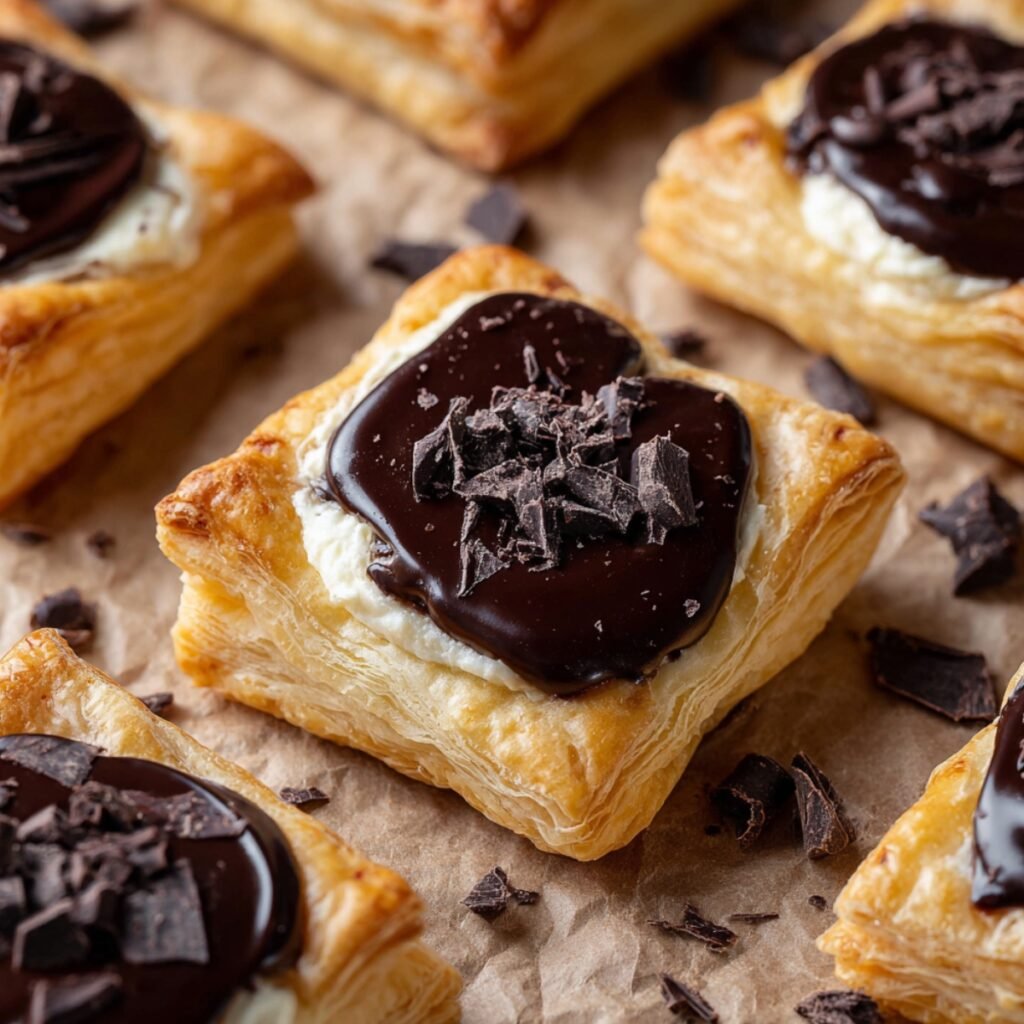
A sweet dusting of icing sugar settled over the baking parchment as Anna gave the flour sifter one final, enthusiastic thump. Her nose was dotted with white powder, and she was giggling as the butter in the oven began to fill our kitchen with a rich, comforting warmth. Today we are baking a Chocolate Cream Cheese Danish, a crisp pastry that turns a simple morning into a sweet holiday celebration.
Jump to:
Why This Recipe Is Special
This homemade pastry brings the luxury of an authentic bakery directly to your family breakfast table. It balances the smooth, tangy richness of a sweet dairy core with a glossy layer of melted chocolate nested inside a shattering golden shell. Creating these individual treats builds a comforting kitchen bonding routine that makes a slow weekend afternoon feel incredibly rewarding for adults and children alike.
How To Make Chocolate Cream Cheese Danish
My first attempt at this breakfast danish recipe was a total disaster because I piled the liquid filling too high on a warm sheet of dough, causing the sweet centers to overflow into a messy puddle. Max loudly asked if we were baking chocolate soup for our weekend treats! Anna and I fixed that problem by chilling our dough and scoring a neat border line.
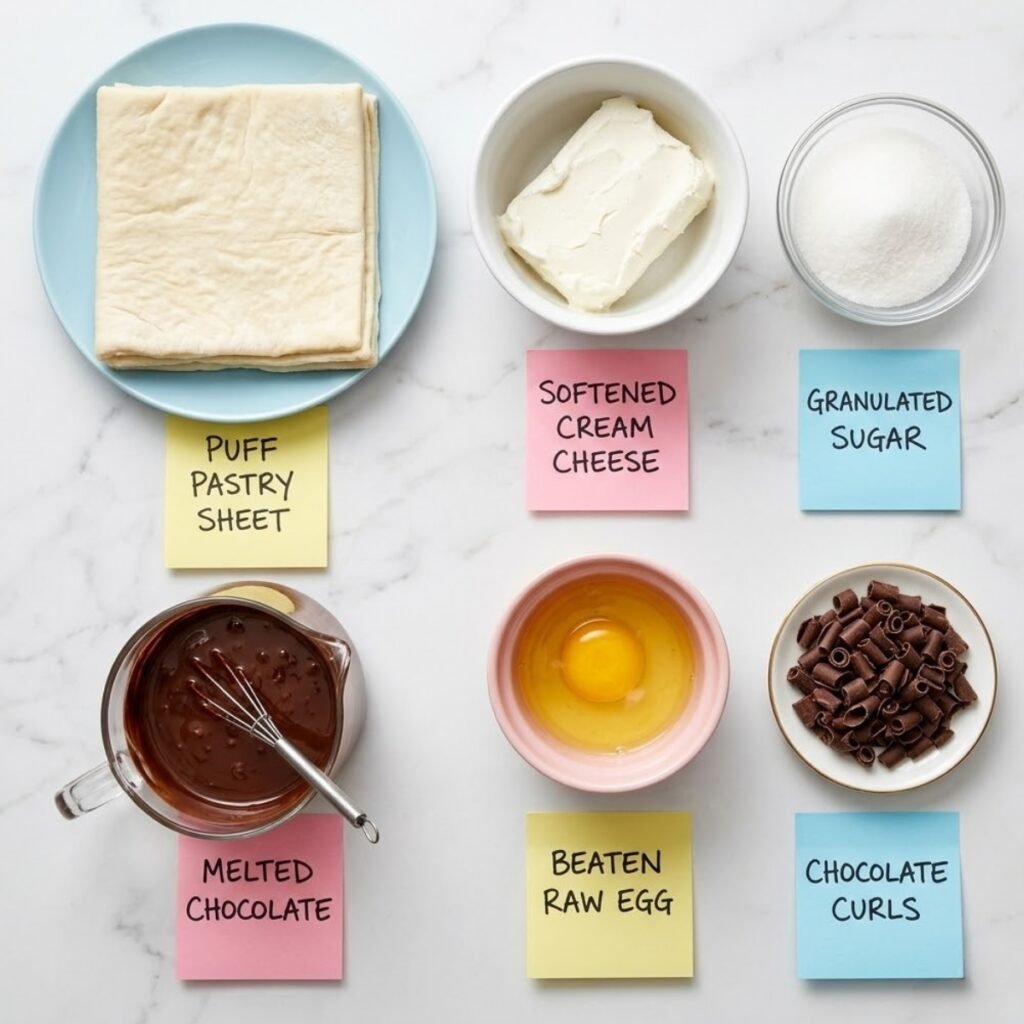
Main Ingredients
- 1 sheet puff pastry thawed (the secret to building a quick chocolate danish puff pastry shell that shatters beautifully)
- 8 ounces cream cheese softened (forms the velvety smooth, tangy foundation for our easy cream cheese danish filling)
- ¼ cup granulated sugar (sweetens the rich dairy layer cleanly without adding any heavy grit to the center)
- ½ cup dark chocolate chips melted (creates a luxurious, glossy puddle nested right in the heart of the sweet buns)
- 1 large egg beaten (brushed over the exposed edges to build a beautiful golden color in the oven heat)
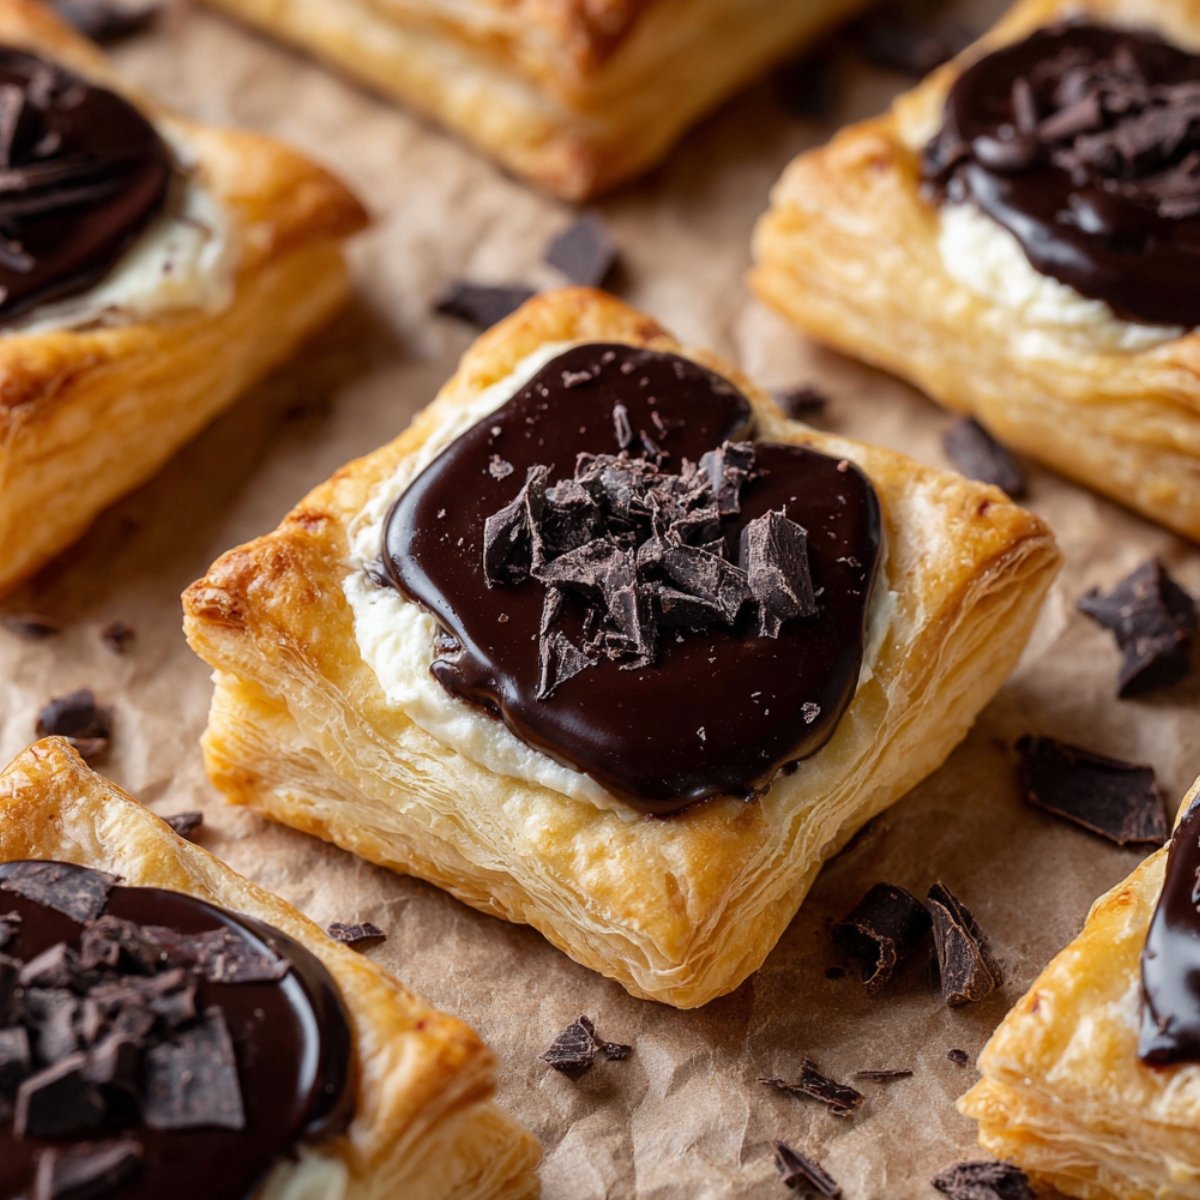
- ¼ cup chocolate curls (provides a beautiful exterior crunch and elegant decoration to match our reference photo layout)
Step by Step Instructions
Mix the Core
- Combine the softened cream cheese, granulated sugar, and vanilla extract together thoroughly inside a medium mixing bowl.
- Stir the mixture with a silicone spatula until the dairy turns completely velvety and lump-free on the counter.
- Transfer the sweet cream mixture into a small piping bag to make assembly clean and simple for little hands.
- Keep the filling cool while you prepare the delicate pastry layers on your clean kitchen workspace board.
Shape the Pastry
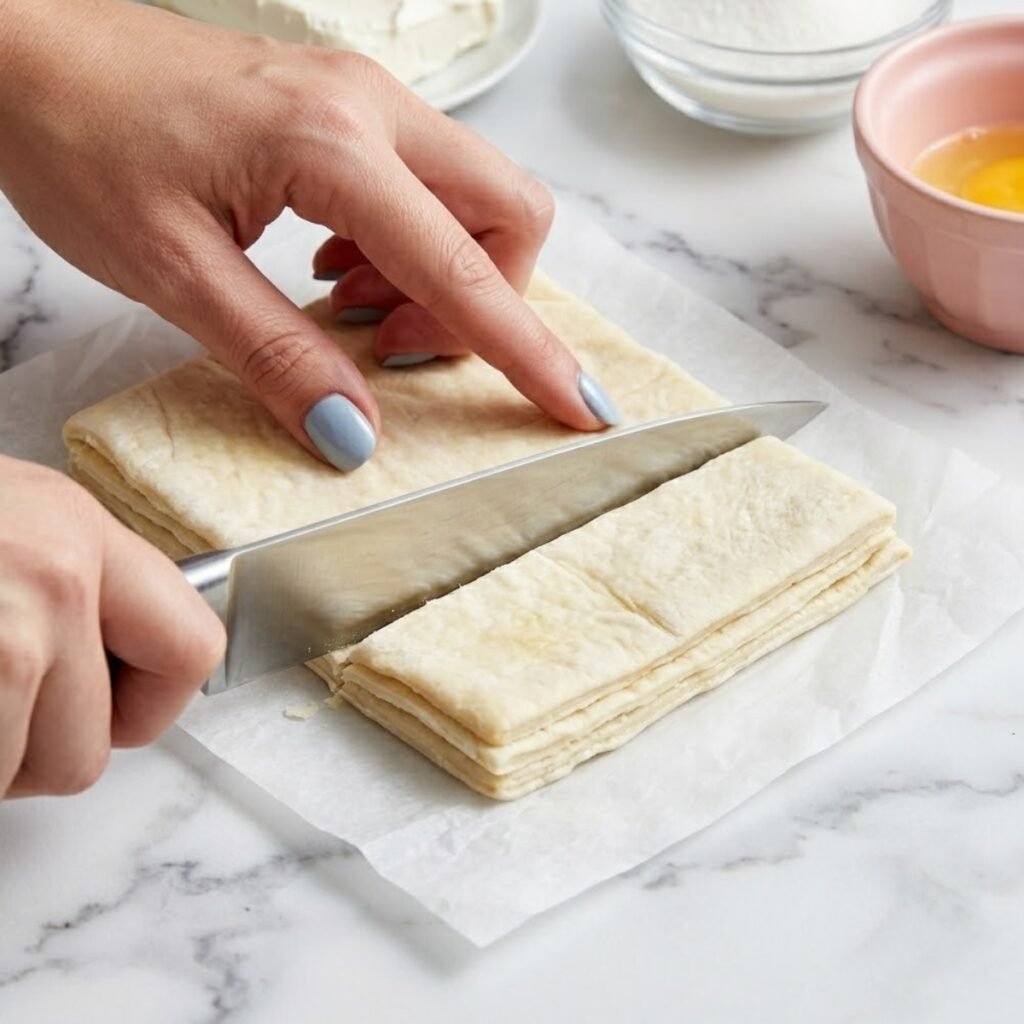
- Unroll your thawed sheet of puff pastry flat across a large sheet of non-stick baking parchment paper.
- Slice the dough sheet cleanly into six equal rectangular pastries using a sharp chef's knife or pizza cutter.
- Score a neat half-inch border inside the edge of each rectangle, taking care not to cut completely through.
- Prick the center space inside the scored border lines several times with a dinner fork to limit rising.
Layer the Fillings
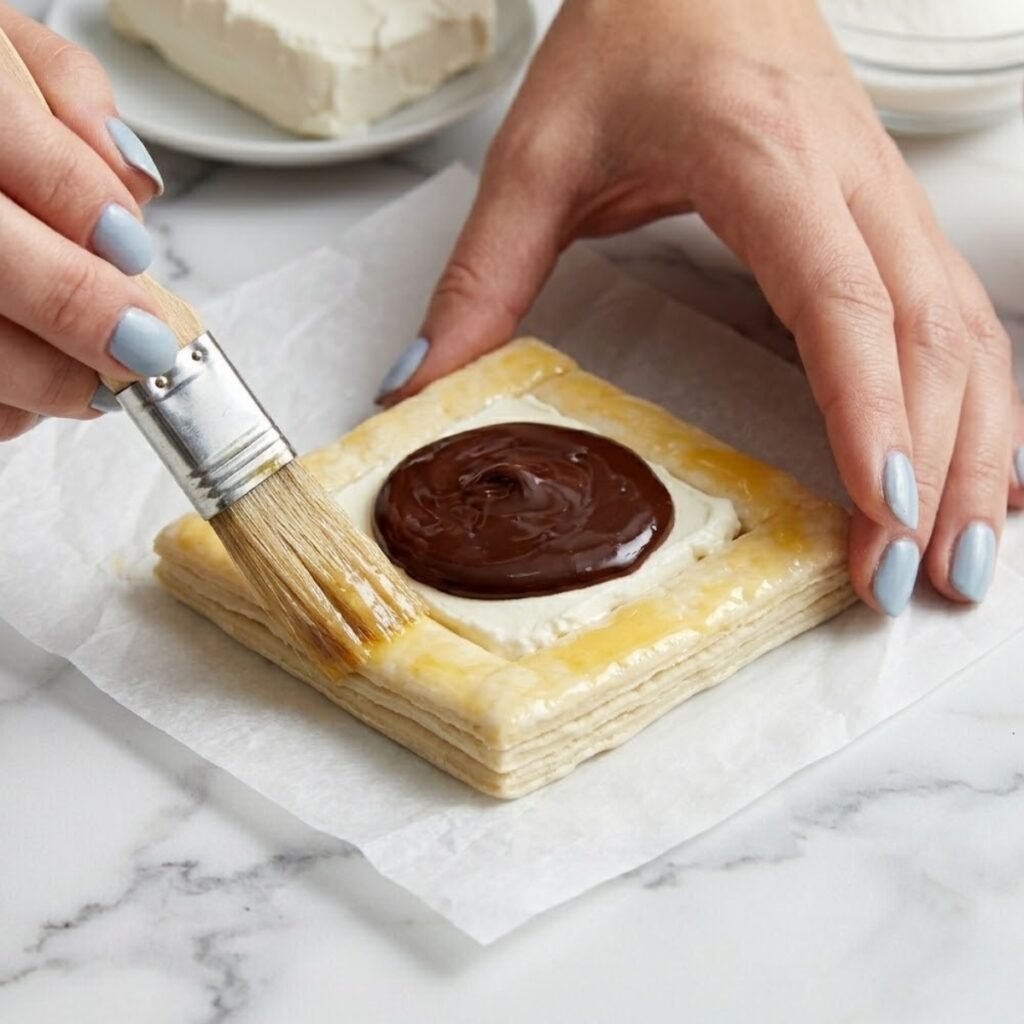
- Pipe a neat, even layer of the sweet vanilla cream cheese filling directly into the center of each rectangle.
- Spread the dairy cream flat with the back of a small spoon, keeping it strictly inside the scored boundaries.
- Spoon a glossy puddle of melted dark chocolate chips cleanly right over the center of the white cheese filling.
- Brush the outer exposed pastry borders lightly with a beaten egg wash using a small kitchen pastry brush.
Bake and Decorate
- Transfer the parchment sheet with the unbaked pastries carefully onto a large metal baking sheet pan.
- Bake at 400°F for fifteen minutes until the puff pastry edges rise high and turn a deep golden brown.
- Remove the hot pan from the oven and let the pastries cool on a wire rack for five minutes.
- Scatter a generous handful of dark chocolate curls over the glossy centers to match our reference photo layout perfectly.
Chocolate Cream Cheese Danish Variations
Anna's Marshmallow Pastry Buns
- Drop three mini marshmallows into the heart of the chocolate layer right before sliding the pan into the oven.
- The marshmallows puff up and toast under the heat to build a gooey, pillowy texture that young children adore.
- This variation turns the elegant breakfast pastry into a playful morning treat that disappears from plates instantly.
Sweet Banana Cream Chocolate Cheese Danish
- Layer thin slices of fresh ripe banana over the raw cream cheese filling layer before spooning the dark chocolate.
- Whisk a tiny pinch of ground cinnamon into your white sugar dairy mixture to add a warm bakery aroma.
- The natural sugars of the banana complement the bittersweet chocolate chunks beautifully to satisfy heavy morning appetites.
Holiday Almond Cream Cheese Chocolate Chunk Pastries
- Fold a tablespoon of almond paste and a half cup of chocolate chips into your cream cheese filling base.
- Scatter sliced flaked almonds across the outer egg-washed borders right before baking the pan to a crisp texture.
- This alternative brings a delightful, sophisticated nuttiness that makes a weekend holiday breakfast exceptionally special.
Substitutions
- Phyllo Dough: Use sheets of layered phyllo dough if a chocolate danish puff pastry sheet is missing from your market drawer.
- Maple Syrup: Swap out the white sugar in the dairy mix for two tablespoons of real maple syrup to add a rustic undertone.
- Neufchâtel Cheese: Use Neufchâtel cheese instead of standard full-fat brick cream cheese to build a slightly lighter filling profile cleanly.
- Milk Chocolate: Use premium milk chocolate chunks if you find deep dark bittersweet chocolate a bit too sharp for young kids.
Equipment
- Baking sheet pan
- Mixing bowl
- Kitchen pastry brush
- Sharp chef's knife
Storage Tips
Make Ahead Strategy
You can mix your sweet vanilla cream cheese filling and score your puff pastry dough rectangles the night before. Keep the individual components wrapped tightly inside the refrigerator overnight, then simply dollop the fillings and bake fresh in under twenty minutes the next morning.
Refrigeration
Store any leftover baked cream cheese pastries inside a secure, airtight glass container inside the refrigerator. Keep chilled for up to three days for the best taste, ensuring the glossy chocolate center layers stay firm.
Reheating
Warm individual leftover danishes inside a 350°F air fryer or toaster oven for three minutes to restore the crisp pastry layers. Avoid high microwave settings so the delicate laminated dough doesn't turn rubbery or lose its signature shattering crunch.
Family Secret Worth Sharing
Grandma always told me that the real magic of baking with laminated dough lives inside the temperature of your baking pan before it hits the oven. She would have me chill our lined metal trays in the fridge for five minutes before arranging our pastries on the sheet. "If your pan is warm, Emma, the cold butter inside the dough will melt too early instead of turning into steam," she'd explain gently. "You need that steam to explode the layers into a light, shattering puff crust." Now, I guide Anna's little hands to chill our trays, passing down that careful kitchen wisdom.
FAQs
Why did my pastry centers rise up into giant domes and spill the chocolate filling out?
This happens if you forget to prick the center of your dough with a fork before adding the dairy. Docking the pastry creates tiny escape vents for steam, keeping the center flat so the sweet filling lines stay nestled safely inside the border.
How do I keep the bottom of my cream cheese danishes from turning soggy and wet?
Ensure your cream cheese filling isn't too runny by using brick-style cream cheese rather than a soft, spreadable tub variety. Baking on the middle rack at a high 400°F heat helps the bottom pastry layer crisp up at the exact same rate as the edges.
Can I use frozen strawberries as a topping decoration alongside the chocolate?
You can, but frozen fruit releases a heavy amount of water as it thaws under the oven heat, which can make your chocolate cream cheese danish soggy. Stick to dry garnishes like chocolate curls or fresh whole berries added right after baking.
A Crispy Flaky Pastry to Start the Weekend
As the soft morning light filled our dining room, Anna proudly set out our dessert plates with a triumphant grin, matching the gorgeous. We sat together at the wooden kitchen table, pulling apart the crisp layers and catching the melting chocolate drops with our fingers. This rewarding morning project satisfies our sweet tooth just as much as the afternoons we spend baking Roasted Cherry Brownies, or the hot summer days we layer an Erdbeer-Dessert im Glas mit Joghurt. It brings that same celebratory kitchen sweetness as scooping a bright bowl of Blue Moon Ice Cream.
Don't forget to snap a picture of your Chocolate Cream Cheese Danish before that first flaky bite (trust me, it will disappear quickly!), and leave a rating below. We'd love to hear how this Chocolate Cream Cheese Danish becomes part of your baking story.
Star Rate this recipe and join our family baking story.
Related
Looking for other recipes like Chocolate Cream Cheese Danish? Try these:
- Blueberry Lemonade Cupcakes35 Minutes
- Oreo Cheesecake Donut Burger15 Minutes
- Apple Pie Cheesecake Tacos25 Minutes
- Jasmine Peach Vanilla Cake50 Minutes
Chocolate Cream Cheese Danish
Ingredients
Equipment
Method
- Soften your brick cream cheese completely at room temperature on the counter to prevent small unblended dairy lumps from forming later.
- Whisk the cream cheese, sugar, and vanilla extract together thoroughly inside a bowl until the texture looks completely velvety.
- Unroll the thawed sheet of puff pastry flat across a clean piece of parchment paper to prevent sticking surfaces.
- Slice the dough cleanly into six equal rectangular portions using a sharp chef's knife or standard pizza wheel cutter.
- Score a neat half-inch border inside the edge of each rectangle gently without slicing completely through the bottom layer.
- Prick the internal space inside the scored boundaries several times with a fork to build micro steam vents safely.
- Spoon a neat tablespoon of the vanilla cream cheese mixture directly into the middle of each prepared rectangle boundary.
- Dollop a glossy spoonful of melted dark chocolate cleanly right over the center of the white cheese filling layers.
- Brush the exposed outer pastry edges lightly with a thin coat of beaten egg wash using your pastry brush.
- Bake the pan at 400°F for fifteen minutes until the borders puff up high and display a deep golden hue.
- Scatter the crisp dark chocolate curls generously across the warm centers to match our reference photo presentation layout perfectly.

Leave a Reply