
Anna had never tasted dulce de leche straight from the spoon until the afternoon we made this together. She dipped in carefully, the way she does when she is not sure what to expect, and then stood completely still for a moment before asking if we could just eat it like that without making anything else. I told her we were doing something even better with it. The second she watched the mousse take shape in the bowl, pale and golden and impossibly smooth, she stopped asking questions. Dulce de Leche Mousse has a way of doing that.
Jump to:
Why You Will Love This Dulce de Leche Mousse
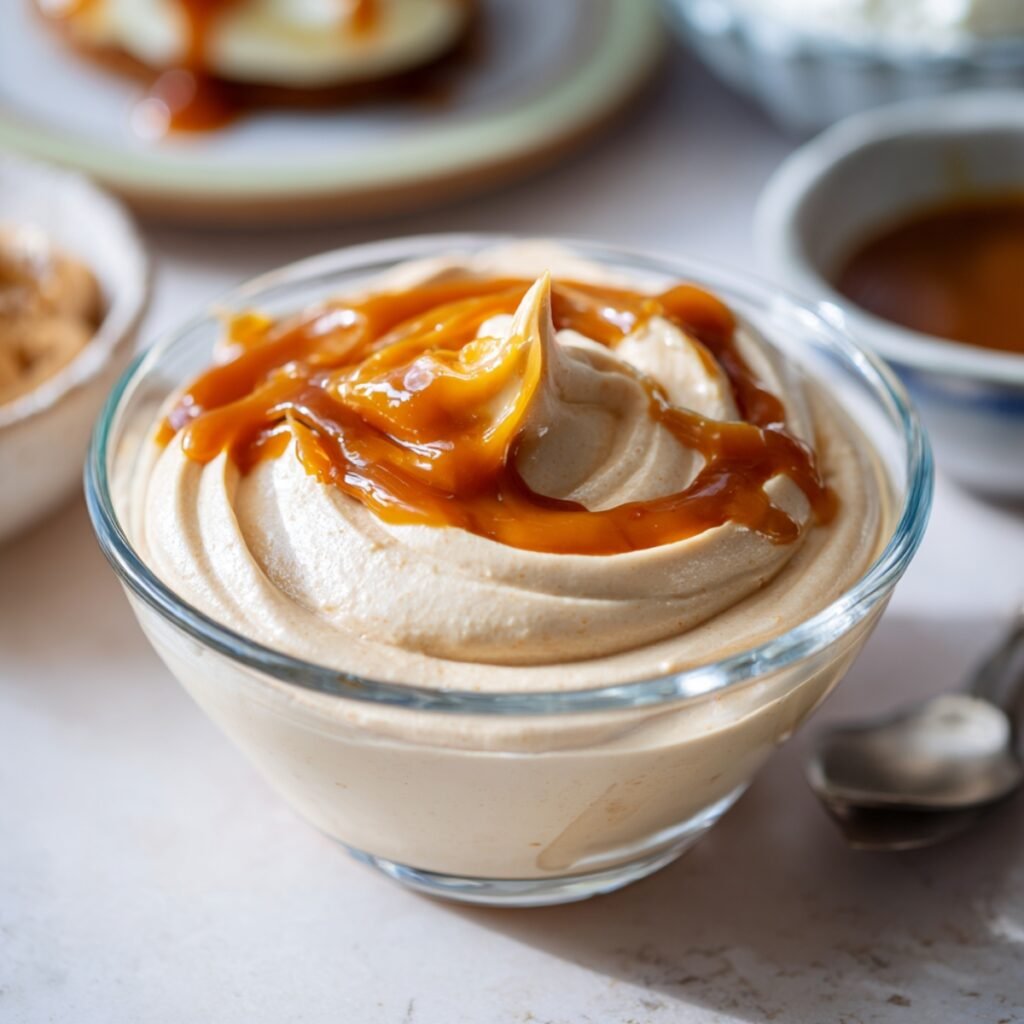
This mousse delivers that deep caramel flavor in a texture that is light enough to feel effortless after a full meal. It comes together with just a few ingredients, requires no baking, and can be made hours ahead so the work is done before anyone arrives at the table. The glossy dulce de leche dollop on top is not just decoration; it melts slightly into the mousse and creates a slow, sweet ribbon through every spoonful as you work your way down the glass.
How To Make Dulce de Leche Mousse
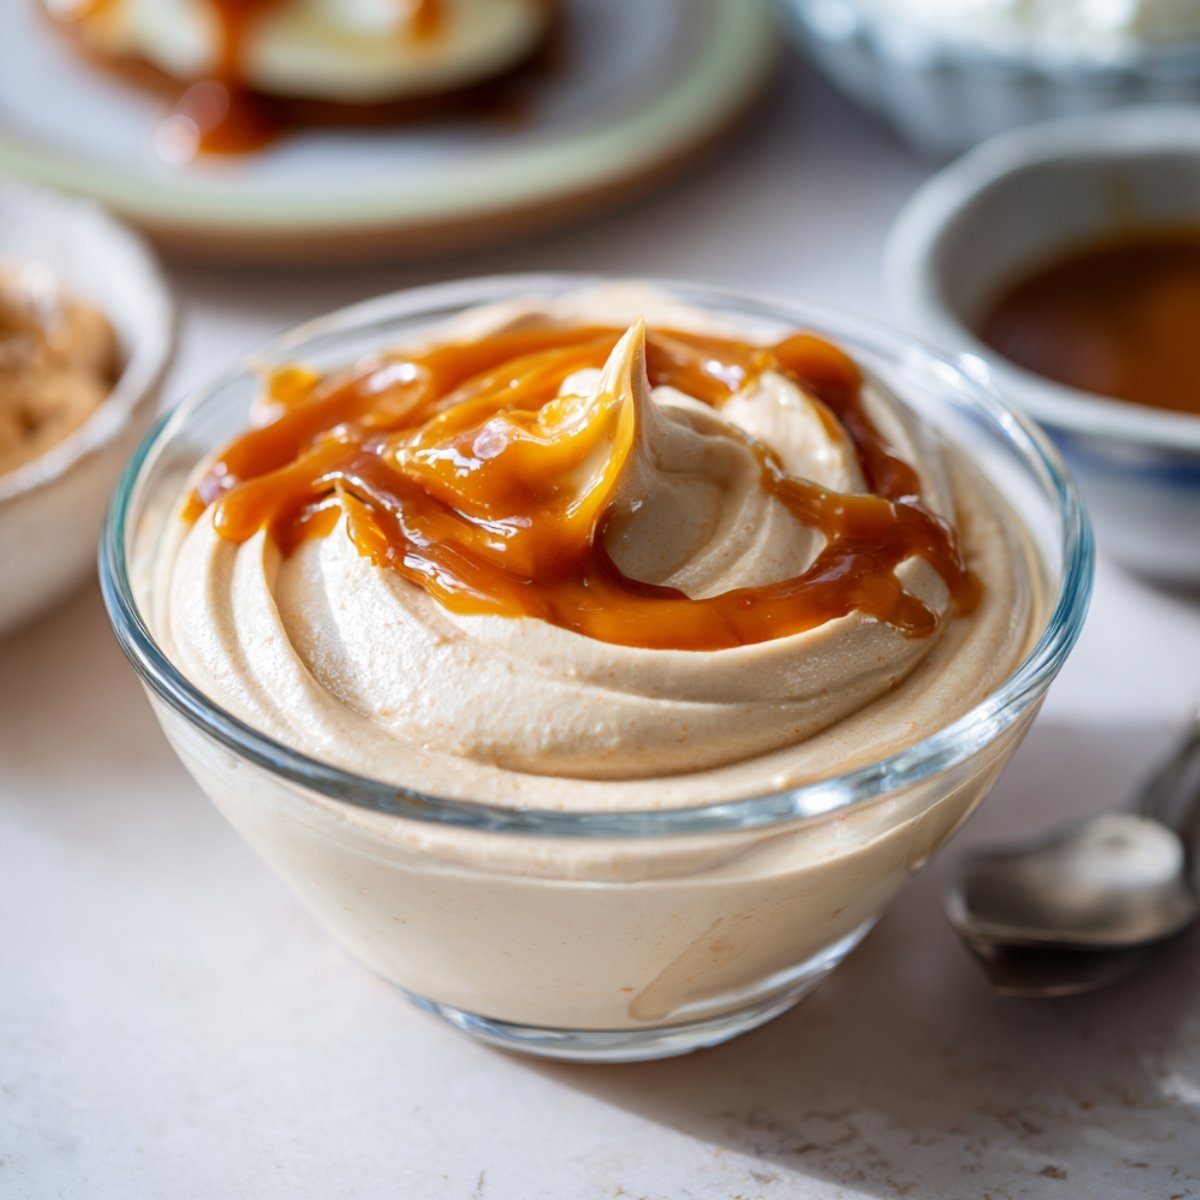
The first time I made this, I folded the cream into the dulce de leche while it was still slightly warm and the whole thing deflated into a thick, flat pudding. Anna looked at the bowl, then at me, and said it still tasted nice but did not look like what she expected. That one mistake taught me the rule that now governs every batch: the dulce de leche must be completely cool and the cream must be whipped cold before they ever meet. Temperature is everything in this mousse and once you respect that, the texture in the image is entirely achievable.
Main Ingredients
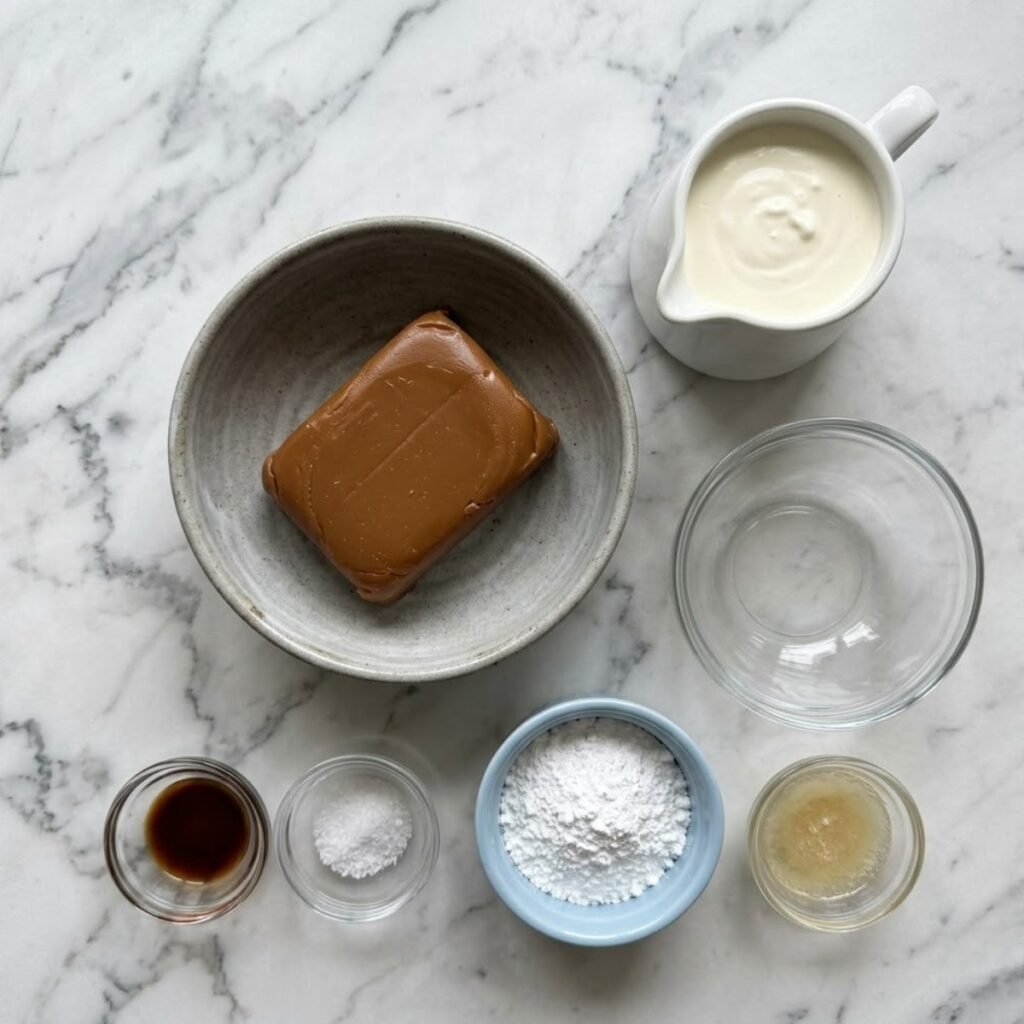
- 400g dulce de leche, store-bought or homemade, plus extra for topping (the primary flavor and the glossy caramel dollop visible sitting at the center of the mousse in the image)
- 400ml heavy whipping cream, very cold (whipped to soft peaks and folded in to create the airy, cloud-like texture throughout)
- 1 teaspoon vanilla extract (deepens the caramel flavor and adds warmth to the finished mousse)
- 1 tablespoon powdered sugar (a small amount to stabilize the whipped cream slightly without adding noticeable sweetness over the dulce de leche)
- ½ teaspoon fine sea salt (a pinch of salt sharpens the caramel flavor and prevents the mousse from tasting one-dimensionally sweet)
- 1 teaspoon powdered gelatin bloomed in 1 tablespoon cold water (optional but recommended for a mousse that holds its swirled shape for several hours as shown in the image)
Step by Step Instructions
Step 1: Cool the Dulce de Leche and Bloom the Gelatin
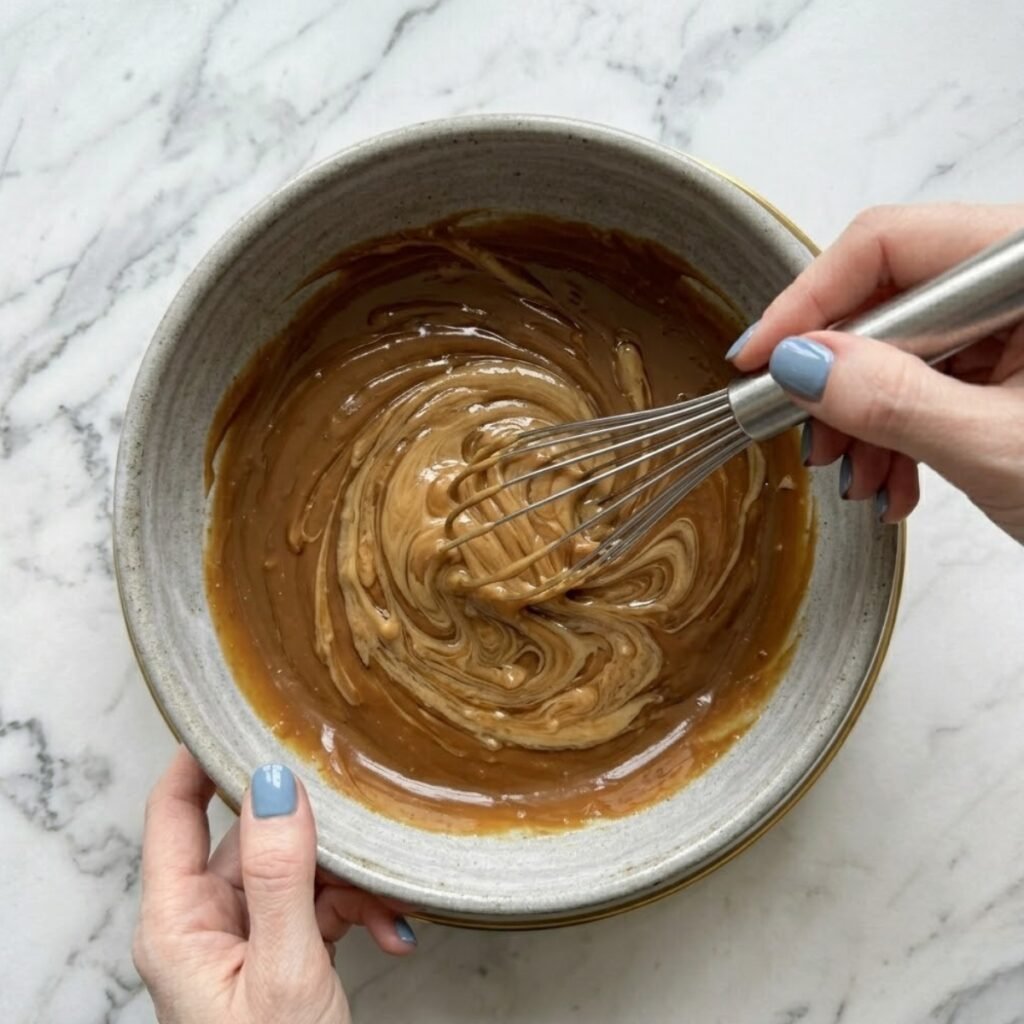
- Spoon the dulce de leche into a large mixing bowl and let it sit at room temperature for 20 minutes if it came straight from the refrigerator so it loosens enough to fold smoothly
- If using gelatin, sprinkle it over 1 tablespoon of cold water in a small bowl and allow it to bloom for 5 minutes until fully swollen and spongy
- Place the bloomed gelatin bowl in a larger bowl of hot water and stir until it dissolves completely into a clear liquid with no granules remaining
- Stir the dissolved gelatin into the room-temperature dulce de leche immediately and mix until fully incorporated before it sets
Step 2: Whip the Cream to Soft Peaks
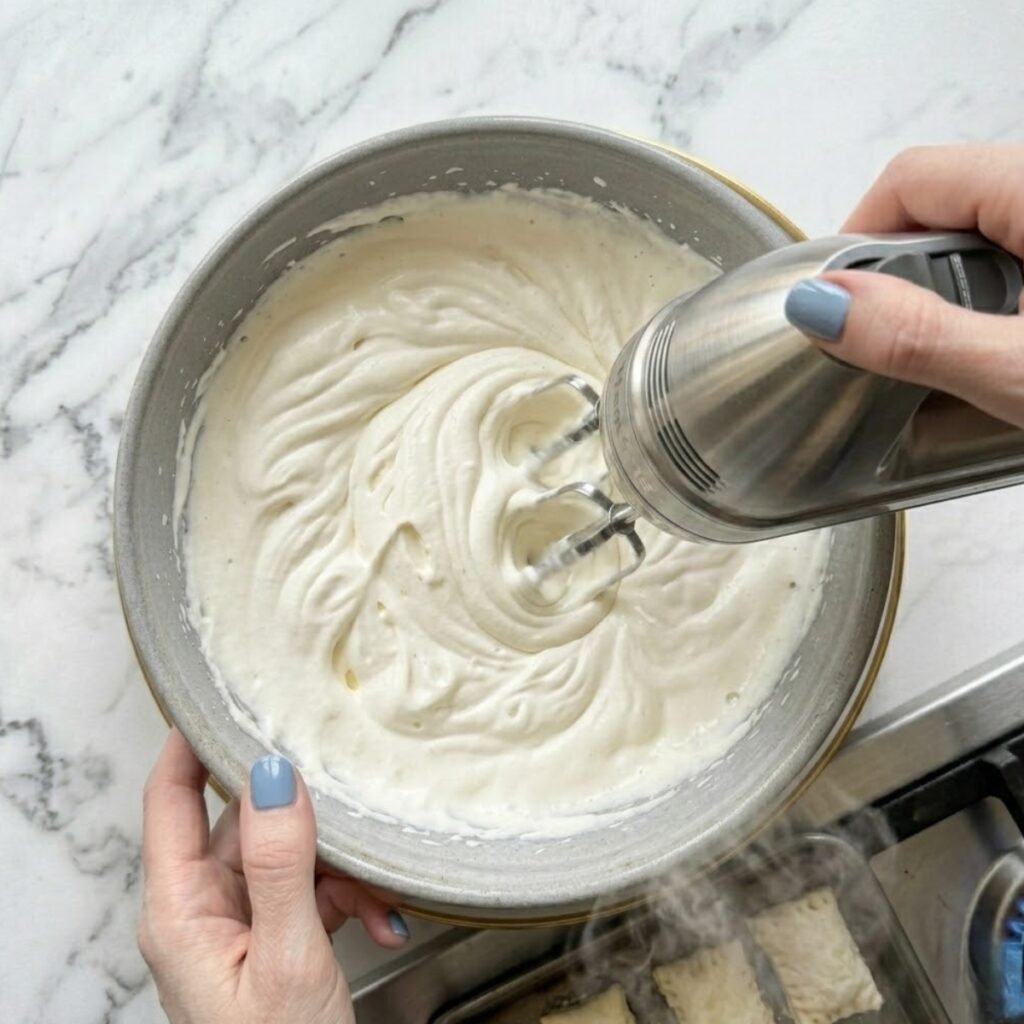
- Pour the very cold heavy cream into a chilled bowl along with the powdered sugar and vanilla extract
- Whip on medium-high speed with a hand mixer until the cream reaches soft peaks that hold a gentle shape but still move slightly when the bowl tilts
- Do not over-whip; stiff peaks make the mousse dense and grainy rather than light and smooth as shown in the image
- Refrigerate the whipped cream immediately if the dulce de leche mixture is not completely ready for folding
Step 3: Fold the Cream Into the Dulce de Leche
- Add the fine sea salt to the cooled dulce de leche mixture and stir briefly to combine
- Add one third of the whipped cream to the dulce de leche and fold using a wide spatula with slow circular strokes to lighten the base without deflating the cream
- Add the remaining whipped cream in two more additions, folding each one gently until no white streaks remain and the color is an even warm ivory-gold throughout
- Stop folding the moment the mixture looks uniform; over-mixing at this stage removes the airiness that gives the mousse its texture
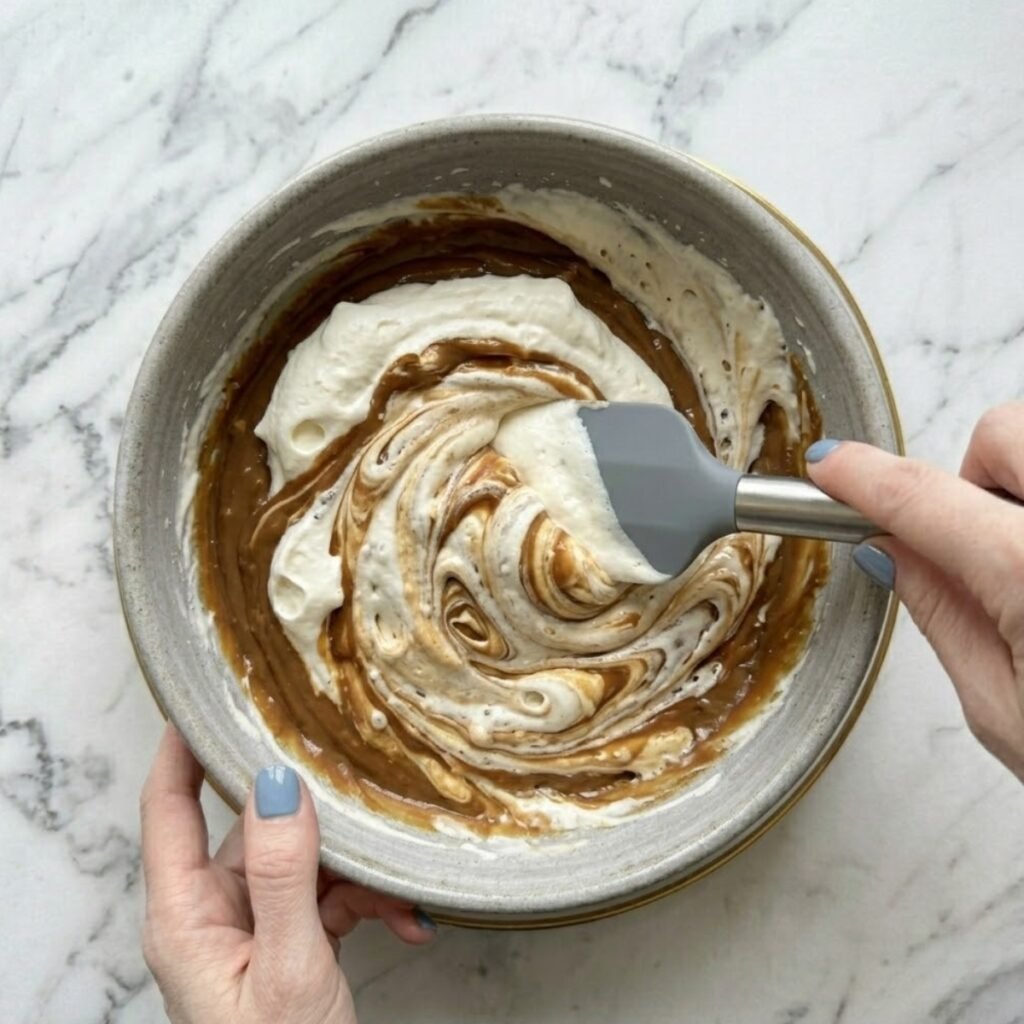
Step 4: Portion, Chill, and Finish
- Spoon or pipe the mousse into clear glass bowls so the pale golden color and smooth swirled texture are visible from the outside exactly as shown in the image
- Create a swirl at the top of each bowl by pulling the spatula or spoon in a gentle arc so the surface has the same wave-like finish visible in the image
- Cover each bowl loosely with plastic wrap and refrigerate for a minimum of 2 hours or up to overnight so the mousse firms to a sliceable, spoonable consistency
- Just before serving, add a generous dollop of room-temperature dulce de leche to the center of each bowl so it sits glossy and slightly melting on top of the set mousse
Dulce de Leche Mousse Variations
Dulce de Leche Mousse Without Gelatin
- Skip the gelatin entirely and increase the whipped cream to 450ml to compensate for the additional structure gelatin would provide
- The mousse will be slightly softer and will not hold its shape as firmly at room temperature but the flavor and texture are identical
- Serve within 2 hours of making for the best presentation and keep refrigerated until the moment it goes to the table
- This version is ideal when you need a quick dessert without planning ahead for gelatin blooming
Dulce de Leche Mousse Cake Filling
- Reduce the whipping cream to 300ml and increase gelatin to 1½ teaspoons for a firmer mousse that holds between cake layers
- Allow the assembled mousse to set in the refrigerator for at least 4 hours before slicing so the layers stay distinct and clean
- Use the same dulce de leche dollop as a drizzle between each cake layer for a visible caramel ribbon inside every slice
- Anna declared this version the one she wants for her next birthday cake with no further discussion
Salted Caramel Dulce de Leche Mousse
- Increase fine sea salt to 1 full teaspoon and stir it directly into the dulce de leche before folding in the cream
- Add a pinch of flaky sea salt on top of the finished dulce de leche dollop just before serving for a visible salty finish
- The contrast between the sweet mousse and the salt crystals on top creates a more complex, restaurant-style flavor profile
- This variation works particularly well served in small individual glasses for a dinner party dessert course
Substitutions
Dulce de Leche: Thick caramel sauce made from sweetened condensed milk cooked low and slow can replace store-bought dulce de leche. The flavor is very similar though homemade versions vary slightly in sweetness depending on cooking time. Use the same quantity and ensure it is completely cooled before folding in the cream.
Heavy Whipping Cream: Full-fat coconut cream chilled overnight and whipped cold works as a dairy-free alternative. The mousse will have a faint coconut note that actually complements the caramel flavor well. Expect a slightly softer set and serve within 1 hour of assembling for the best presentation.
Powdered Gelatin: Agar agar can replace gelatin at a 1 to 1 ratio for a vegetarian version. Dissolve it in warm liquid on the stovetop rather than cold water and note that it sets firmer than gelatin so reduce the quantity by a quarter teaspoon to keep the mousse texture soft and spoonable.
Powdered Sugar: A teaspoon of honey stirred directly into the cream before whipping adds the same gentle stabilizing sweetness. The flavor shift is minimal and works naturally alongside the dulce de leche without introducing any competing notes.
Equipment
- Two large mixing bowls, one chilled for the cream
- Hand mixer or stand mixer with whisk attachment
- Wide silicone spatula for folding
- Clear glass serving bowls (the transparency shows the color and texture as in the image)
- Small bowl for blooming gelatin
- Piping bag with a wide round tip (optional but helpful for the swirled finish on top)
Emma Tip: If you do not have a piping bag, spoon the mousse into the glass and then run the back of a large spoon across the surface in one smooth arc to create the swirled wave finish visible in the image. It takes one practiced motion and looks just as intentional as piping.
Storage Tips
Make Ahead Strategy
- This mousse is ideal for making the night before a dinner party or gathering
- Portion into individual glasses, cover loosely with plastic wrap, and refrigerate overnight for up to 12 hours before serving
- Add the dulce de leche topping dollop only just before serving so it stays glossy and does not absorb into the mousse surface
Refrigeration
- Covered mousse portions keep in the refrigerator for up to 3 days without any significant loss of flavor or texture
- The mousse firms slightly more with each passing day which actually makes it easier to spoon cleanly
- Always add the dulce de leche garnish fresh at serving time rather than storing it on top
Freezing
- Dulce de leche mousse freezes well for up to 3 weeks in individual sealed containers
- Thaw overnight in the refrigerator rather than at room temperature so the texture recovers smoothly without any separation
- After thawing, give each portion a gentle stir if any slight separation has occurred then re-smooth the surface before adding the dulce de leche topping
My Grandma's Secret Worth Sharing
Emma's grandmother made dulce de leche by simmering an unopened can of condensed milk in a pot of water for three hours while she did everything else in the kitchen. She said patience was the ingredient that no recipe ever listed. Anna learned that lesson standing at the stove with a timer, checking the pot every fifteen minutes and asking if it was done yet. The real secret though was the salt. Her grandmother added a small pinch directly into the caramel while it was still warm, long before it became a fashionable thing to do. That pinch is what makes this mousse taste complete rather than simply sweet, and it is the one step that Anna now insists on doing herself every single time.
FAQs
Why did my dulce de leche mousse turn out flat and dense?
Either the cream was under-whipped before folding or the dulce de leche was still warm when the cream was added. Warm dulce de leche melts the fat in the whipped cream immediately and collapses the structure. Always cool the dulce de leche completely and whip the cream to genuine soft peaks before folding. If the mixture still looks dense after folding, the cream likely deflated during mixing; fold more gently and stop as soon as the color is uniform.
Can I make dulce de leche mousse without gelatin?
Yes, and many home cooks prefer it that way for a simpler ingredient list. Without gelatin the mousse is softer and will not hold its shape quite as firmly at room temperature, but it tastes identical and sets well enough to spoon cleanly from a cold glass. Serve it within 2 hours of assembling and keep it refrigerated right up until it goes to the table.
What are the key dulce de leche mousse ingredients?
The core ingredients are dulce de leche, very cold heavy whipping cream, vanilla extract, a small amount of powdered sugar, and a pinch of fine sea salt. Optional gelatin is recommended if you want the mousse to hold the swirled shape shown in the image for several hours. Everything else is technique: temperature control, folding gently, and chilling long enough before serving.
The Spoon Goes In and the Room Goes Quiet
Anna carried her glass to the table with both hands and took the first spoonful slowly, making sure to catch the dulce de leche dollop from the top. She held it in her mouth for a moment and then looked up with the expression she reserves for things she wants to remember. That quiet is the real measure of a dessert. If you are building a full dessert menu around something this rich and creamy, Honey Orange Ricotta Mousse Dome brings a lighter citrus counterpoint that keeps the table feeling balanced and thoughtful. When a layered, nutty dessert is needed to round things out, Pistachio Tiramisu sits beautifully alongside the caramel warmth of this mousse without competing with it. And for something tropical and unexpected that surprises people at the end of a meal, Hawaiian Guava Cake offers a fruity brightness that makes the whole spread feel carefully considered. Make this mousse once and leave a comment below telling us how your first spoonful landed.
Related
Looking for other recipes like Dulce de Leche Mousse? Try these:
- Blueberry Lemonade Cupcakes35 Minutes
- Oreo Cheesecake Donut Burger15 Minutes
- Apple Pie Cheesecake Tacos25 Minutes
- Jasmine Peach Vanilla Cake50 Minutes
Dulce de Leche Mousse
Ingredients
Equipment
Method
- Spoon dulce de leche into a large bowl and allow it to sit at room temperature for 20 minutes until loose enough to fold smoothly without streaks.
- Sprinkle gelatin over cold water in a small bowl and let it bloom for 5 minutes until fully swollen and spongy before dissolving.
- Set the gelatin bowl inside a larger bowl of hot water and stir until fully dissolved into a clear liquid with no visible granules remaining.
- Stir dissolved gelatin into the room-temperature dulce de leche immediately and mix until fully incorporated before it begins to set.
- Pour cold heavy cream into a chilled bowl with powdered sugar and vanilla extract and whip on medium-high speed until soft peaks form that hold a shape but still move gently.
- Add fine sea salt to the dulce de leche mixture and stir briefly, then add one third of the whipped cream and fold with a wide spatula using slow circular strokes to lighten the base.
- Add the remaining whipped cream in two additions, folding each one gently until no white streaks remain and the color is an even warm ivory-gold throughout.
- Spoon or pipe the mousse into clear glass bowls, creating a gentle swirl at the top surface by pulling a spoon or spatula in one smooth arc as shown in the image.
- Cover each bowl loosely with plastic wrap and refrigerate for a minimum of 2 hours or overnight until the mousse firms to a sliceable, spoonable consistency.
- Just before serving, add a generous dollop of room-temperature dulce de leche to the center of each bowl so it sits glossy and slightly melting on top of the set mousse as shown in the image.
Leave a Reply