
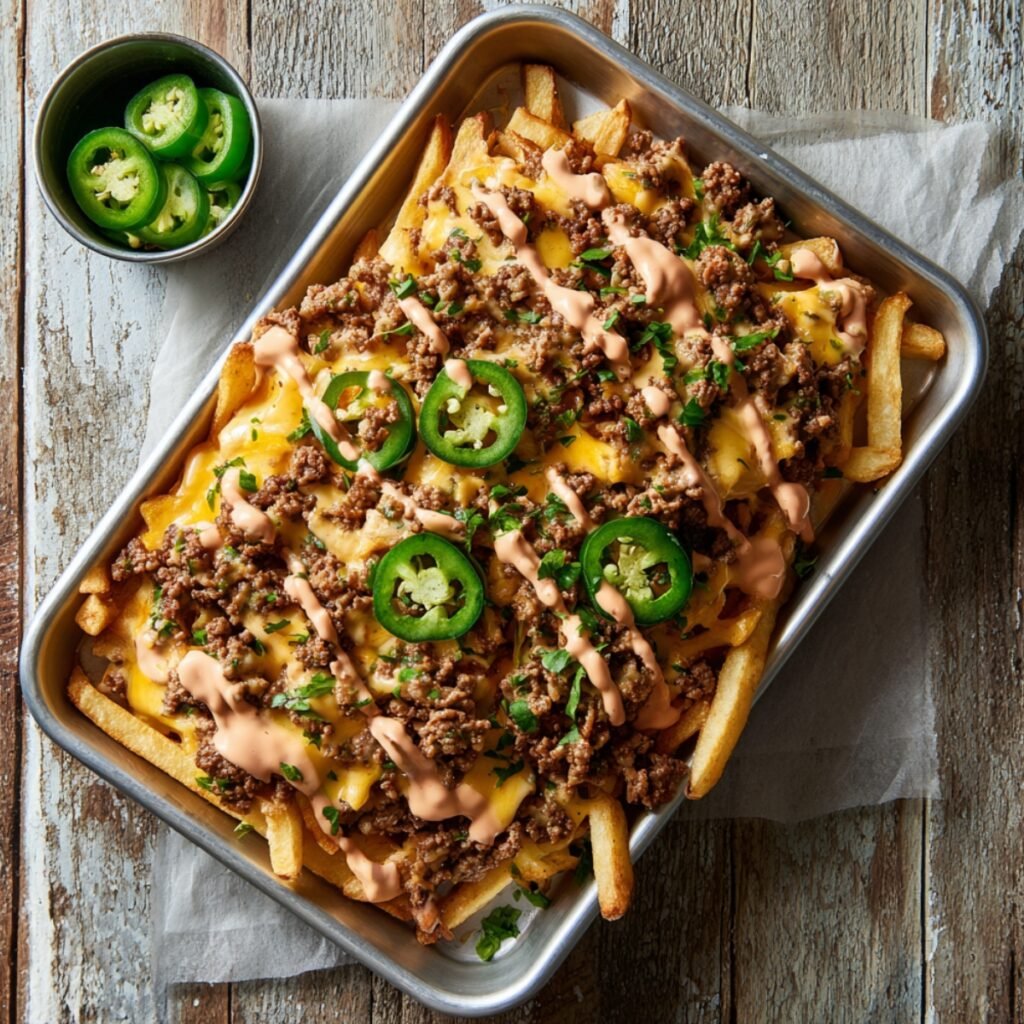
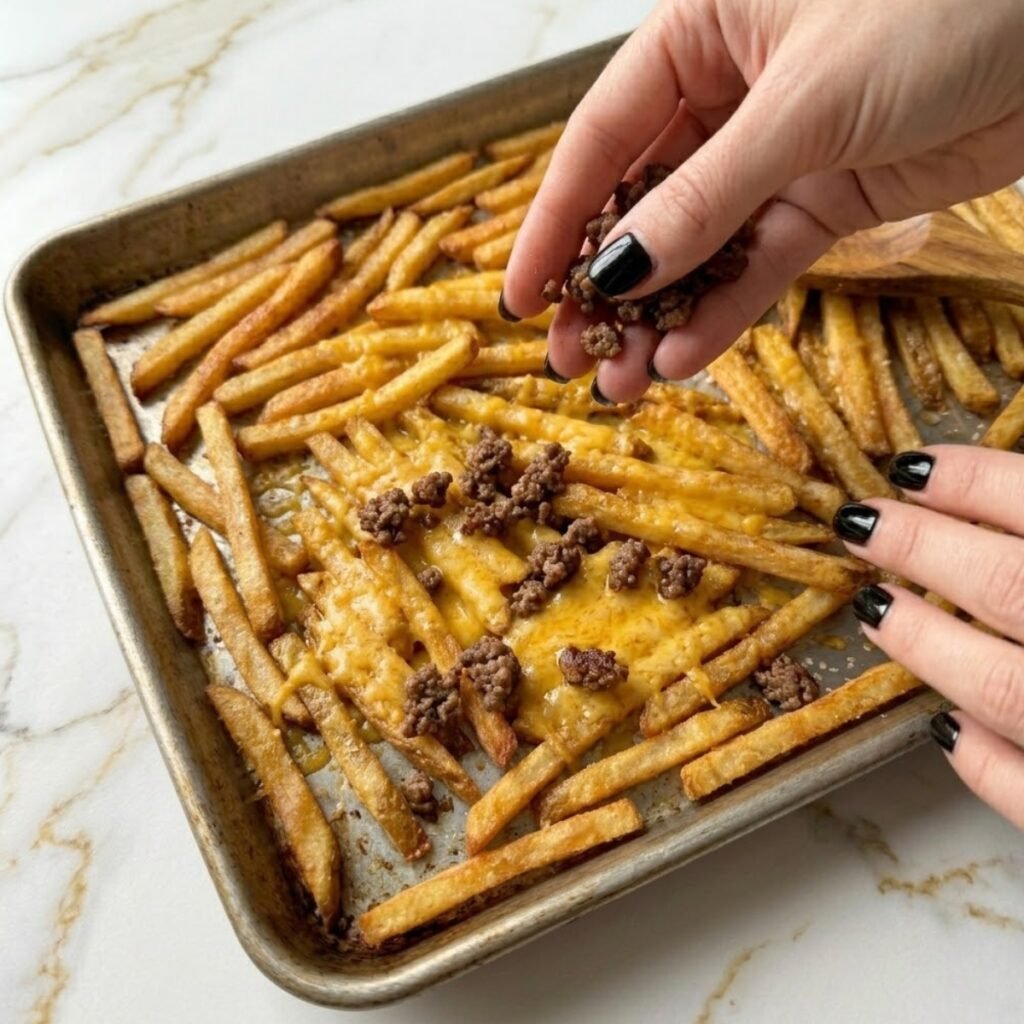
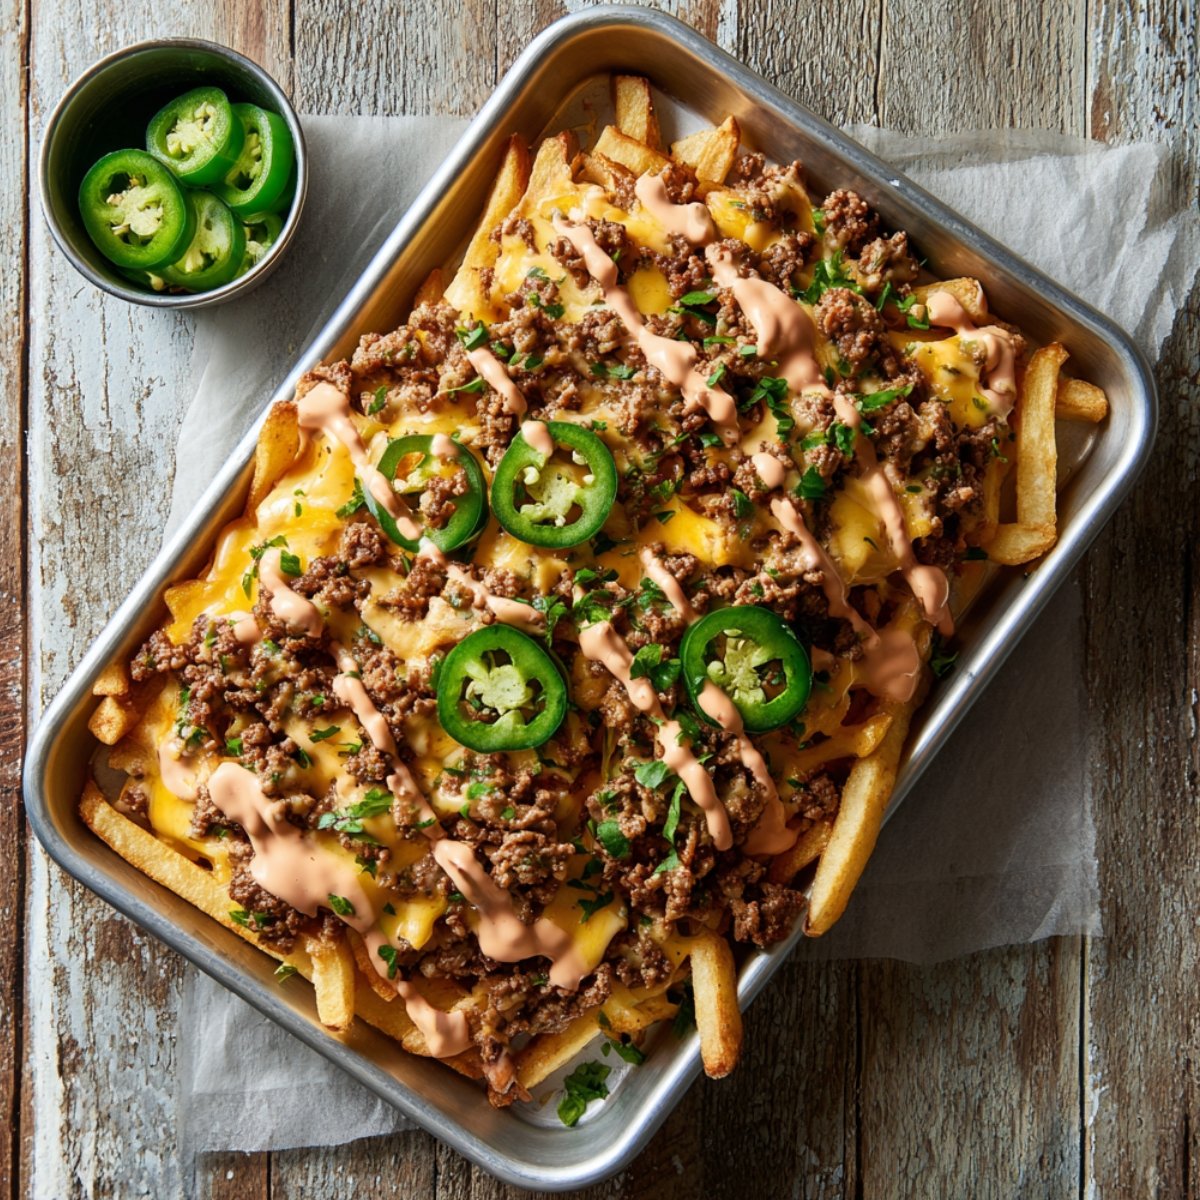
Anna had her face about six inches from the sheet pan before I had even finished drizzling the burger sauce. She tracked every layer from the bottom up: the golden fries, the melted cheese underneath, the seasoned beef crumbled across everything, the pickled jalapeño rounds lined down the center, and then that thick, creamy sauce pulling across the whole tray in slow ribbons. She looked up and said she needed a fork immediately. Hearty Smash Burger Fries became the Friday night request that has not rotated out of the weekly rotation since.
Jump to:
Why You Will Love These Hearty Smash Burger Fries
This tray takes everything a smash burger should be and rebuilds it horizontally across a sheet pan so everyone at the table gets every component in every bite. The fries form a crisp base, the melted cheddar layer underneath the beef acts like a built-in sauce, the seasoned ground beef is cooked until browned with crisp edges, the pickled jalapeños cut through everything with a sharp brine, and the burger sauce ties all of it together in thick drizzled lines exactly as shown in the image. It is one pan, one meal, and zero plates left with anything on them.
How To Make Hearty Smash Burger Fries
The first time I made this, I layered the cheese on top of the beef and it melted unevenly into the sauce rather than creating its own distinct layer beneath. Anna picked up a fry from the edge that had no cheese on it and quietly moved it to the center of the pan, which told me everything I needed to know. The correct sequence is fries first, cheese directly onto the hot fries so it melts into the base, then beef on top so the cheese layer is sealed underneath and visible when the pan is served as shown in the image.
Main Ingredients
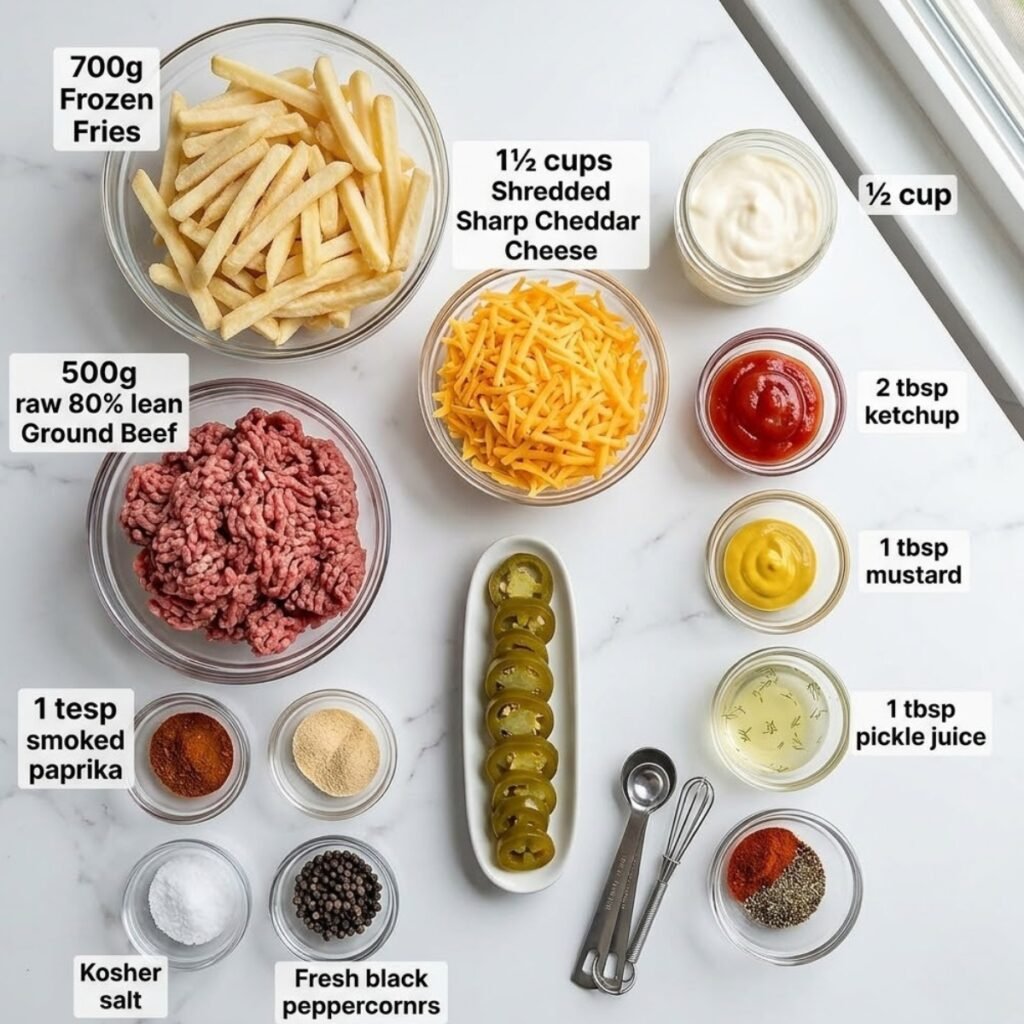
- 700g frozen or fresh-cut fries (the base layer of the tray; baked or fried until fully golden and crisp before anything else goes on top)
- 500g ground beef, 80 percent lean (the seasoned beef crumbled across the fries; the higher fat content gives it the flavor and browning visible throughout the tray)
- 1 teaspoon smoked paprika (part of the beef seasoning blend that gives the meat its color and subtle smokiness)
- 1 teaspoon garlic powder (blended into the beef seasoning for depth without visible chunks)
- 1 teaspoon onion powder (rounds out the beef flavor and works with the paprika and garlic)
- Salt and black pepper to taste (seasoned generously into the beef as it cooks so the flavor builds from the inside out)
- 1½ cups shredded cheddar cheese (spread directly onto the hot fries before the beef goes on so it melts into the base layer as shown in the image)
- 8 to 10 pickled jalapeño rounds (the green rounds lined down the center of the finished tray visible in the image; pickled rather than fresh for the brine that cuts through the richness)
- ½ cup mayonnaise (the base of the burger sauce)
- 2 tablespoons ketchup (gives the burger sauce its pink-beige color visible drizzled across the tray)
- 1 tablespoon yellow mustard (adds tang to the sauce and balances the mayonnaise)
- 1 tablespoon pickle juice (the acidic note in the sauce that makes it taste like a proper smash burger sauce)
- ½ teaspoon smoked paprika for the sauce (echoes the beef seasoning and deepens the sauce color)
- Black pepper for the sauce (the visible dark specks across the sauce surface in the image)
Step by Step Instructions
Step 1: Cook the Fries Until Fully Crisp
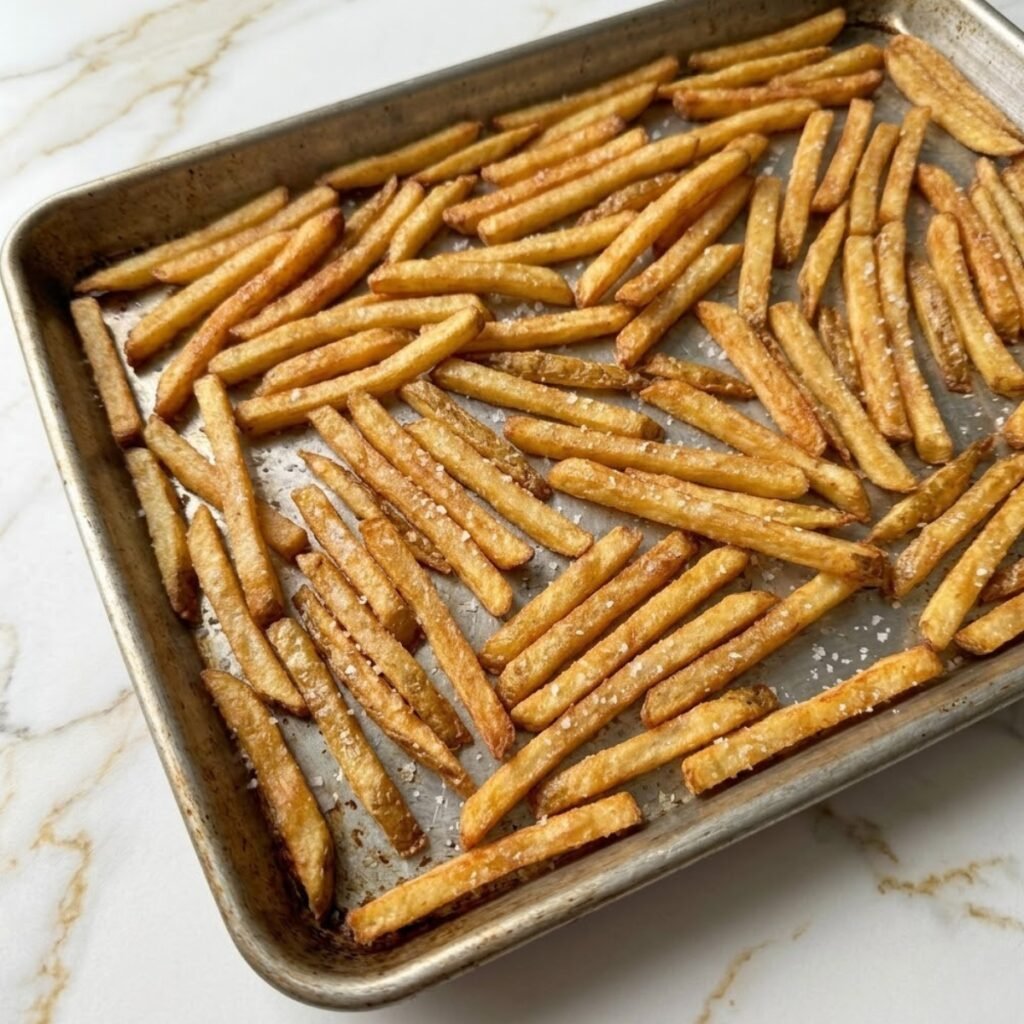
- Spread fries in a single even layer on a large rimmed sheet pan and bake at 220°C for 25 to 30 minutes, flipping once at the halfway mark, until every fry is fully golden and crisp with no soft spots
- Do not crowd the fries onto the pan; if they are piled on top of each other they will steam rather than crisp and the base of the tray will be soggy under the toppings
- Season the fries with salt immediately after they come out of the oven while they are still hot so the seasoning adheres to the surface
- Remove from the oven and reduce oven temperature to 190°C while the beef is prepared so the tray can go back in briefly to melt the cheese
Step 2: Season and Brown the Beef
- Combine smoked paprika, garlic powder, onion powder, salt, and black pepper in a small bowl and add to the ground beef, mixing briefly so the seasoning is evenly distributed throughout
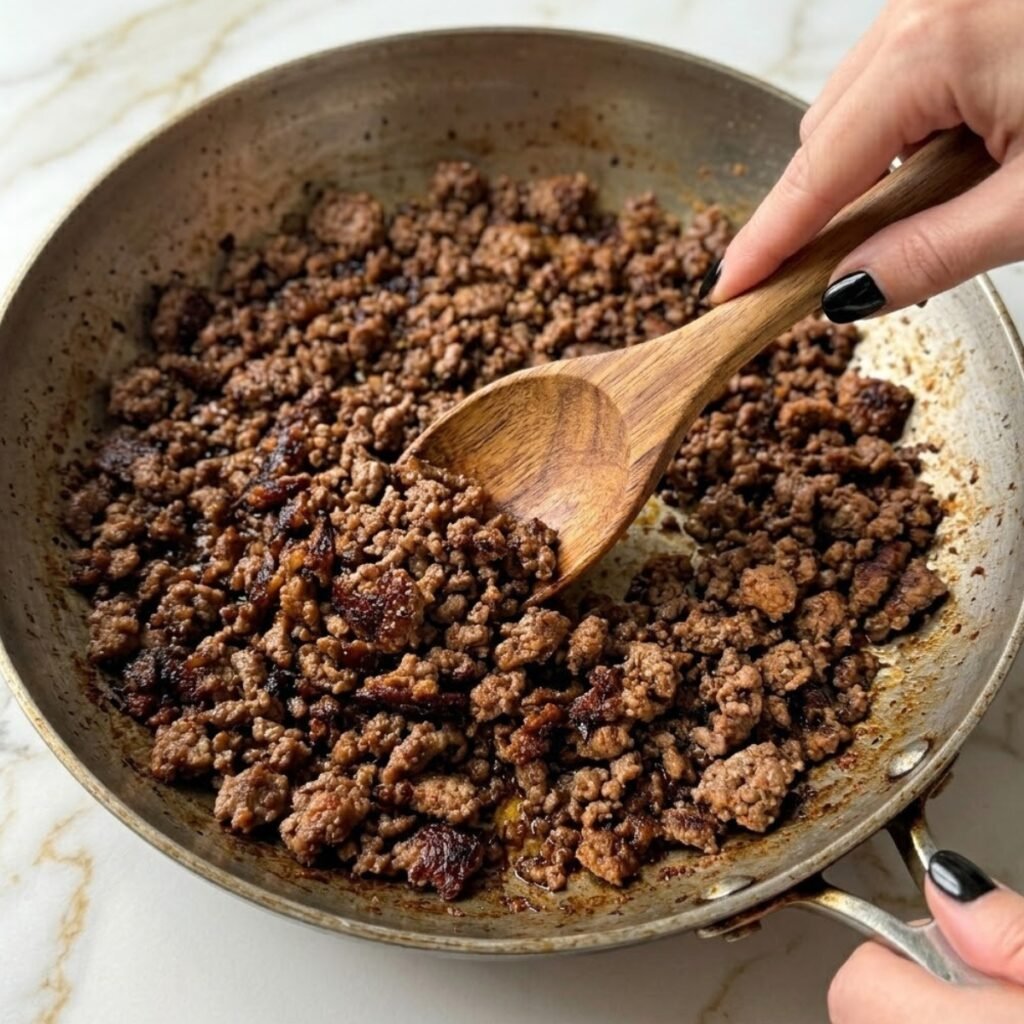
- Cook the seasoned beef in a wide skillet over high heat without stirring for the first 2 minutes so the underside develops a browned, slightly crispy crust before breaking it up
- Break the beef into small, uneven crumbles with a wooden spoon or spatula and continue cooking until no pink remains and the edges of each crumble look caramelized and slightly crisp
- Drain any excess fat from the pan by tilting it and spooning off the liquid so the beef does not make the fry base soggy when it goes on top
Step 3: Build the Layers on the Tray
- Scatter shredded cheddar cheese evenly over the hot crisp fries directly on the sheet pan so the cheese makes full contact with the fry surface and begins melting from the residual heat
- Place the tray back in the 190°C oven for 3 to 4 minutes until the cheese is fully melted and beginning to bubble at the edges and the fries underneath have absorbed some of the melted cheese
- Remove from the oven and immediately scatter the seasoned cooked beef evenly across the cheese layer so every part of the tray has a similar ratio of fries to meat as shown in the image
- Arrange pickled jalapeño rounds in a line down the center of the tray pressing them gently into the beef layer so they sit flat and visible exactly as shown in the image
Step 4: Make the Burger Sauce and Finish the Tray
- Whisk mayonnaise, ketchup, yellow mustard, pickle juice, smoked paprika, and black pepper together in a small bowl until completely smooth and uniformly pale pink-beige in color
- Transfer the sauce to a small squeeze bottle or a piping bag with the tip cut off for the drizzling effect visible across the tray in the image
- Drizzle the burger sauce in slow, thick lines back and forth across the entire tray so every section is covered without the sauce pooling in one spot as shown in the image
- Serve the tray immediately at the center of the table with extra sauce on the side and let everyone reach in directly from the pan
Hearty Smash Burger Fries Variations
Loaded Smash Burger Fries With Caramelized Onions
- Cook 2 large yellow onions thinly sliced in butter over low heat for 25 to 30 minutes until deeply golden and jammy then scatter them over the melted cheese layer before the beef goes on
- The caramelized onions add a sweet depth that works with the pickled jalapeño brine and the tangy burger sauce in a way that tastes genuinely different from the original version
- Anna tried this variation and said it tasted like a proper burger with everything on it which was exactly the point
- Keep the jalapeño rounds and sauce drizzle identical for the same visual finish as the image
Smash Burger Fries With Smashburger Rosemary Seasoning
- Toss the fries in 1 tablespoon of olive oil, 1 teaspoon of dried rosemary, and a generous pinch of garlic salt before baking so the fry base has a more herbed, savory character
- The rosemary seasoning echoes the Smashburger rosemary fries flavor profile and adds an herbal note that contrasts well with the richness of the beef and sauce
- Keep the beef seasoning, cheese layer, jalapeños, and sauce identical so the rosemary fry base is the only change that distinguishes this variation
- This version works particularly well when served as a shareable appetizer at a dinner gathering rather than a main course
Smash Burger Loaded Fries With Bacon
- Cook 6 strips of streaky bacon until very crispy then crumble them directly over the beef layer before the jalapeños and sauce go on
- The bacon adds a smoky, salty crunch in every bite that takes the tray from very good to the kind of thing people ask to have again the same week
- Drizzle a small amount of the bacon fat over the fries before the cheese goes on for an extra layer of rendered richness in the base
- Keep the jalapeño center line and the burger sauce drizzle identical to the image for the full visual effect
Substitutions
Ground Beef: Ground turkey or ground chicken works as a leaner substitute cooked in the same way over high heat. The browning will be less pronounced and the flavor more neutral so increase the smoked paprika to 1½ teaspoons and add a dash of Worcestershire sauce to the seasoning blend to compensate. Frozen Fries: Fresh-cut potatoes soaked in cold water for 30 minutes, dried completely, and baked at 220°C for 35 minutes produce a crispier, more flavorful base than frozen. Air-fried frozen fries also work and take about 18 minutes at 200°C with no oil needed. Shredded Cheddar: Pepper jack cheese adds its own heat layer under the beef and pairs naturally with the pickled jalapeños on top. American cheese slices torn and scattered across the fries melt more completely and create a smoother, more uniform cheese layer across the entire tray. Pickled Jalapeños: Fresh jalapeño rings can be substituted but they bring heat without the brine that makes the pickled version cut through the richness so effectively. If using fresh, add a squeeze of lime juice over the top just before serving to replace the acidic note the pickle brine provides.
Equipment
- Large rimmed sheet pan (at least 33x45cm; the silver tray in the image gives the most even heat distribution)
- Wide skillet for browning the beef
- Small bowl and whisk for the burger sauce
- Small squeeze bottle or piping bag for drizzling the sauce
- Slotted spoon or spatula for draining the beef
- Wooden spoon or spatula for breaking the beef into crumbles
Emma Tip: If you do not have a squeeze bottle for the sauce, spoon it into a small zip-lock bag and snip a very small corner off one end. The opening gives you the same thin, controlled drizzle lines visible across the tray in the image without any extra equipment and Anna found the whole process considerably more entertaining than using a spoon.
Storage Tips
Make Ahead Strategy
- Cook the beef and make the burger sauce up to 24 hours ahead and refrigerate them separately in sealed containers
- Bake the fries fresh just before assembling so the base stays crisp; reheated fries lose their crunch quickly under the warm wet toppings
- Have the cheese measured, jalapeños drained, and sauce in the squeeze bottle before the fries come out of the oven so the layering happens quickly while everything is still hot
Refrigeration
- Leftover assembled tray keeps in the refrigerator covered for up to 2 days but the fries will soften significantly overnight from the moisture in the beef and sauce
- Reheat leftovers spread on a sheet pan at 200°C for 10 to 12 minutes so the fries crisp back up slightly before serving
- Store leftover burger sauce separately in a sealed jar in the refrigerator for up to 1 week; it also works as a dipping sauce or sandwich spread
Freezing
- The seasoned cooked beef freezes well for up to 2 months in a sealed freezer bag; thaw overnight in the refrigerator and reheat in a skillet over medium heat before building the tray
- Do not freeze the assembled tray as the fry texture breaks down completely after thawing and the sauce separates
- Burger sauce does not freeze well; always make it fresh or refrigerate for short-term use only
My Grandma's Secret Worth Sharing
Emma's grandmother made sheet pan meals before they had a name for them. She said a tray you could carry to the table and serve from directly was the most honest way to feed people because it showed exactly what went into it and asked nothing of anyone to plate it individually. Anna took that philosophy to heart the first time we made this together and carried the whole tray to the table herself with both oven mitts, setting it down with the kind of authority that comes from knowing the food is going to be well received. The secret she would have added was the pickle juice in the sauce. Her grandmother used it in everything that needed a sharp edge and said it was the ingredient that made people lean in for a second bite even when they were already full.
FAQs
Why are my fries soggy instead of crisp under the toppings?
Either the fries were not fully crisp before the toppings went on or the beef was too wet when it was scattered over the cheese layer. Bake the fries until completely golden with no soft patches and drain the cooked beef thoroughly before layering. Excess fat from undrained beef is the most common reason the fry base softens quickly after assembly. Work fast once the toppings start going on and serve the tray immediately so the fries have minimum time under the warm, moist toppings.
What is the best smash burger fries seasoning for the beef?
The combination of smoked paprika, garlic powder, onion powder, salt, and black pepper mixed directly into the raw beef before cooking gives the most evenly seasoned result throughout every crumble. Adding the seasoning before cooking rather than after means every piece of beef is seasoned to its core rather than just on the surface. A small amount of Worcestershire sauce stirred into the raw beef also deepens the flavor considerably for anyone who wants a more savory, umami-forward beef layer.
Can I make smash burger loaded fries with different cheese?
Yes, and the cheese choice significantly changes the character of the base layer. Cheddar gives the sharpest, most traditional burger flavor. Pepper jack adds heat. American cheese melts the most smoothly and creates the glossiest, most even layer across the fries. Mozzarella stretches but lacks flavor on its own so blend it with cheddar if using it. Whatever cheese is used, scatter it directly onto the hot fries and return the tray to the oven until it is fully melted before the beef goes on.
The Tray Hits the Table and Everyone Reaches at Once
Anna pulled the tray toward her side before I had even sat down, then pushed it back to the center when she noticed everyone else leaning in. That moment of instinct followed by generosity is exactly what a shared tray meal should produce. If you are building a full dinner spread around something this satisfying and communal, Churu Chicken Amarillo brings a completely different flavor direction with its golden Peruvian sauce that makes the table feel like a genuinely varied meal rather than variations on the same theme. When a lighter, herb-forward option is needed alongside the richness of this tray, Blueberry Thyme Chicken offers that sweet-savory contrast that always earns a second look from anyone who has not tried fruit with roasted meat before. And for a side that sits naturally alongside loaded fries without competing for attention, Garlic Parmesan Mushrooms bring a savory, creamy depth that feels like it was made specifically to go beside something as bold as this. Make this tray once on a Friday and leave a comment below telling us how long it lasted on the table.
Related
Looking for other recipes like Hearty Smash Burger Fries? Try these:
- Bang Bang Chicken Bowl30 Minutes
- Shrimp and Sausage Gumbo1 Hours
- Firecracker Ground Chicken15 Minutes
- Hot Sausage Feta Honey Pizza30 Minutes
Hearty Smash Burger Fries
Ingredients
Equipment
Method
- Spread fries in a single even layer on a large rimmed sheet pan and bake at 220°C for 25 to 30 minutes, flipping once halfway, until every fry is fully golden and crisp with no soft spots.
- Season hot fries immediately with salt then reduce oven temperature to 190°C and set the tray aside while the beef is prepared.
- Mix smoked paprika, garlic powder, onion powder, salt, and black pepper into the raw ground beef until evenly distributed, then cook in a wide skillet over high heat without stirring for 2 minutes so the underside develops a browned crust.
- Break the beef into small uneven crumbles and continue cooking until no pink remains and the edges of each crumble look caramelized, then drain excess fat by tilting the pan and spooning it off.
- Scatter shredded cheddar cheese evenly over the hot crisp fries on the sheet pan, then return the tray to the 190°C oven for 3 to 4 minutes until the cheese is fully melted and bubbling at the edges.
- Remove from the oven and immediately scatter the drained seasoned beef evenly across the melted cheese layer so every part of the tray has a similar ratio of fries to meat as shown in the image.
- Arrange pickled jalapeño rounds in a line down the center of the tray pressing them gently into the beef layer so they sit flat and visible exactly as shown in the image.
- Whisk mayonnaise, ketchup, yellow mustard, pickle juice, smoked paprika, and black pepper together in a small bowl until completely smooth and uniformly pale pink-beige in color.
- Transfer sauce to a squeeze bottle or zip-lock bag with a small corner cut off, then drizzle in slow back-and-forth lines across the entire tray so every section is covered as shown in the image.
- Serve the tray immediately at the center of the table with extra burger sauce on the side so everyone can reach in directly from the pan while the fries are still crisp.

Leave a Reply