
Anna spotted the mug before I even had the cocoa powder measured. "Is that a brownie in a cup?" she asked, pressing up onto her toes at the counter edge. I told her to watch the microwave timer and count down. Sixty seconds in, the smell hit us both at once, deep chocolate and something warm and nutty underneath. That afternoon, the Two Minute Protein Brownie became the only dessert she wanted all week.
Jump to:
Why You Will Love This Two Minute Protein Brownie
This recipe was made for the moment when you want something chocolatey but do not want to wait or wash a full pan. It comes together in one mug, cooks in two minutes flat, and the peanut butter drizzle on top sets it apart from anything you could pull from a wrapper. Anna loves the chocolate chips scattered over the frosting because they sink just slightly into the warm surface and stay half-melted when you reach the first bite. It is a genuinely satisfying single-serve dessert that requires almost no cleanup and almost no planning.
How To Make a Two Minute Protein Brownie
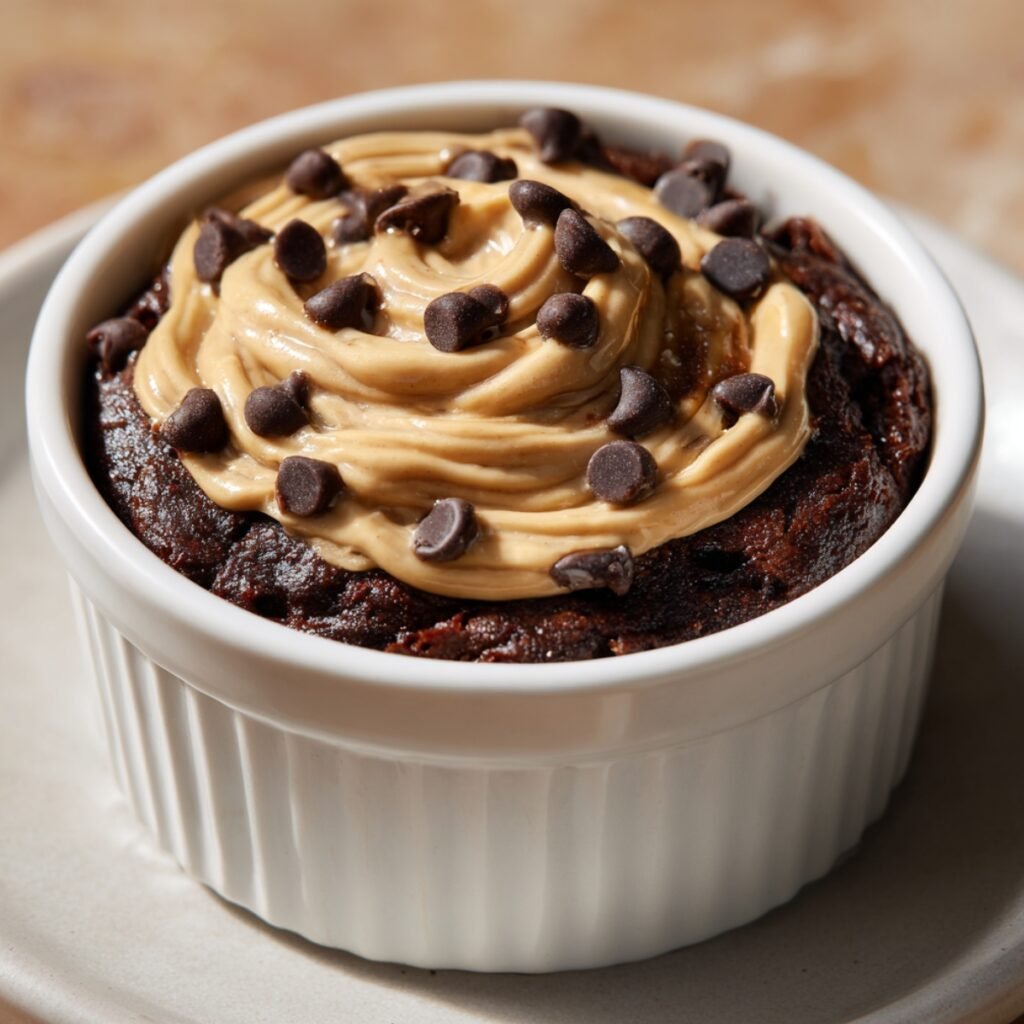
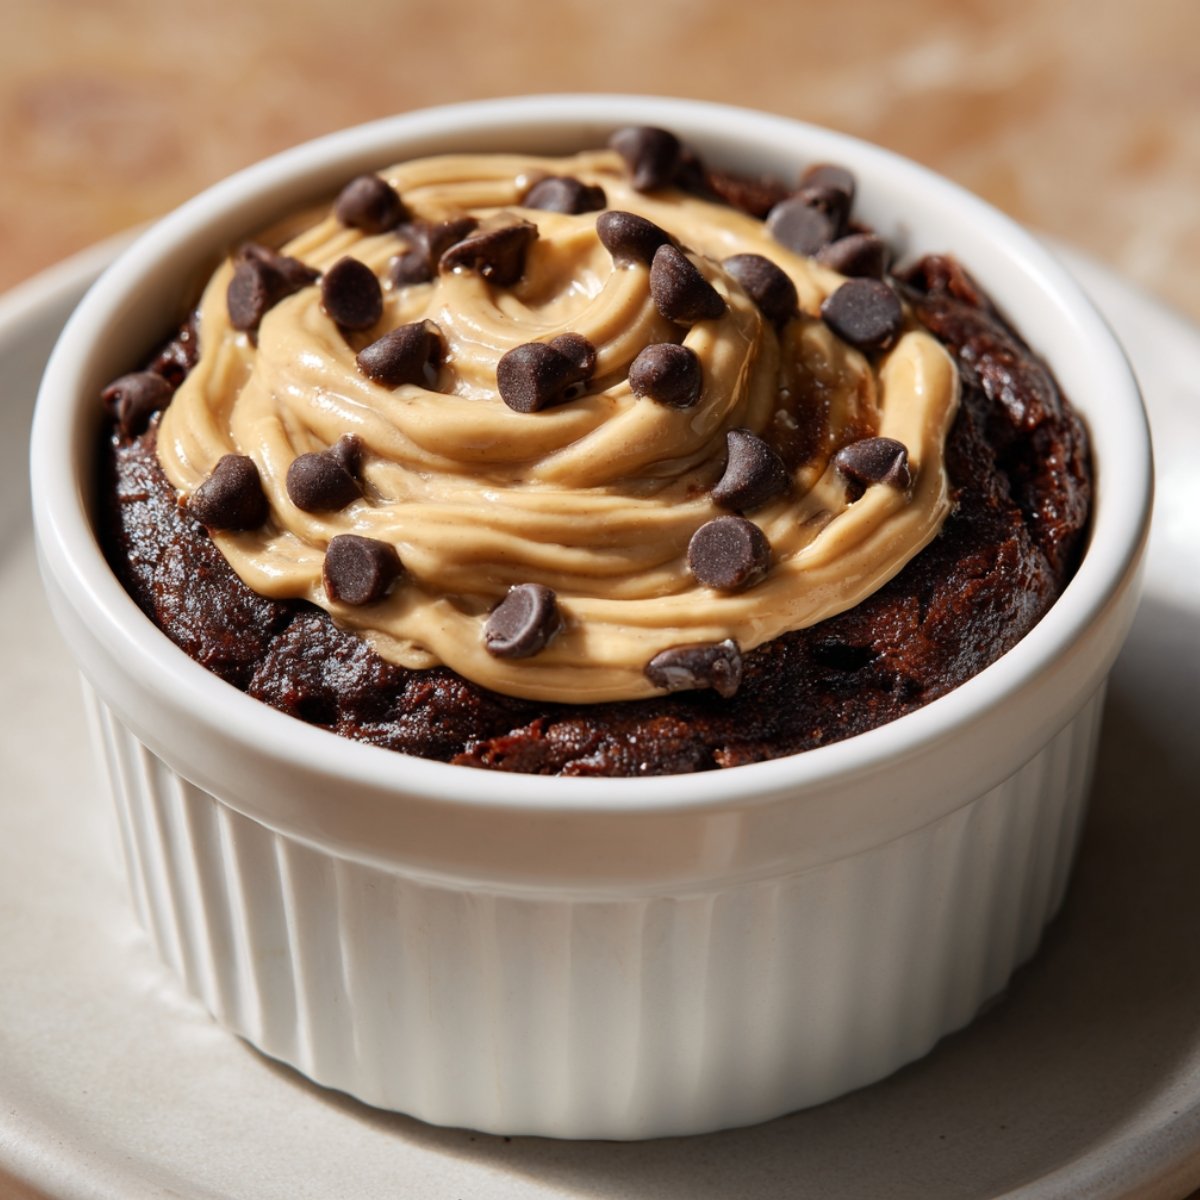
The first time I made this, I stirred everything directly in a coffee mug without measuring and the batter came out grainy and far too thick. Anna stood beside me watching it come out of the microwave looking more like a hockey puck than a brownie, and she laughed loud enough that the neighbor probably heard. The second time, I measured carefully, added the milk one teaspoon at a time until the batter just dropped from the spoon, and cooked it in a slightly larger mug so the batter had room to rise. That version came out soft, fudgy in the center, and exactly like the image told me it should look.
Main Ingredients
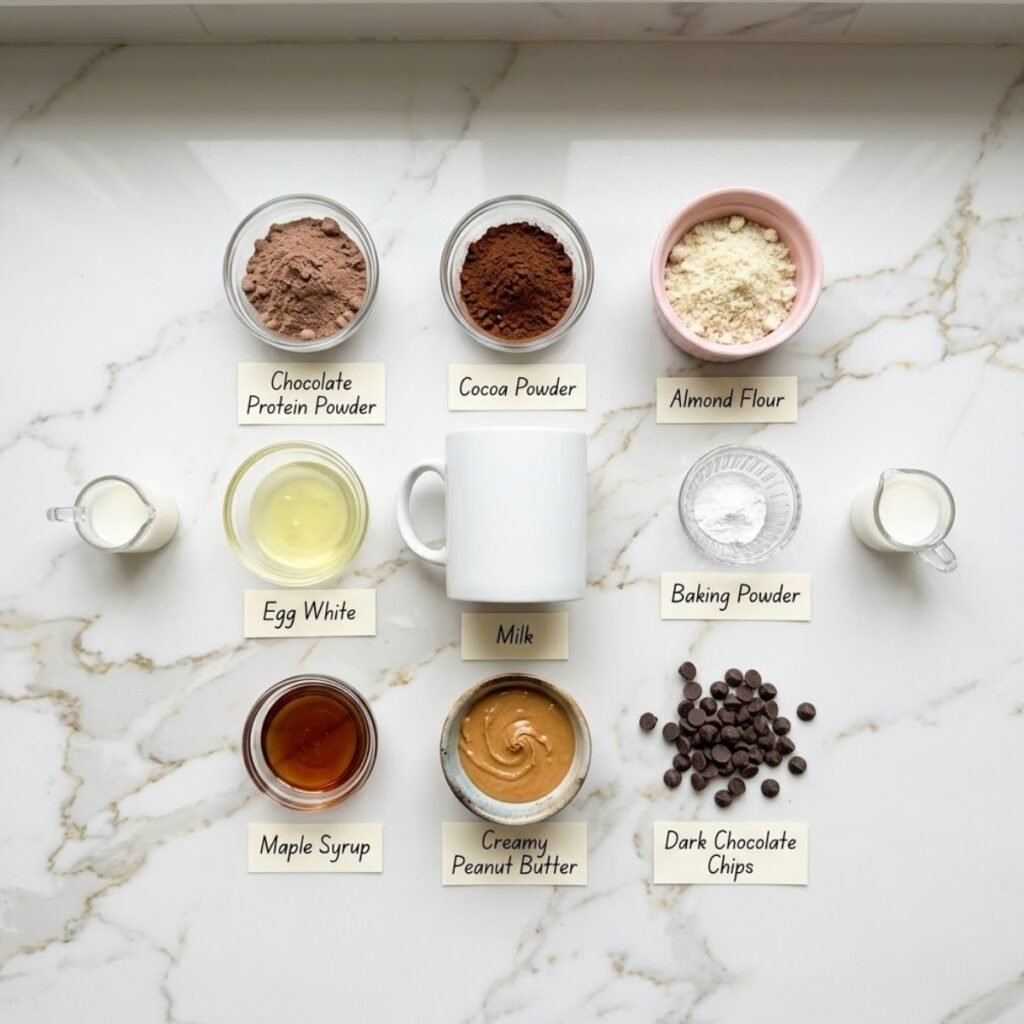
- 2 tablespoons chocolate protein powder (the base structure of the brownie; a whey-casein blend gives the fudgiest texture)
- 1 tablespoon unsweetened cocoa powder (deepens the chocolate flavor beyond what protein powder alone provides)
- 1 tablespoon almond flour or oat flour (adds body and prevents the brownie from turning rubbery after cooking)
- ½ teaspoon baking powder (a small amount encourages the batter to rise slightly so the center stays soft rather than dense)
- 1 tablespoon maple syrup or honey (natural sweetener that blends smoothly into the batter without grittiness)
- 1 egg white (binds the batter and keeps the texture tender rather than crumbly)
- 2 to 3 tablespoons milk of choice (adjusts batter consistency; add one teaspoon at a time until it just drops from the spoon)
- 1 teaspoon coconut oil or butter, melted (prevents sticking and adds a subtle richness to the finished brownie)
- 2 tablespoons peanut butter (the topping base; warmed slightly so it drizzles in thick, visible ribbons over the surface)
- 1 tablespoon Greek yogurt, optional (stirred into the peanut butter for a creamier, lighter topping with a tangy edge)
- 1 tablespoon chocolate chips (scattered over the topping while the brownie is still warm so they sit slightly into the surface)
Step by Step Instructions
Step 1: Prepare the Mug and Mix the Dry Ingredients
- Choose a microwave-safe mug with at least 10 oz capacity so the batter has room to expand during cooking without overflowing.
- Add the chocolate protein powder, cocoa powder, almond flour or oat flour, and baking powder directly into the mug.
- Use a small fork to stir the dry ingredients together until no visible pockets of powder remain settled at the bottom of the mug.
- Coat the inside of the mug with a thin layer of the melted coconut oil or butter using a pastry brush or your fingertip before adding the wet ingredients to prevent sticking.
Step 2: Add the Wet Ingredients and Check Batter Consistency
- Pour the maple syrup, egg white, and 2 tablespoons of milk into the mug directly over the dry mixture.
- Stir firmly with a fork in small circular motions from the bottom of the mug upward until the batter looks fully combined with no dry streaks visible along the sides.
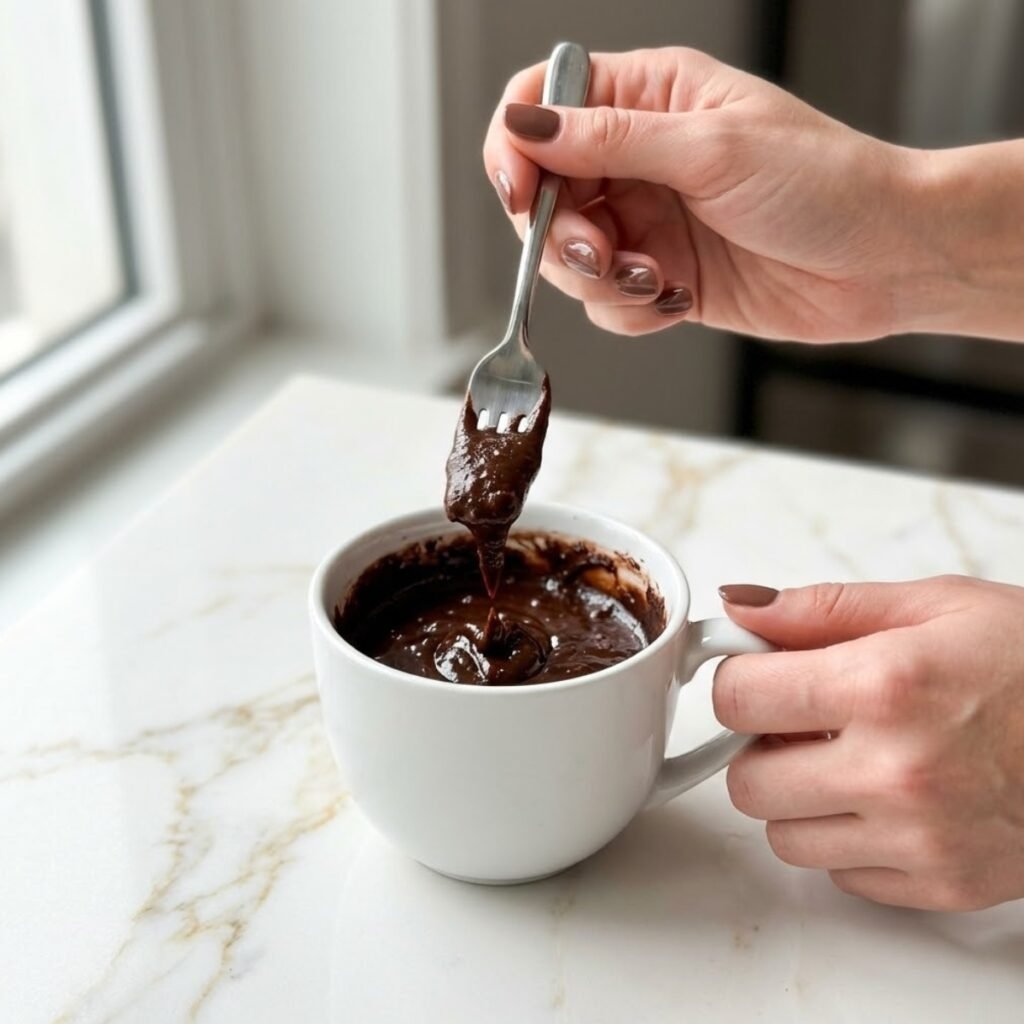
- Check the consistency by lifting the fork; the batter should drop slowly and thickly from the tines rather than pouring freely or clinging in a stiff clump.
- If the batter looks too thick or dry, add the remaining teaspoon of milk and stir again, repeating one small addition at a time until the texture looks smooth and just barely pourable.
Step 3: Microwave and Rest
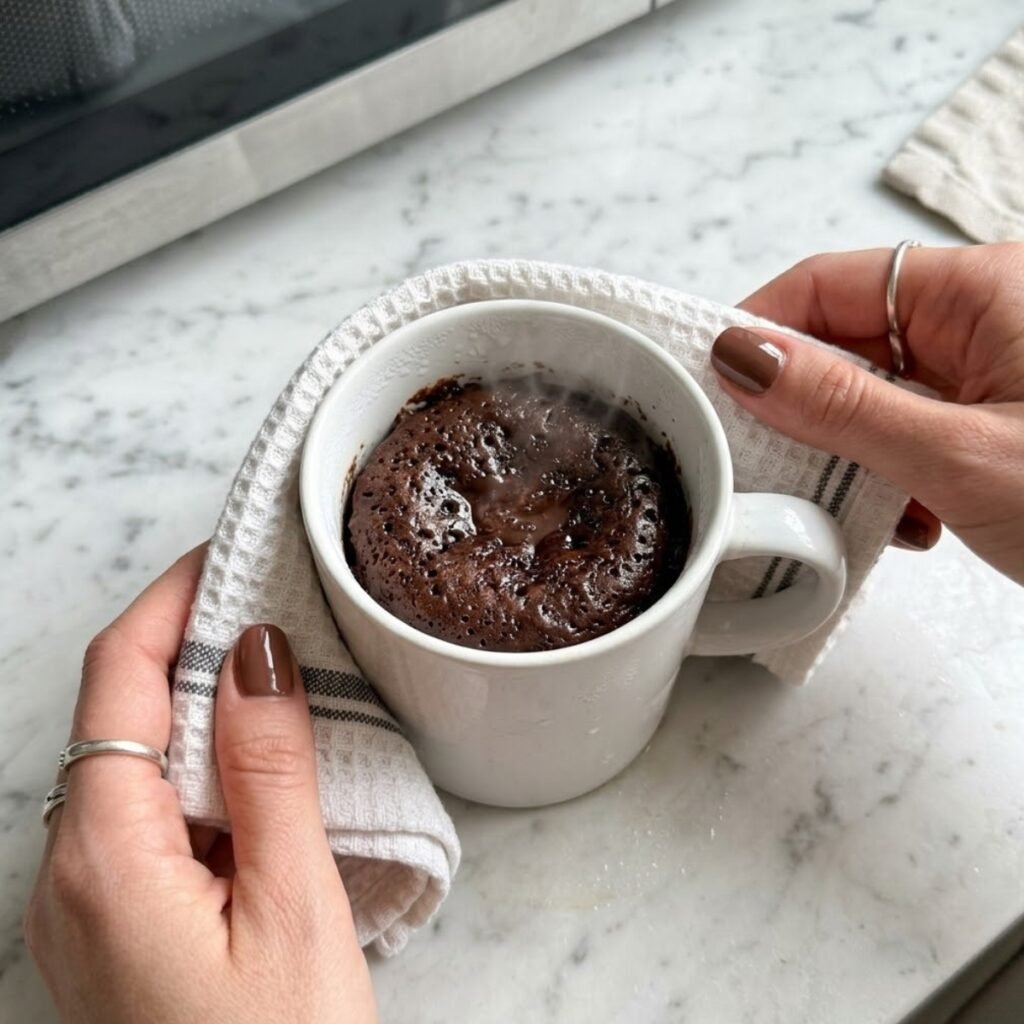
- Place the mug in the center of the microwave and cook on full power for 60 seconds, then stop and check the surface; the center should look just set but still appear slightly moist.
- If the center looks completely liquid or the batter has barely changed, return the mug to the microwave and cook in 15-second bursts, checking after each one, until the surface no longer jiggles visibly when you tap the mug gently on the counter.
- Remove the mug carefully using a folded kitchen towel because the ceramic will be hot all the way through, and set it on a flat surface to rest for 90 seconds without covering.
- The brownie will continue cooking from residual heat during the rest period, which is what brings the center from barely-set to fully fudgy; skipping this step almost always results in a rubbery texture.
Step 4: Make the Peanut Butter Topping and Finish
- Spoon the peanut butter into a small microwave-safe bowl and heat it on full power for 15 to 20 seconds until it loosens and flows easily from a spoon without needing to be pushed.
- If using Greek yogurt, stir it into the warm peanut butter immediately after heating until the mixture is smooth, creamy, and slightly lighter in color than the peanut butter alone.
- Pour the warm peanut butter mixture over the surface of the rested brownie in a slow drizzle, moving back and forth across the mug so it falls in thick visible ribbons that pool slightly at the edges.
- Scatter the chocolate chips across the top of the peanut butter drizzle while everything is still warm so they sit half-embedded into the surface, then serve immediately directly from the mug.
Two Minute Protein Brownie Variations
Banana Protein Brownie
- Replace the egg white with 2 tablespoons of mashed ripe banana, which binds the batter and adds natural sweetness that reduces the need for maple syrup.
- Reduce the maple syrup to half a teaspoon or leave it out entirely if the banana is very ripe, since overripe banana already contributes enough sweetness on its own.
- The finished brownie will have a slightly softer, moister center than the original version and a faint banana flavor that works especially well with the chocolate and peanut butter topping.
- Anna prefers this version on school mornings because the banana makes the brownie feel a little more like breakfast and a little less like dessert.
Cottage Cheese Brownie Mug Cake
- Replace the egg white and 1 tablespoon of milk with 3 tablespoons of full-fat cottage cheese blended smooth before adding to the dry ingredients.
- The blended cottage cheese creates a very creamy, dense center that holds moisture better than the egg white version and slices cleanly with a spoon when the brownie is fully cooled.
- This version works well for a high protein brownie microwave recipe because the cottage cheese contributes additional protein alongside the powder without changing the chocolate flavor significantly.
- Top with the same warm peanut butter drizzle and chocolate chips for a result that looks identical to the image but with a noticeably richer, almost ganache-like interior texture.
Easy Protein Brownie With Peanut Butter Batter
- Stir 1 tablespoon of peanut butter directly into the brownie batter before microwaving rather than reserving it for the topping, which creates a marbled interior with pockets of warm nut butter throughout.
- Reduce the milk by one teaspoon to compensate for the added moisture from the peanut butter so the batter does not become too loose to hold its shape during cooking.
- Once cooked and rested, top with just the Greek yogurt stirred smooth and the chocolate chips scattered across the surface for a cleaner finish that still carries the warm, nutty flavor from within.
- This variation works especially well as protein brownies for one on a day when you want something more filling that carries you through a few hours rather than a lighter sweet snack.
Substitutions
- Chocolate protein powder can be replaced with vanilla protein powder combined with an extra teaspoon of cocoa powder; the flavor stays chocolate-forward and the texture behaves identically under microwave heat.
- Almond flour can be swapped for oat flour, finely ground rolled oats, or a tablespoon of coconut flour; if using coconut flour, reduce the amount to half a tablespoon because it absorbs significantly more liquid than the others.
- Maple syrup can be replaced with honey, agave, or a teaspoon of granulated monk fruit sweetener dissolved in the milk before mixing; monk fruit sweetener keeps the calorie count lower and does not affect the texture noticeably.
- Peanut butter in the topping can be replaced with almond butter, cashew butter, or sunflower seed butter for a nut-free version; all three warm and drizzle in the same way and pair equally well with the chocolate base and scattered chips.
Equipment
- 10 oz or larger microwave-safe mug
- Small fork for mixing
- Small microwave-safe bowl for the peanut butter topping
- Measuring spoons
- Folded kitchen towel for handling the hot mug
Emma Tip: If you do not have a microwave, pour the batter into a small oven-safe ramekin, place it on a baking sheet, and bake at 350°F for 10 to 12 minutes until the center looks just set. The result will be slightly less fudgy than the microwave version but equally satisfying with the warm peanut butter topping drizzled on immediately after it comes out.
Storage Tips
Make Ahead Strategy
- The dry ingredients, which include the protein powder, cocoa powder, flour, and baking powder, can be measured and combined in the mug up to 24 hours in advance and covered with a small plate or plastic wrap until needed.
- Pre-measuring the wet ingredients into a small jar or container the night before also works well; just give the jar a quick stir before pouring into the mug so the egg white and milk are fully combined.
- The peanut butter topping can be mixed with the Greek yogurt and stored in a small covered bowl in the refrigerator overnight, then warmed for 15 seconds before drizzling.
Refrigeration
- A fully cooked brownie mug can be covered tightly with plastic wrap and stored in the refrigerator for up to 2 days, though the texture becomes firmer and more cake-like as it cools and the center loses most of its initial fudginess.
- To restore some of the original soft texture, return the refrigerated mug to the microwave uncovered and heat on 50 percent power for 20 to 25 seconds before adding a fresh drizzle of warm peanut butter.
- Add the chocolate chips only after reheating so they sit on the warm surface rather than being embedded into a cold, firm interior.
Freezing
- The cooked brownie can be removed from the mug once fully cooled, wrapped tightly in plastic wrap, and frozen for up to 4 weeks in a sealed freezer bag.
- Thaw at room temperature for 20 minutes or microwave from frozen on 50 percent power in 20-second intervals until the center is soft and warm through.
- Do not freeze the peanut butter topping with the brownie; prepare it fresh each time since it only takes 20 seconds to warm and stir, and the texture is noticeably better when it is freshly made.
My Grandma's Secret Worth Sharing
Emma's grandmother never had protein powder in her kitchen but she understood the principle behind it perfectly. She always said that the best single-serving desserts are the ones that feel like someone made them just for you, right now, not pulled from a tray of twelve. When I made this for Anna the first time and set the mug down in front of her with the peanut butter still dripping warm down the side and the chocolate chips gleaming on top, I saw exactly what my grandmother meant. Anna held the mug with both hands and ate slowly, not because she had to but because she wanted it to last a little longer.
FAQs
Why did my protein brownie come out rubbery and dry?
This is the most common issue with microwave protein brownies and it almost always comes from overcooking or too little liquid in the batter. Protein powder absorbs moisture quickly, so the batter should look smooth and just barely pourable before going into the microwave. Cook for 60 seconds first and check before adding more time; even 15 extra seconds can take the center from perfectly fudgy to noticeably dry.
Can I use a plant-based protein powder?
Yes, but plant-based powders, especially pea and rice blends, tend to absorb more liquid than whey-based ones, so the batter will often need an extra teaspoon of milk to reach the right consistency. The texture of the finished brownie may be slightly denser and less fudgy than the whey version, but the flavor and structure hold up well and the peanut butter topping covers any textural difference effectively.
Why does my brownie overflow in the microwave?
The mug is too small. A 10 oz mug is the practical minimum for this recipe because the baking powder causes the batter to rise during cooking before it settles back. Using a mug smaller than 10 oz almost always results in overflow, especially if the batter is on the looser side. A wider, shorter mug also works better than a tall narrow one for more even heat distribution.
Warm Mug, Melted Chips, and a Spoon Between Two
Anna had her chin resting on her hand before the peanut butter had even finished drizzling, watching it pool into the cracks in the brownie surface with complete concentration. We shared the mug at the kitchen table, passing it back and forth one spoonful at a time, and she asked halfway through if we could make it again tomorrow. If this recipe finds its way into your regular rotation the same way it found its way into ours, you might also love our Mango Sorbet for a lighter finish on warmer evenings, our Chocolate Raspberry Cheesecake Domes when you want something more layered and special, or our Dulce de Leche Mousse for a creamy alternative that comes together just as quickly. Make this one once and you will understand why the mug rarely makes it to the sink before it is completely empty.
Related
Looking for other recipes like Two Minute Protein Brownie? Try these:
- Blueberry Lemonade Cupcakes35 Minutes
- Oreo Cheesecake Donut Burger15 Minutes
- Apple Pie Cheesecake Tacos25 Minutes
- Jasmine Peach Vanilla Cake50 Minutes


Two Minute Protein Brownie
Ingredients
Equipment
Method
- Select a microwave-safe mug with at least 10 oz capacity and coat the inside with a thin layer of melted coconut oil or butter to prevent the brownie from sticking to the sides and base.
- Add the chocolate protein powder, cocoa powder, almond flour or oat flour, and baking powder into the prepared mug and use a small fork to stir until no visible pockets of powder remain at the bottom.
- Pour the maple syrup, egg white, and 2 tablespoons of milk directly into the mug over the dry mixture and stir firmly with the fork in small circular motions from the bottom upward until the batter is fully combined with no dry streaks along the sides.
- Lift the fork and check the consistency; the batter should drop slowly and thickly from the tines rather than pouring freely or clinging as a stiff clump, and if it looks too thick, add the remaining milk one teaspoon at a time and stir again until it reaches that smooth, just-pourable texture.
- Place the mug in the center of the microwave and cook on full power for 60 seconds, then remove and check the surface; the center should look just set but still appear slightly moist rather than completely dry or shiny-wet.
- If the center still looks completely liquid after 60 seconds, return the mug to the microwave and cook in 15-second bursts, checking after each one, until the surface no longer jiggles when you tap the mug gently on the counter.
- Remove the mug carefully using a folded kitchen towel and set it on a flat surface to rest uncovered for 90 seconds, which allows the residual heat to finish cooking the center through to a fudgy, soft texture without drying it out.
- While the brownie rests, spoon the peanut butter into a small microwave-safe bowl and heat for 15 to 20 seconds until it loosens easily, stir in the Greek yogurt if using, then pour the warm peanut butter mixture over the brownie surface in slow drizzling ribbons, scatter the chocolate chips across the top, and serve immediately directly from the mug.

Leave a Reply